
Toilet Handle Replacement

Kristen Gismondi and one other contributor
Last updated on Jul 18, 2017
Views: 9.8K
View statistics:
- Past 24 Hours:
- 9
- Past 7 Days:
- 53
- Past 30 Days:
- 308
- All Time:
- 9,764
Comments: 0
No one has left comments on this guide. Will you be first?
Go to guide commentsCompleted: 3 4
3 people have marked this guide "completed." Will you be next?
4 people have marked this guide "completed." Including you — great job!
Favorites: 6 7
6 people have favorited (and subscribed to) this guide. Will you be next?
7 people have favorited (and subscribed to) this guide — including you!
Introduction
Go to step 1 ↓Improperly tightened handles are a common cause of flushing problems with toilets.
If your toilet is not flushing completely, check to see if you have a loose toilet handle. Loose handles can be tightened easily with an adjustable wrench.
If your toilet is running continuously, make sure your toilet handle isn't too tight. When the nut on a toilet handle is too tight, the handle arm won’t fall to its resting position after flushing. Make sure the handle has enough room to allow the arm to move freely. Tight handles can be loosened with an adjustable wrench.
Broken toilet handles will prevent a toilet from running at all and require replacement. Use this guide to replace the flush lever and tank lever on a traditional gravity flush toilet.
What you need
Tools

-
-
-
-
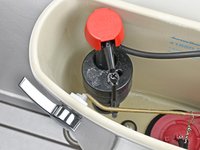
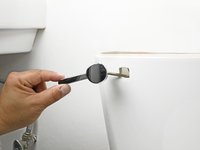
Squeeze open the spring clasp that connects the pull chain to the tank lever.
-
Disconnect the spring clasp from the tank lever.
-
-
-
-
-
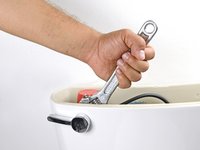
Using an adjustable wrench, turn the locknut on the toilet handle clockwise until it loosens.
-
-
-
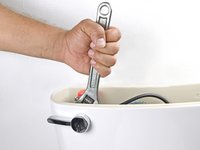
Turn the locknut clockwise until it releases from the threaded shank on the flush lever.
-
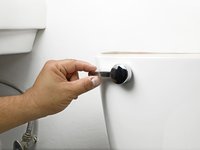
Remove the locknut from the tank lever.
-
-
-


 Ask FixBot




To reassemble your device, follow these instructions in reverse order.
Cancel: I did not complete this guide.
3 other people completed this guide.


