Free Shipping on Domestic Orders $75+

Toilet Flapper Replacement

Views: 21K

View statistics:

Past 24 Hours:
14
Past 7 Days:
132
Past 30 Days:
618
All Time:
21,040
Comments: 2

2 guide comments.

Go to guide comments
Completed: 8

8 people have marked this guide "completed." Will you be next?

Favorites: 10

10 people have favorited (and subscribed to) this guide. Will you be next?

Time Required: 5 - 10 minutes
Difficulty: Easy
Toilet Flapper Replacement

Introduction

Go to step 1 ↓

The toilet flapper opens to allow water to flow from the toilet tank into the bowl when the toilet is flushed. Afterwards, it closes as the toilet tank fills back up. If water is constantly flowing from your toilet tank, chances are your flapper is not functioning properly and will require a replacement.

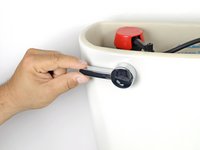
    1. Toilet Flapper Replacement, Tank Lid: step 1, image 1 of 3 Toilet Flapper Replacement, Tank Lid: step 1, image 2 of 3 Toilet Flapper Replacement, Tank Lid: step 1, image 3 of 3
      • Lift the tank lid up and away from the toilet tank.

      Ask FixBot

      Add Comment

    1. Toilet Flapper Replacement, Shutting off the Water Supply to a Toilet: step 2, image 1 of 2 Toilet Flapper Replacement, Shutting off the Water Supply to a Toilet: step 2, image 2 of 2
      • Shut off the stop valve underneath the toilet by turning it clockwise until it becomes hand tight.

      • The appearance of this valve may differ from toilet to toilet, but most operate the same. Some valves require multiple turns to stop the water while others only require a quarter turn.

      Ask FixBot

      Add Comment

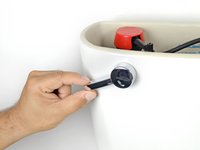
    1. Toilet Flapper Replacement, Draining a Toilet Tank: step 3, image 1 of 2 Toilet Flapper Replacement, Draining a Toilet Tank: step 3, image 2 of 2
      • Push down the flush lever.

      • Hold the lever down until water stops draining from the tank.

      • A small amount of water will remain in the bottom of the tank.

      • If the flush lever or pull chain have become disconnected, lift up the toilet flapper to drain the tank.

      Ask FixBot

      Add Comment

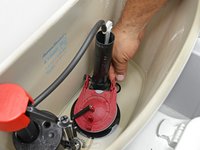
    1. Toilet Flapper Replacement, Disassembling Toilet Pull Chain Spring Clasp: step 4, image 1 of 3 Toilet Flapper Replacement, Disassembling Toilet Pull Chain Spring Clasp: step 4, image 2 of 3 Toilet Flapper Replacement, Disassembling Toilet Pull Chain Spring Clasp: step 4, image 3 of 3
      • Squeeze open the spring clasp that connects the pull chain to the tank lever.

      • Disconnect the spring clasp from the tank lever.

      Ask FixBot

      Add Comment

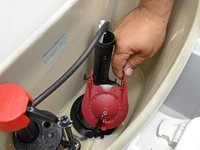
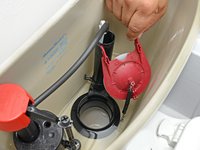
    1. Toilet Flapper Replacement, Flapper: step 5, image 1 of 3 Toilet Flapper Replacement, Flapper: step 5, image 2 of 3 Toilet Flapper Replacement, Flapper: step 5, image 3 of 3
      • Disconnect the flapper from the posts on each side of the overflow tube.

      • Remove the flapper from the toilet tank.

      Ask FixBot

      Add Comment

Conclusion

To reassemble your device, follow these instructions in reverse order.

Cancel: I did not complete this guide.

8 other people completed this guide.

Kristen Gismondi

Member since: 11/12/14

109,615 Reputation

271 Guides authored

Team

iFixit Member of iFixit

Staff

121 Members

72,888 Guides authored

2 Guide Comments

Thank you I needed that

My Mama - Reply Share

How universal is the flapper size? Do I need to measure the existing one before buying a replacement?

John Clements - Reply Share

Add Comment

View Statistics:

Past 24 Hours: 14

Past 7 Days: 132

Past 30 Days: 618

All Time: 21,040