
Free Shipping on Domestic Orders $75+

ThinkPad Yoga 12 Heasink & CPU Fan Replacement

What you need

  1. ThinkPad Yoga 12 Heasink & CPU Fan Replacement, Bottom Cover Removal: step 1, image 1 of 3 ThinkPad Yoga 12 Heasink & CPU Fan Replacement, Bottom Cover Removal: step 1, image 2 of 3 ThinkPad Yoga 12 Heasink & CPU Fan Replacement, Bottom Cover Removal: step 1, image 3 of 3
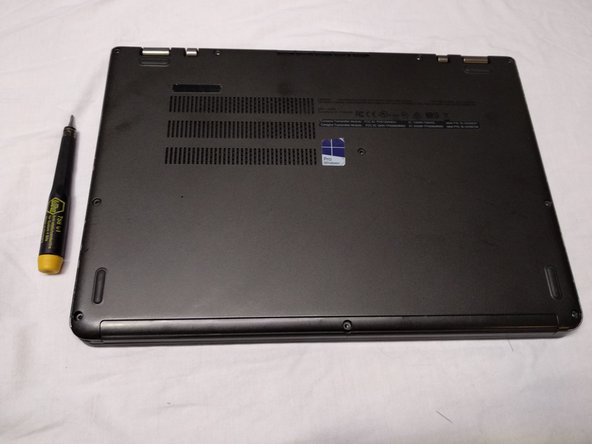
    • Remove the nine Phillips screws using a Philips 00 screwdriver

  2. ThinkPad Yoga 12 Heasink & CPU Fan Replacement, Prying: step 2, image 1 of 2 ThinkPad Yoga 12 Heasink & CPU Fan Replacement, Prying: step 2, image 2 of 2
    • Pry up the case carefully using a spudger.

    • Make sure to not push the spudger in too far, as this could result in internal damage

  3. ThinkPad Yoga 12 Heasink & CPU Fan Replacement, Remove Speaker: step 3, image 1 of 3 ThinkPad Yoga 12 Heasink & CPU Fan Replacement, Remove Speaker: step 3, image 2 of 3 ThinkPad Yoga 12 Heasink & CPU Fan Replacement, Remove Speaker: step 3, image 3 of 3
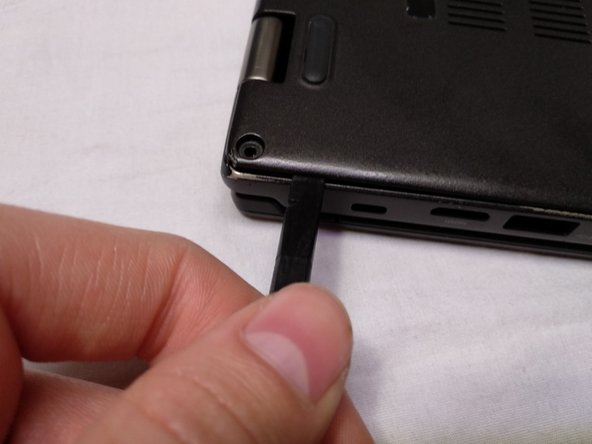
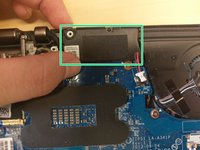
    • Top speaker left which needs to be removed to reveal the cooling system

    • Push out the plug for the speaker in the direction of the arrow.

    • Grab the speaker on the top an bottom and pull it out.

    • Insert wisdom here.

Conclusion

To reassemble your device, follow these instructions in reverse order.

2 other people completed this guide.

David Staeheli

Member since: 05/03/18

157 Reputation

1 Guide authored

2 Guide Comments

Hello, are there some steps missing? The mainboard needs to be removed as well!

Jan Beneš III. - Reply Share

Yes there are some steps missing, but i can’t add them on this teadown and I don’t know why.

David Staeheli - Share

Add Comment

View Statistics:

Past 24 Hours: 0

Past 7 Days: 2

Past 30 Days: 12

All Time: 1,529