
TackLife GSW01A Pump Assembly Replacement

Mallory A Gullett and 5 other contributors
Last updated on Jul 28, 2023
Views: 2.6K
View statistics:
- Past 24 Hours:
- 2
- Past 7 Days:
- 21
- Past 30 Days:
- 110
- All Time:
- 2,553
Comments: 2
2 guide comments.
Go to guide commentsCompleted: 3 4
3 people have marked this guide "completed." Will you be next?
4 people have marked this guide "completed." Including you — great job!
Favorites: 0 1
No one has favorited (and subscribed to) this guide. Will you be the first?
1 person has favorited (and subscribed to) this guide — and that's you!
Introduction
Go to step 1 ↓This guide shows how to remove and replace the pump assembly as a unit for the TackLife GSW01A Pressure Washer.
You have to remove the output assembly from the pump in order to replace the pump assembly. This requires removing many tight bearings, so having the proper tools will speed up the process.
The following tools are optional, but can help with disassembly:
- 1 × Channellock Groove Joint Pliers or Vise-Grips
- 1 × Hammer
- 1 × Cleaning Rag
What you need
Parts
Tools


-
-
-
Pull the siphon tube apart from connector.
-
Try to twist the high-pressure hose off by hand. If too tight, use Vise-Grips or Channellock pliers on the grip to loosen and remove the hose. Careful to maintain a steady grip lest the handle strip.
-
-
-
To remove the handle, unscrew the orange triangle knobs on both sides. With a firm grip on both sides pull handle apart from pressure washer.
-
-
-
Remove the 4 mounting bolts. (M8x20)
-
Use an open-ended or box wrench to loosen the bolts. There is not enough clearance for using a socket wrench.
-
-
-
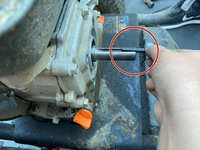
Remove the existing pump from motor shaft.
-
Retrieve the shaft key from the keyway inside the pump if it is not on the motor shaft keyseat.
-
-
-
Correctly set the shaft key and hold in place while sliding the pump onto the motor shaft.
-
Align the keyway inside the pump with the key and slide the pump onto the motor shaft.
-
-
-
-
Reattach the hoses.
-
Reattach handle if removed in earlier steps (OPTIONAL step #3).
-


 Ask FixBot




To reassemble your device, follow these instructions in reverse order.
Cancel: I did not complete this guide.
3 other people completed this guide.

Team

University of Memphis, Team S1-G1, Lane Summer 2020 Member of University of Memphis, Team S1-G1, Lane Summer 2020
UM-LANE-SU20S1G1
5 Members
12 Guides authored
2 Guide Comments
I'm getting milky oil I want to change pump on my tacklife pressure washer 3200 psi what is a good pump?I cant find OEM pump from the number on pump?What size shaft?
