
TOZO HT2 Daughterboard Replacement

Raven M and 4 other contributors
Last updated on Jan 2, 2025
Views: 577
View statistics:
- Past 24 Hours:
- 1
- Past 7 Days:
- 14
- Past 30 Days:
- 61
- All Time:
- 577
Comments: 1
1 comment on steps.
Completed: 0 1
No one has marked this guide "completed." Will you be the first?
1 person has marked this guide "completed." It's you — great job!
Favorites: 0 1
No one has favorited (and subscribed to) this guide. Will you be the first?
1 person has favorited (and subscribed to) this guide — and that's you!
Introduction
Go to step 1 ↓When dealing with the daughterboard, similar to the motherboard, it can be a delicate repair that demands attention to and some soldering. Following the steps outlined in this guide, we will provide you with a comprehensive explanation on how to correctly swap out the daughterboard. Unlike its predecessor in the circuitry, this board is linked directly to the battery, which contains potentially harmful chemicals meaning it is extremely important to exercise caution in order to prevent damaging the battery. The daughterboard is located underneath the left ear pad, close to the headphones edge. When you do remove this part it is vital to use caution because damaging the connecting wires is easy if you are not paying enough attention.
Each of the screws for this project are the same 6.3mm Phillips head screws.
What you need
Tools


-
-
-
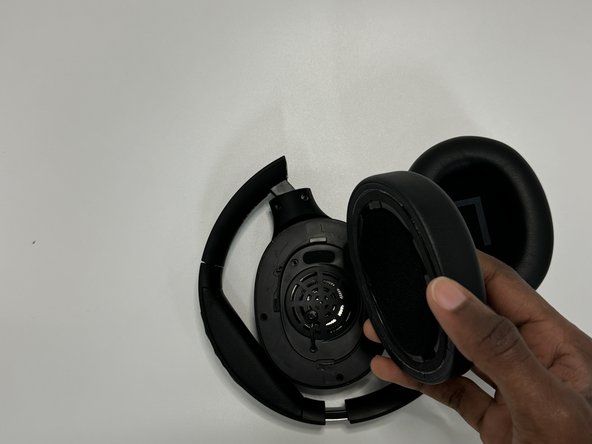
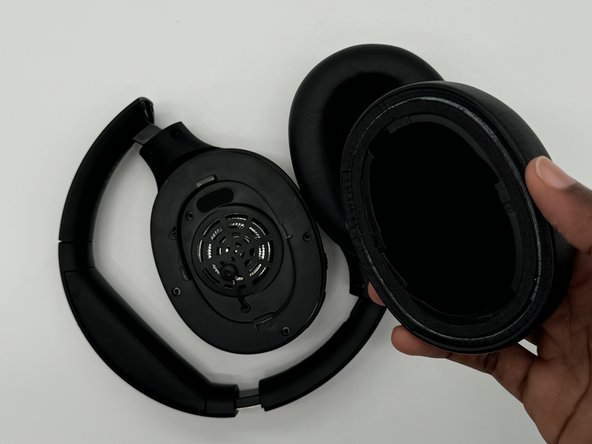
Firmly hold the headphone housing in one hand to hold the device steady and put the other hand on the ear pad you intend to replace.
 Ask FixBot
-
-
-
-
-
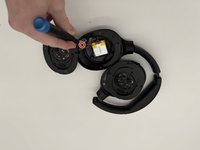
Use a Phillips screwdriver to remove all four screws that secure the right speaker cover.
-
Lift the cover off without pulling on the wires inside and set it to the side to access the circuit board.
-
-
-
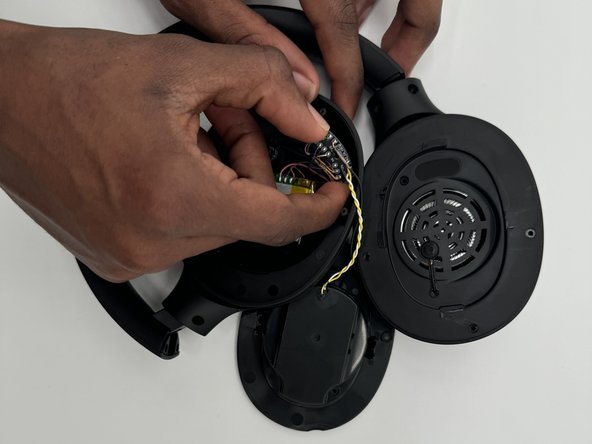
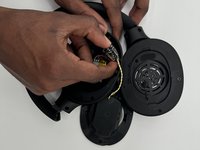
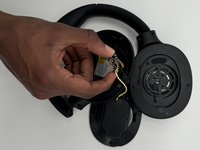
Unscrew the circuit board and gently pull it up from the plastic tab it sits on.
-
-
-
-
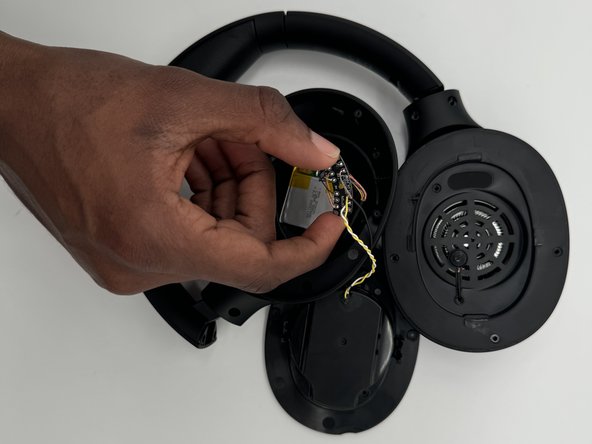
Carefully use flush cutters, to cut the wires connecting to the circuit board and the battery.
-
-






To reassemble your device, follow the above steps in reverse order.
Take your e-waste to an R2 or e-Stewards certified recycler.
Repair didn’t go as planned? Try some basic troubleshooting or ask our Answers community for help.

Team

University of North Texas, Team 7-2, Kilpatrick Fall 2024 Member of University of North Texas, Team 7-2, Kilpatrick Fall 2024
UNT-KILPATRICK-F24S7G2
4 Members
60 Guides authored
