This translation was generated by a machine and has not been reviewed by a person yet. Speak this language? Review it.

Synology DS1522+ Cooling Fan Replacement

Last updated on Sep 2, 2026
Views: 1.6K
View statistics:
- Past 24 Hours:
- 4
- Past 7 Days:
- 32
- Past 30 Days:
- 139
- All Time:
- 1,584
Comments: 0
No one has left comments on this guide. Will you be first?
Go to guide commentsCompleted: 3 4
3 people have marked this guide "completed." Will you be next?
4 people have marked this guide "completed." Including you — great job!
Favorites: 1 2
1 person has favorited (and subscribed to) this guide. Will you be next?
2 people have favorited (and subscribed to) this guide — including you!
Featured Guide
This guide has been found to be exceptionally cool by the iFixit staff.
Community-Contributed Guide
An awesome member of our community made this guide. It was not created by iFixit staff.
Introduction
Go to step 1 ↓This guide shows how you can replace the cooling fans in the Synology DiskStation 1522+.
The cooling fan installed by Synology is a Y.S TECH FD129225LL-N DC 12V 0.12A 90x90x25mm 3-Wire Server Cooling Fan. In the NAS data sheet, the dimensions are specified as 2x (92 x 92 x 25 mm).
As a replacement, Noctua NF-A9 FLX 92mm Premium cooling fans are installed in this guide.
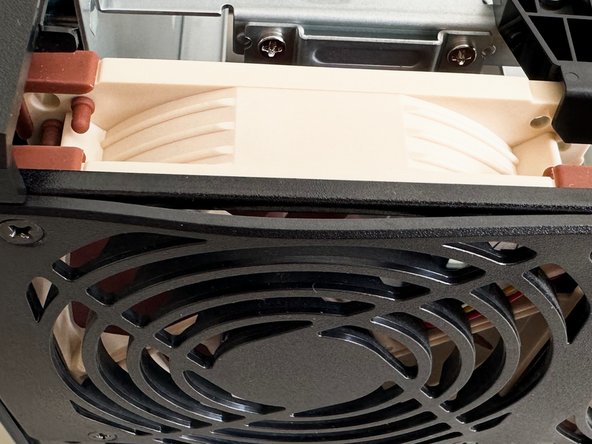
Note that these press the cover slightly outward in some places, but are otherwise suitable for the device.
You can also use this guide to clean dust and dirt from the cooling fan.
What you need
Parts
-
×2
Tools


-
-
-
Shut down the NAS.
-
Disconnect all cables and connected devices.
 Ask FixBot
-
-
-
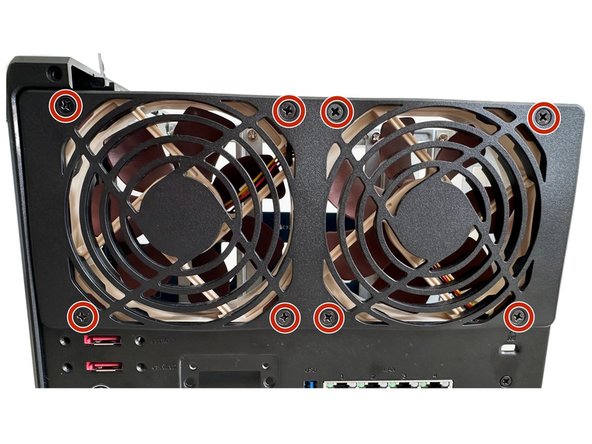
Remove the eight 9 mm Phillips PH2 screws shown that secure the cooling fan.
-
-
-
Pry off the cover at the top and bottom corners.
-
The cover is held in place at the marked spots on the device.
-
-
-
Remove the two 5 mm Phillips PH 2 screws shown.
-
Remove the cover or the 10GbE expansion card.
-
-
-
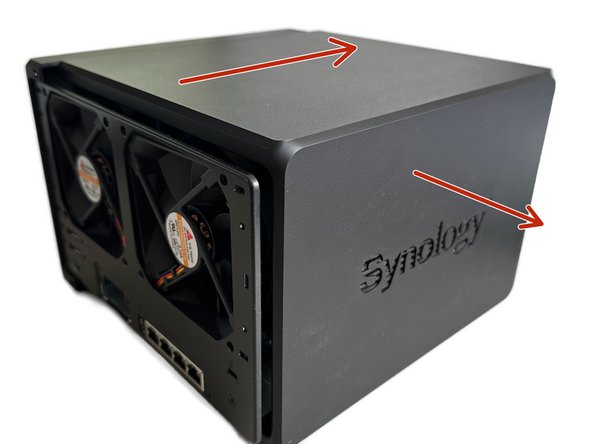
Remove the two 1.4 mm Phillips PH 1 screws.
-
Then slide the upper housing forward and then outward.
-
-
-
Remove the expansion slot tray to have more clearance.
-
To do this, remove the two 5 mm Phillips PH2 screws on the back of the device.
-
Also remove the two 7 mm Phillips PH2 screws on the bottom.
-
Now remove the tray by first pulling the right side toward you. This makes it easier to remove the part.
-
-
-
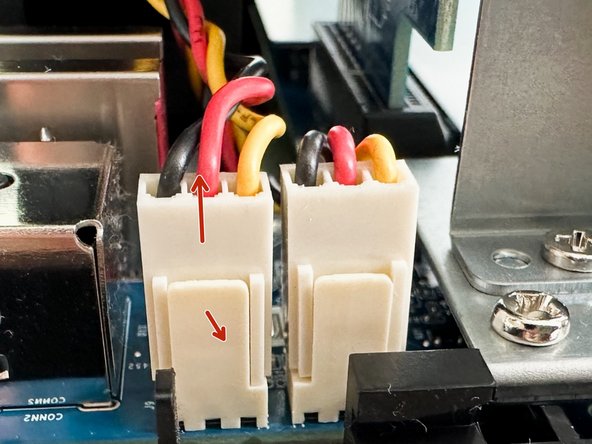
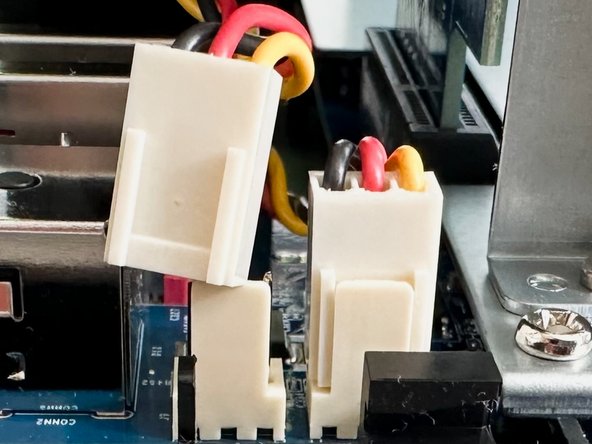
Slightly bend the plastic clip pointing toward you, and with your other hand, pull the cooling fan cable socket upward.
-
Repeat this for the other cooling fan.
-
-
-
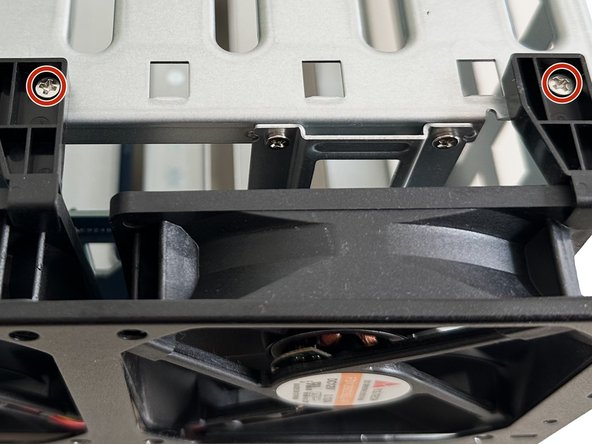
Unscrew the two retaining arms.
-
To do this, remove the two Phillips PH 2 screws.
-
Lift the cooling fans, along with the retaining arms, out of the housing.
-
Now pull the retaining arms off of the cooling fans.
-
-
-
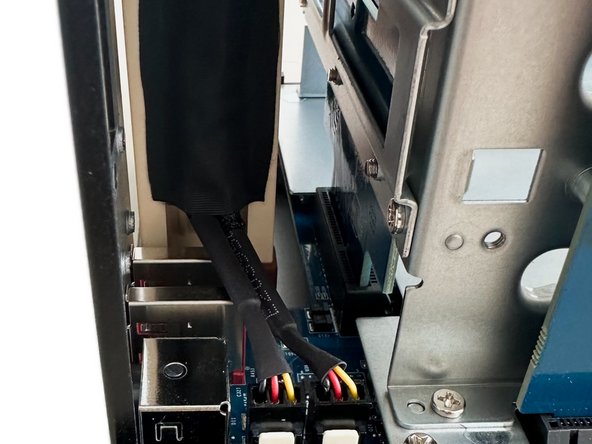
Prepare the cooling fans before installation and consider how to orient them so that the cables are not lying everywhere inside the device, as the new cooling fans have significantly longer cables than the removed ones.
-
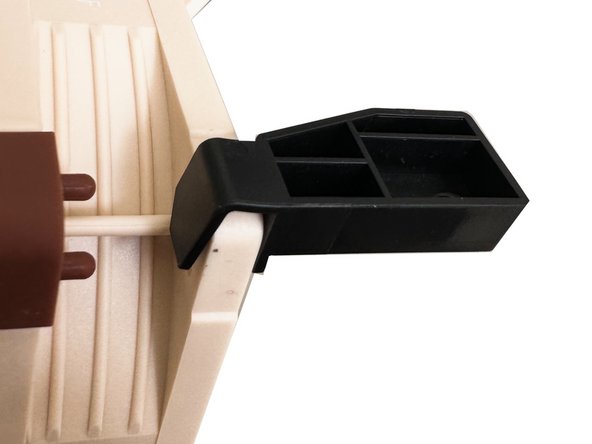
Now attach the bracket back onto the cooling fans at the appropriate spot (rear right corner). The bracket may be slightly overstretched if the frame is thicker than that of the old cooling fans. You may also need to remove the rubber anti-vibration corner attached to some cooling fans at that location.
-
-
-
Place your device on its side.
-
Slide the cooling fans into the device from the left, making sure to route the cables downward for now.
-
Secure the two retaining arms again with the previously removed Phillips PH 2 screws.
-
Plug the cooling fan connectors back in.
-
-
-
-
Snap the cover back onto the device from the outside.
-
Now secure the cooling fans with the eight 9 mm Phillips PH2 screws from the beginning.
-
-
-
Insert the left side first, then the right side, into the housing.
-
Secure the cover with the two 7 mm Phillips #2 screws on the bottom of the device.
-
Now secure the cover with the two 5 mm Phillips #2 screws on the back of the device.
-
-
-
Slide the housing onto the device from the side, positioning it slightly further forward than the rest of the unit.
-
Once the housing touches the other part already attached to the device, slide it backward along the device so that the two parts fit together again.
-
Now, fasten the two 1.4 mm Phillips PH 1 screws on the back to hold both parts together.
-
-
-
Insert the expansion with the bottom edge first.
-
Secure it with the two 5 mm Phillips PH 2 screws.
-
-


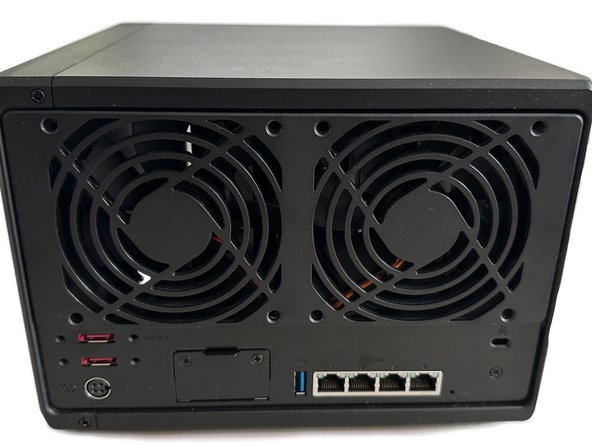


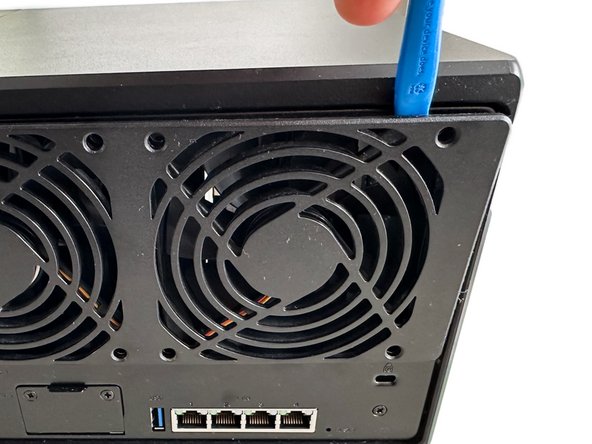
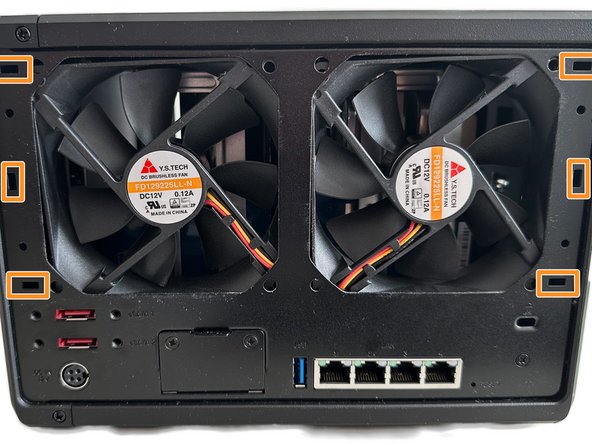


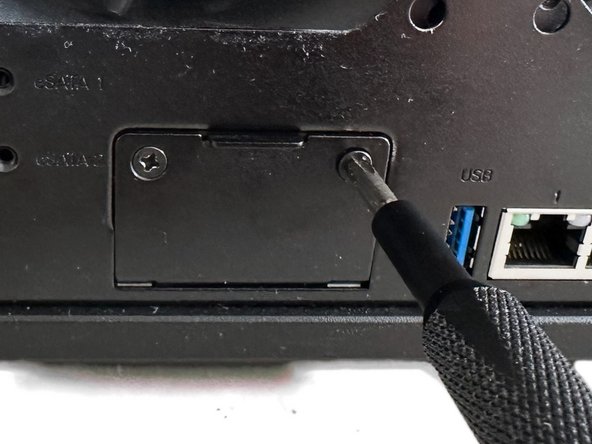














Now all that remains is to test whether the cooling fans are working. This can be done after starting the NAS in the settings under Hardware & Power by setting the fan mode to "Full Speed Mode" and applying the settings at the bottom right. If you can now feel airflow coming out of the back of the NAS, you have successfully replaced the cooling fans :))
Cancel: I did not complete this guide.
3 other people completed this guide.

