
Sunbeam FPSBPMM980 Disassembly

Etai Kurtzman and one other contributor
Last updated on Dec 15, 2021
Views: 660
View statistics:
- Past 24 Hours:
- 2
- Past 7 Days:
- 15
- Past 30 Days:
- 65
- All Time:
- 660
Comments: 0
No one has left comments on this guide. Will you be first?
Go to guide commentsCompleted: 0 1
No one has marked this guide "completed." Will you be the first?
1 person has marked this guide "completed." It's you — great job!
Favorites: 0 1
No one has favorited (and subscribed to) this guide. Will you be the first?
1 person has favorited (and subscribed to) this guide — and that's you!
Needs Better Images
Better photos will improve this guide. Help out by taking, editing, or uploading new ones!
Needs More Images
A few more images would make this guide's procedures crystal clear.
Better Introduction
Improve this guide by completing or revising its introduction.
Introduction
Go to step 1 ↓Required Materials:
Phillips #2 Screwdriver.
Potential Hazards:
This device uses electricity and can heat up to high temperatures ; do not disassemble while using or shortly after use.
Some of the metal in the device is quite sharp, use caution.
This guide may be useful if your device has stopped working or you want to replace a certain part within the device.
What you need
Tools

-
-
-
Open up the device.
-
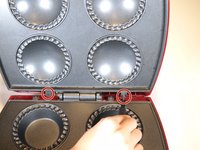
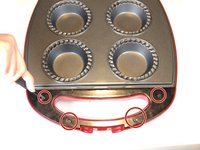
Using the Phillips #2 screwdriver, remove the two 12 mm screws and the two 15 mm screws from the top handle.
 Ask FixBot
-
-
-
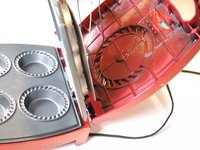
Using the Phillips #2 screwdriver, remove the two 12 mm screws that attach the top half to the hinges.
-
Disconnect the top half of the pie mold from the rest of the casing.
-
-
-
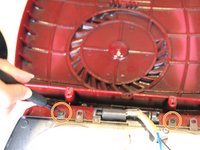
On the back of the upper pan, use the Phillips #2 screwdriver to remove the two 12 mm screws that attach the top pan to the hinge.
-
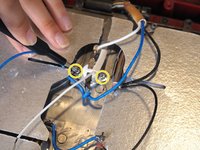
Using the same screwdriver, remove the two 6 mm screws that attach the thermostat to the back of the top pie mold.
-
-
-
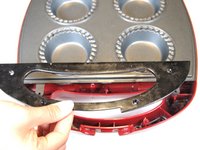
Using the Phillips #2 screwdriver, remove the two 12 mm screws and the two 15 mm screws from the bottom handle.
-
Remove the bottom handle from the device.
-
Using the Phillips #2 screwdriver, remove the two 12 mm screws that attach the lower pan to the hinge.
-
-
-
Using the Phillips #2 screwdriver, remove the two 12 mm screws that attach the lower pan to the hinge.
-
-
-
-
Close the device and turn it over.
-
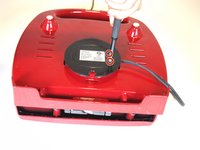
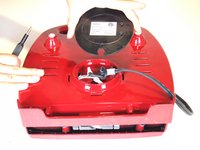
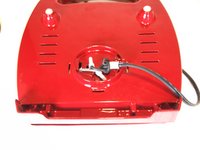
Using the Phillips #2 screwdriver, remove the two 12 mm screws from the bottom lid and slide it out.
-
-
-
Operation Guide: Insert the plug of the pie maker into a 120V socket. The Power (red) light will turn on. Wait until the plates heat up to the necessary temperature and the “Bake ready!” light (green) will turn on.
-
As soon as the green light turns on, you can use it. After finishing cooking, just unplug the pie maker and leave it open to cool down.
-
There are only lights that can turn on/off. The red light turns on when you plug the pie maker and the green light turns on when the thermostat detects the necessary temperature on plates.
-
Temperature is not regulated on this device, but is sensed to indicate when the device is ready for baking.
-
-









To reassemble your device, follow these instructions in reverse order.

Team

Tufts University School of Engineering, Team 1-3, Bell Fall 2021 Member of Tufts University School of Engineering, Team 1-3, Bell Fall 2021
TUFTS-BELL-F21S1G3
2 Members
12 Guides authored
