
Summer LookOut Duo Camera Stand Replacement

Jordyn Looney and 3 other contributors
Last updated on May 16, 2025
Views: 254
View statistics:
- Past 24 Hours:
- 3
- Past 7 Days:
- 14
- Past 30 Days:
- 58
- All Time:
- 254
Comments: 0
No one has left comments on this guide. Will you be first?
Go to guide commentsCompleted: 0 1
No one has marked this guide "completed." Will you be the first?
1 person has marked this guide "completed." It's you — great job!
Favorites: 0 1
No one has favorited (and subscribed to) this guide. Will you be the first?
1 person has favorited (and subscribed to) this guide — and that's you!
Introduction
Go to step 1 ↓If your Summer LookOut Duo baby monitor cameras are having trouble staying in position or they broke, then you may need to replace the stand. This step-by-step guide goes through how to replace the stand of baby monitor cameras.
Before proceeding, make sure the device is powered off and dry to avoid internal damage to the device or potential shock hazards.
CHOKING HAZARD: This device contains small screws. If possible, use a magnetic mat or small container within eyesight to keep track of the screws to prevent possible ingestion or misplacement.
What you need
Tools

-
-
-
Remove the plastic wall mount attached to the base of the stand.
-
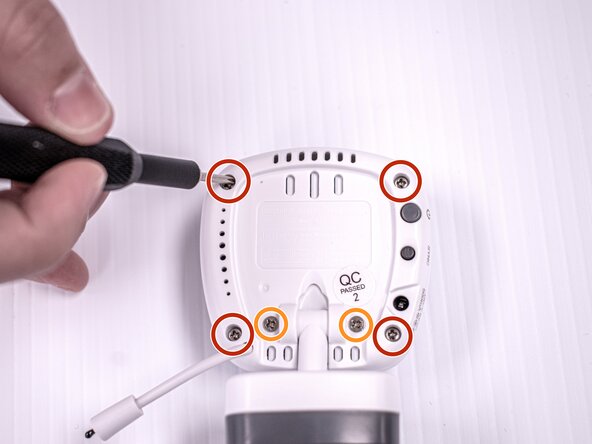
Remove the four 9 mm screws on the back four corners of the camera using a Phillips #00 screwdriver.
-
Remove the two 8 mm screws near the bottom center of the back of the camera using a Phillips #00 screwdriver.
 Ask FixBot
-
-
-
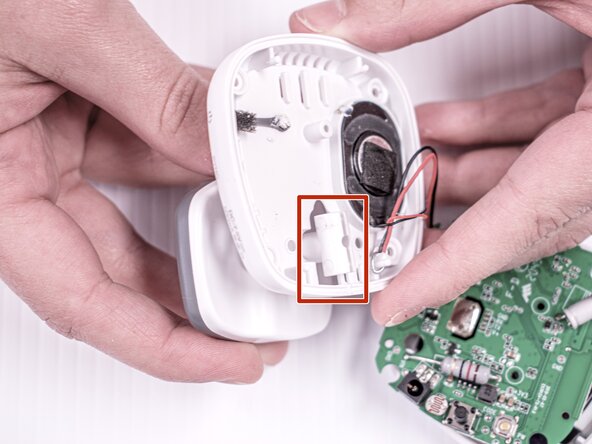
Gently remove the front casing.
-
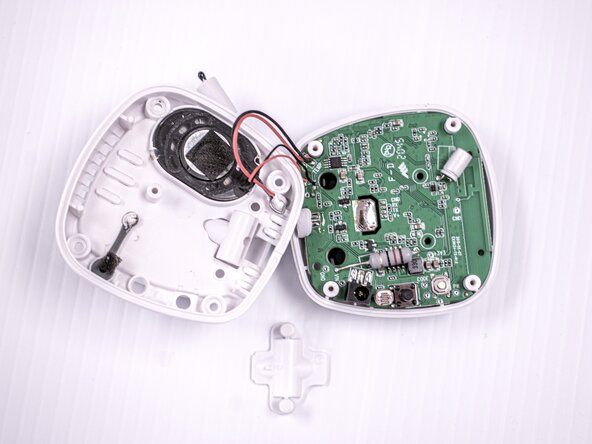
Grab the base of the stand and rotate it 90 degrees so the head of the stand is perpendicular to the opening. Tilt the head down and pull it through the opening.
-
Replace the new stand.
-
-
-





To reassemble your device, follow these instructions in reverse order.

Team

Idaho State University, Team 1-4, Watkins Spring 2025 Member of Idaho State University, Team 1-4, Watkins Spring 2025
ISU-WATKINS-S25S1G4
4 Members
60 Guides authored
