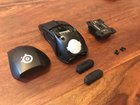
Steelseries Rival 700 Gaming Mouse Disassembly

Vincent Monteil and one other contributor
Last updated on Dec 5, 2016
Views: 20K
View statistics:
- Past 24 Hours:
- 2
- Past 7 Days:
- 23
- Past 30 Days:
- 160
- All Time:
- 20,218
Comments: 12
12 guide comments.
Go to guide commentsCompleted: 7 8
7 people have marked this guide "completed." Will you be next?
8 people have marked this guide "completed." Including you — great job!
Favorites: 0 1
No one has favorited (and subscribed to) this guide. Will you be the first?
1 person has favorited (and subscribed to) this guide — and that's you!
Community-Contributed Guide
An awesome member of our community made this guide. It was not created by iFixit staff.
Better Introduction
Improve this guide by completing or revising its introduction.

-
-
-
To avoid electronically damaging either your computer or your mouse, unplug the usb cable from its socket.
 Ask FixBot
-
-
-
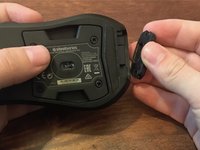
The Rival 700 mouse is a non wireless mouse. The micro-USB cable end is an elbow socket, secured by a plastic clip.
-
To disconnect the cable from the mouse, firmly press the plastic clip using your thumb
-
-
-
The original nameplate is a soft rubber one that can be removed just by pulling it softly out of its socket.
-
WARNING: When reassembling, if you're using a custom nameplate that may not be as stretchable as the original one, insert it softly, and use a lime tool on the new part to avoid damaging the mouse socket.
-
-
-
You will be able to download the 3D files to design a custom nameplate on the Steelseries website. The link is also provided in the part description.
-
On this picture, the original "RIVAL" nameplate will be replaced with a new one on which i just had my Twitch ID printed.
-
Be creative, use colored plastic, put logos and drawings on your mouse.
-
-
-
-
-
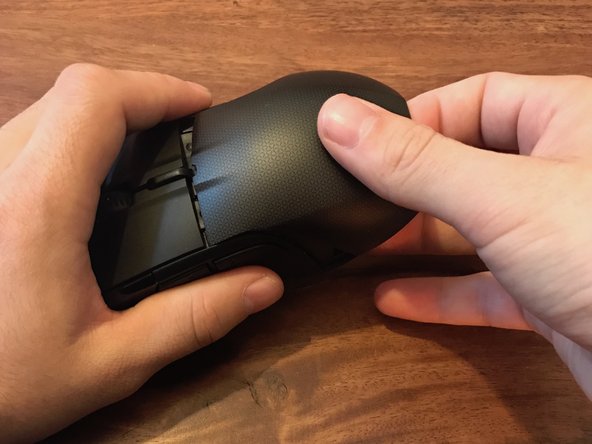
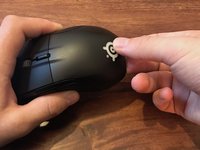
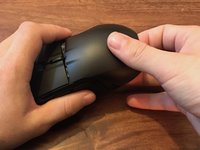
Use both your index and thumb to gently pry the top cover out from the mouse.
-
This part is a thin plastic one which needs a certain amount of strength to be removed. Be careful not to break it.
-
-
-
Steelseries sells a set of two different covers to replace the original one, with a sweat-resistant one f.e.
-
Check the parts section for the purchase link.
-
On the left, you can see on the wide led slot that is used to color the Steelseries logo on your mouse.
-
-
-
-
-
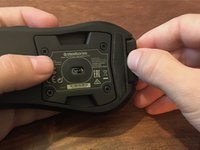
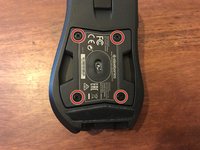
Use a Philips #0 screwdriver to remove the four screws that are keeping the mouse sensor assembly sealed.
-
-
-
-
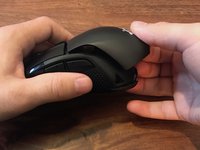
Insert your thumb and index in the two mouse holes and gently pry the sensor assembly out from its socket.
-
-
-
-
-
The sensor assembly is linked to the mouse body with a 10-pin Steelseries custom connector.
-
-
-
Only four screws have to be removed to entirely re-design this gaming mouse, which is not that expensive regarding the high performance, features, and customizability.
-
-







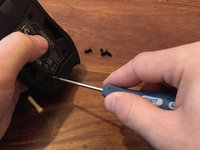


To reassemble your device, follow these instructions in reverse order.
Cancel: I did not complete this guide.
7 other people completed this guide.

12 Guide Comments
Is it possible to open it up so that you can see the mouse wheel? Mine needs some lubrication since it's making a squeaking sound as soon as I use the mouse wheel. Level of annoyance is over 9000!
Hi @andned,
Never gave it a try as long as mine doesn't need it. It is a pretty expensive mouse so I wouldn't like to damage it.
The purpose of this guide was to demonstrate how easy customizing the mouse is easy.
Give us your feedback if you managed to do it :)
You didn’t disassemble anything.
I actually did :) my purpose was to demonstrate how easy it was to customise the mouse.
I think that you meant “this isn’t deep repair”. Indeed, it isn’t :)
