Introduction
If your mouse buttons are unresponsive, require excessive force to click, or register multiple unintended clicks, the issue may be due to worn or failing switches. Mouse switches can degrade over time, leading to inconsistent or unreliable input. If the switches in your SteelSeries Rival 3 Wireless mouse are no longer functioning properly, they will need to be removed and replaced.
In this guide, you’ll learn how to repair your SteelSeries Rival 3 Wireless by replacing its worn or faulty switches.
Before replacing the switches, check the troubleshooting pages to confirm your mouse needs new switches.
Warning: To access the switches, you’ll need to carefully disassemble the mouse and expose the internal button mechanisms attached to the circuit board.
Make sure to power off the mouse and remove the batteries before beginning the replacement or working with any internal components.
This guide requires soldering. If you're unfamiliar with soldering, review the How to Solder and Desolder Connections guide and take appropriate precautions before beginning.
What you need
-
-
-
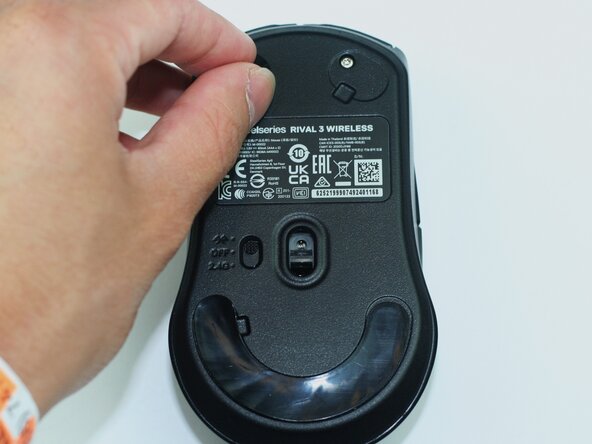
Flip the mouse upside down.
-
Locate the wireless mode switch on the bottom.
-
Slide it to the OFF position.
 Ask FixBot
-
-
-
Place two fingers on the rear top section of the mouse shell.
-
Apply light pressure and slide the battery cover downward (toward you).
-
Slide off the cover and lift away.
-
Remove the two AA batteries.
-
-
-
-
-
Carefully peel off the mouse feet (skates) from the bottom.
-
Remove the four 5 mm screws with a T6 Torx screwdriver.
-
-
-
-
Insert an opening pick into the seam between the lower and upper case.
-
Pry around the perimeter until the cases separate.
-
Lift off and remove the upper case.
-
-
-
Remove the three 5 mm screws securing the motherboard with a Phillips screwdriver.
-
-
-
Disconnect any additional connectors attached to the motherboard.
-
Gently lift the motherboard out of the housing.
-
-
-
-
-
Locate the left and right click switches mounted to the circuit board.
-
Flip the motherboard over.
-
Desolder the switches.
-
-




To reassemble your device, follow the above steps in reverse order.
Take your e-waste to an R2 or e-Stewards certified recycler.
Repair didn’t go as planned? Try some basic troubleshooting or ask our Answers community for help.

Team

Texas Tech, Team 41-1, Johansen Spring 2026 Member of Texas Tech, Team 41-1, Johansen Spring 2026
TTU-JOHANSEN-S26S41G1
4 Members
60 Guides authored
