Free Shipping on Domestic Orders $75+

Sprint Sanyo RL-4920 Display Replacement

What you need

  1. Sprint Sanyo RL-4920 Display Replacement, Back of Phone: step 1, image 1 of 1
    • Flip the phone over so that the screen is facing down.

    Ask FixBot

    Add Comment

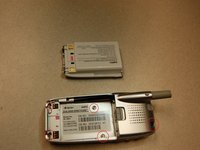
  2. Sprint Sanyo RL-4920 Display Replacement, Remove Battery Pack: step 2, image 1 of 2 Sprint Sanyo RL-4920 Display Replacement, Remove Battery Pack: step 2, image 2 of 2
    • Push the gray lever up towards the top of the phone.

    • Pull up on the battery pack and completely separate it from the phone.

    Ask FixBot

    Add Comment

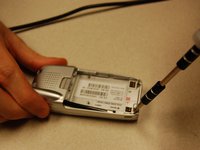
  3. Sprint Sanyo RL-4920 Display Replacement, Screws: step 3, image 1 of 2 Sprint Sanyo RL-4920 Display Replacement, Screws: step 3, image 2 of 2
    • Locate the five screws around the back casing.

    • Use a three-prong screw bit to remove all five screws.

    Ask FixBot

    Add Comment

  4. Sprint Sanyo RL-4920 Display Replacement, Separate Cases: step 4, image 1 of 1
    • Use the plastic opening tool and slide it around the phone to pull apart the front and back casing.

    Ask FixBot

    Add Comment

  5. Sprint Sanyo RL-4920 Display Replacement, Separate Cases: step 5, image 1 of 1
    • Separate the two cases.

    Ask FixBot

    Add Comment

  6. Sprint Sanyo RL-4920 Display Replacement, The Front Case: step 6, image 1 of 1
    • Use the plastic opening tool to remove the motherboard from the front case.

    Ask FixBot

    Add Comment

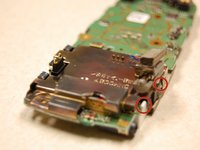
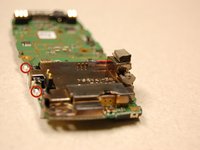
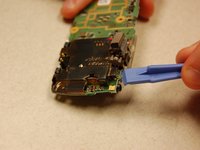
  7. Sprint Sanyo RL-4920 Display Replacement, Display: step 7, image 1 of 2 Sprint Sanyo RL-4920 Display Replacement, Display: step 7, image 2 of 2
    • Locate the 4 white clips of the dispaly.

    Ask FixBot

    Add Comment

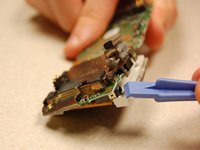
  8. Sprint Sanyo RL-4920 Display Replacement: step 8, image 1 of 2 Sprint Sanyo RL-4920 Display Replacement: step 8, image 2 of 2
    • Using the plastic opening tool, pull the white clips of the display away from the printed circuit board to unclip display.

    Ask FixBot

    Add Comment

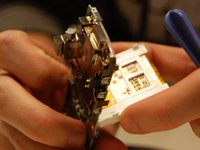
  9. Sprint Sanyo RL-4920 Display Replacement: step 9, image 1 of 2 Sprint Sanyo RL-4920 Display Replacement: step 9, image 2 of 2
    • Grasp the display on both sides and carefully pull the display off of the printed circuit board.

    Ask FixBot

    Add Comment

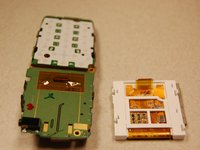
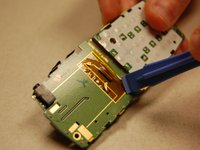
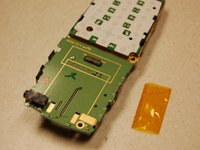
  10. Sprint Sanyo RL-4920 Display Replacement: step 10, image 1 of 2 Sprint Sanyo RL-4920 Display Replacement: step 10, image 2 of 2
    • Using the plastic opening tool, carefully remove the yellow film covering the display connector.

    • Do not damage the yellow film. Ensure that it stays in one piece and does not tear.

    Ask FixBot

    Add Comment

Conclusion

To reassemble your device, follow these instructions in reverse order.

Cancel: I did not complete this guide.

One other person completed this guide.

Patrick Olmstead

Member since: 10/22/13

240 Reputation

2 Guides authored

Team

Clemson, Team 13-5, Benson Fall 2013 Member of Clemson, Team 13-5, Benson Fall 2013

CLEM-BENSON-F13S13G5

3 Members

18 Guides authored

0 Guide Comments

Add Comment

View Statistics:

Past 24 Hours: 0

Past 7 Days: 6

Past 30 Days: 21

All Time: 463