
Speaker Assembly Replacement

Shelby Ramsey and 2 other contributors
Last updated on May 2, 2018
Views: 2.7K
View statistics:
- Past 24 Hours:
- 4
- Past 7 Days:
- 22
- Past 30 Days:
- 109
- All Time:
- 2,733
Comments: 0
No one has left comments on this guide. Will you be first?
Go to guide commentsCompleted: 3 4
3 people have marked this guide "completed." Will you be next?
4 people have marked this guide "completed." Including you — great job!
Favorites: 0 1
No one has favorited (and subscribed to) this guide. Will you be the first?
1 person has favorited (and subscribed to) this guide — and that's you!
Introduction
Go to step 1 ↓This guide is the basis for all repairs of the SRS-XB40 speaker. In order to get inside the speaker to fix any broken or faulty parts, you will need to complete this guide first. When taking apart the plastic cover on the sides of the speaker, you will hear what sounds like cracking, but it is just double sided tape holding the pieces on so don't worry if you hear some cracking sounds.
What you need
Tools


-
-
-
Remove the speaker case from the outer casing by prying it from the base of the speaker using a metal spudger.
 Ask FixBot
-
-
-
Pry the two rubber end pieces loose enough to pry off two pieces of the long plastic casing from the speaker body using a metal spudger.
-
-
-
Pry the two remaining rubber pieces of the casing completely away from the body of the speaker with the same metal pry tool.
-
-
-
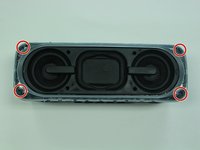
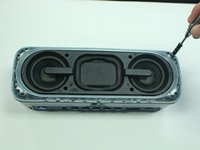
Once you have removed the outer blue casing, four T-8 screws (15 mm long) will be revealed on each corner. After removing these screws, simply pull the top part of the speaker way from the body to get the the inner part of the speaker.
-
-
-
-
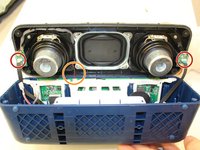
Once you have gotten to the internal parts of the speaker, there are seven wires connecting the speaker plate to the body of the speaker. Pinch the release tabs at the top of each of the four main wires to remove them.
-
-
-
Simply pull the thin wires on each side to remove them from their attachment points.
-
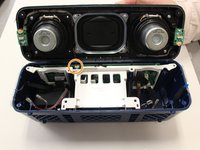
Remove the final red and black wire by gently pulling it apart.
-
This will ultimately detach the speaker plate from the base.
-
-




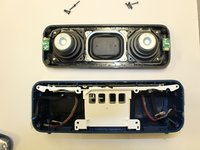
To reassemble your device, follow these instructions in reverse order.
Cancel: I did not complete this guide.
3 other people completed this guide.

Team

University of Alabama, Team S1-G1, Bedsole Spring 2018 Member of University of Alabama, Team S1-G1, Bedsole Spring 2018
UA-BEDSOLE-S18S1G1
4 Members
72 Guides authored
