Free Shipping on Domestic Orders $75+

Sony h.ear on 3 Touchpad Replacement

What you need

  1. Sony h.ear on 3 Touchpad Replacement, Extend the Right Speaker: step 1, image 1 of 2 Sony h.ear on 3 Touchpad Replacement, Extend the Right Speaker: step 1, image 2 of 2
    • Extend the Right cup and fold the Left cup away via the headband .

    • This will help protect the other ear pad while you work on this one.

    Ask FixBot

    Add Comment

  2. Sony h.ear on 3 Touchpad Replacement, Unclip the Right Ear Pad: step 2, image 1 of 3 Sony h.ear on 3 Touchpad Replacement, Unclip the Right Ear Pad: step 2, image 2 of 3 Sony h.ear on 3 Touchpad Replacement, Unclip the Right Ear Pad: step 2, image 3 of 3
    • The pad is attached by 6 clips in a hexagonal pattern, shown by the arrows.

    • Starting from the top, insert an opening pick in between where the cup leather meets the plastic casing, push it in firmly, then twist it until you disengage the top clip.

    • Try not to damage or peel off the leather while doing this. It helps if you pry towards the speaker housing, not the leather cup.

    • Work round the back side, poking the pick in and twisting to disengage further clips until you can gently pull the cup away.

    • When re-assembling, make sure that the stitching line on the ear pad is facing the bottom.

    Ask FixBot

    Add Comment

  3. Sony h.ear on 3 Touchpad Replacement, Unscrew the casing on the Right Speaker: step 3, image 1 of 1
    • Check that you are on the Right Speaker using the indicator on the headband.

    • Use a JIS #000 screwdriver to remove the 5 6mm screws holding the Right Speaker casing in place.

    Ask FixBot

    Add Comment

    • Gently lift the casing apart like a book from the bottom.

    • Do not lift it completely away as the touchpad is still connected by a delicate ribbon cable.

    • When re-assembling, make sure the touchpad ribbon cable isn't pinched by the casing.

    Ask FixBot

    Add Comment

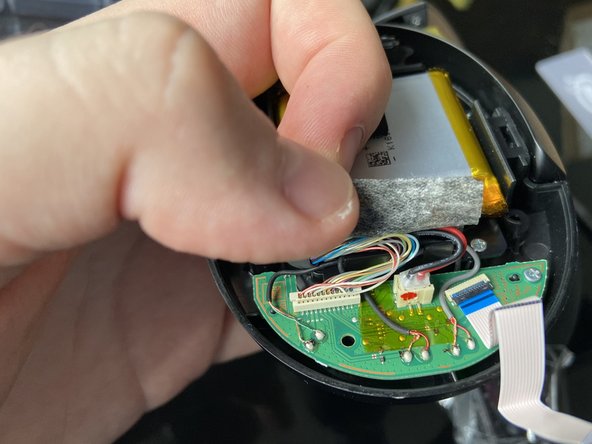
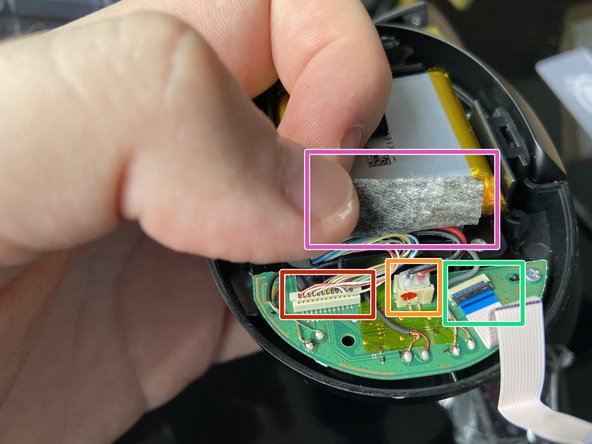
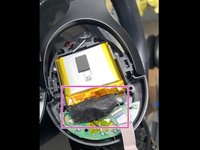
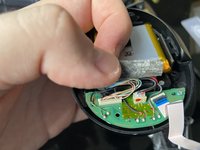
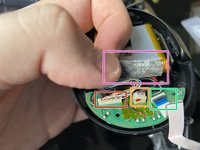
  4. Sony h.ear on 3 Touchpad Replacement, Locate the battery and touchpad connectors: step 5, image 1 of 3 Sony h.ear on 3 Touchpad Replacement, Locate the battery and touchpad connectors: step 5, image 2 of 3 Sony h.ear on 3 Touchpad Replacement, Locate the battery and touchpad connectors: step 5, image 3 of 3
    • Gently peel back the foam tape with a spudger and unstick it from the two cables underneath.

    • The battery and headband cable held in place against the PCB and internal enclosure of the Right Speaker with foam tape. The ZIF connector the touchpad is to the side and not covered in tape.

    • Headband cable connector (under foam tape)

    • Battery connector (under foam tape)

    • ZIF connector for touchpad

    • Foam tape

    Ask FixBot

    Add Comment

  5. Tool used on this step:
    Tweezers
    $4.99
    Buy
    • Using tweezers, gently grab and pull the smaller connector up from the circuit board to disconnect the battery.

    • Be extra careful to make sure you don't puncture the battery with the tweezers.

    Ask FixBot

    Add Comment

    • Using a spudger, gently flip up the latch on the ZIF connector on the circuit board connecting the touchpad.

    • Gently lift the ribbon cable away.

    Ask FixBot

    Add Comment

  6. Sony h.ear on 3 Touchpad Replacement, Remove the Touchpad: step 8, image 1 of 1
    • You can now safely remove the touchpad from the Right Speaker.

    Ask FixBot

    Add Comment

Conclusion

To reassemble your device, follow these instructions in reverse order.

Make sure your headphones work before putting the cups back on.

Cancel: I did not complete this guide.

Caius Nocturne

Member since: 07/12/21

2,106 Reputation

13 Guides authored

0 Guide Comments

Add Comment

View Statistics:

Past 24 Hours: 1

Past 7 Days: 4

Past 30 Days: 11

All Time: 387