Free Shipping on Domestic Orders $75+

Sony Xperia XA Battery Replacement

What you need

  1. Sony Xperia XA Battery Replacement, Back Cover: step 1, image 1 of 1
    • Apply heat on the back surface of the phone.

    • Continue to heat the device as needed throughout the replacement process.

    • The device can get very hot, so be careful when handling it.

    Ask FixBot

    Add Comment

  2. Sony Xperia XA Battery Replacement: step 2, image 1 of 1
    • Stick the small suction cup on the bottom half of the back surface of the phone.

    Ask FixBot

    Add Comment

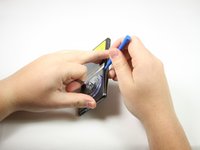
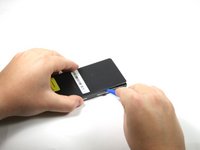
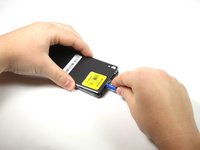
  3. Sony Xperia XA Battery Replacement: step 3, image 1 of 3 Sony Xperia XA Battery Replacement: step 3, image 2 of 3 Sony Xperia XA Battery Replacement: step 3, image 3 of 3
    • With the bottom of the device facing you, lift up on the suction cup handle.

    • Use the plastic opening tool around all sides to pry off the back cover.

    Ask FixBot

    Add Comment

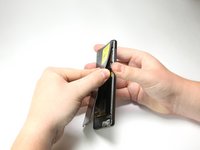
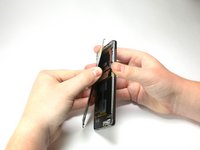
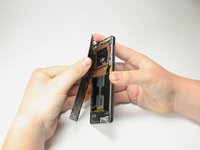
  4. Sony Xperia XA Battery Replacement: step 4, image 1 of 3 Sony Xperia XA Battery Replacement: step 4, image 2 of 3 Sony Xperia XA Battery Replacement: step 4, image 3 of 3
    • Pull the back of the phone case away from the device.

    • You will hear popping sounds of glue being ripped from the phone.

    • You will hear the sound of the back unlatching from the device.

    • You will need to apply adhesive or glue along the device to have maximum seal in reassembly.

    • RAF antenna may be attached to the back cover upon removal.

    Ask FixBot

    Add Comment

  5. Sony Xperia XA Battery Replacement: step 5, image 1 of 1
    • Apply heat to the copper RAF antenna.

    • This step and the following step only apply if the RAF antenna does not come off when taking the back cover off.

    Ask FixBot

    Add Comment

  6. Sony Xperia XA Battery Replacement: step 6, image 1 of 1
    • Peel back the RAF antenna.

    Ask FixBot

    Add Comment

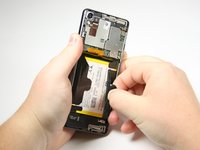
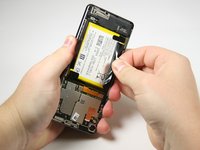
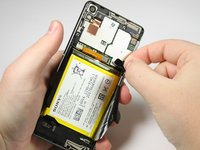
  7. Sony Xperia XA Battery Replacement, Battery: step 7, image 1 of 3 Sony Xperia XA Battery Replacement, Battery: step 7, image 2 of 3 Sony Xperia XA Battery Replacement, Battery: step 7, image 3 of 3
    • Peel back the black tabs on the battery.

    • This may require some force as you are breaking the adhesive seal.

    • You will need to apply more adhesive for the reassembly.

    Ask FixBot

    Add Comment

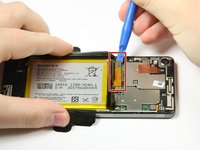
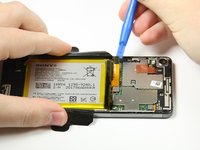
  8. Sony Xperia XA Battery Replacement: step 8, image 1 of 2 Sony Xperia XA Battery Replacement: step 8, image 2 of 2
    • Use a plastic opening tool to pry up the orange battery connector that is directly above the battery in the center of the phone.

    Ask FixBot

    Add Comment

  9. Sony Xperia XA Battery Replacement: step 9, image 1 of 1
    • Use a plastic opening tool to get under the battery and pry it up.

    Ask FixBot

    Add Comment

  10. Sony Xperia XA Battery Replacement: step 10, image 1 of 1
    • Lift the battery out with your hands.

    Ask FixBot

    Add Comment

Conclusion

To reassemble your device, follow these instructions in reverse order.

Cancel: I did not complete this guide.

11 other people completed this guide.

Cassidy Davis

Member since: 04/18/18

645 Reputation

1 Guide authored

Team

Cal Poly, Team S17-G2, Livingston Spring 2018 Member of Cal Poly, Team S17-G2, Livingston Spring 2018

CPSU-LIVINGSTON-S18S17G2

4 Members

8 Guides authored

1 Guide Comment

Thanks for such a clear set of instructions. I used a hair drier rather than heat gun!

Mike Jurkiewicz - Reply Share

Add Comment

View Statistics:

Past 24 Hours: 2

Past 7 Days: 14

Past 30 Days: 49

All Time: 5,964