Free Shipping on Domestic Orders $75+

Sony Xperia Sola Motherboard Replacement

What you need

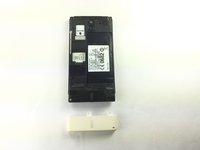
  1. Sony Xperia Sola Motherboard Replacement, Motherboard: step 1, image 1 of 2 Sony Xperia Sola Motherboard Replacement, Motherboard: step 1, image 2 of 2
    • Place phone down with screen side down and camera side facing up as shown.

    • Push on cover away from you. You should hear a snap or pop. This will let you view the battery and sim/sd card slots. Then lift the cover off.

    Ask FixBot
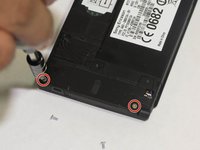
  2. Sony Xperia Sola Motherboard Replacement: step 2, image 1 of 3 Sony Xperia Sola Motherboard Replacement: step 2, image 2 of 3 Sony Xperia Sola Motherboard Replacement: step 2, image 3 of 3
    • Remove the five (5) screws on the phone, using a screwdriver. The screws are at the top and the bottom of the phone as shown.

    Ask FixBot
  3. Sony Xperia Sola Motherboard Replacement: step 3, image 1 of 2 Sony Xperia Sola Motherboard Replacement: step 3, image 2 of 2
    • Pry off the bottom white cover by using the opening tool as a lever.

    Ask FixBot
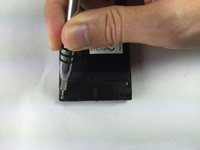
  4. Sony Xperia Sola Motherboard Replacement: step 4, image 1 of 2 Sony Xperia Sola Motherboard Replacement: step 4, image 2 of 2
    • Remove the two additional screws using the Torx screwdriver.

    Ask FixBot
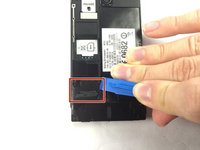
  5. Sony Xperia Sola Motherboard Replacement: step 5, image 1 of 2 Sony Xperia Sola Motherboard Replacement: step 5, image 2 of 2
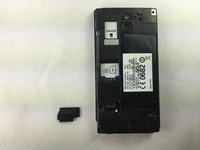
    • Locate the black cover on the bottom left of phone. Use an opening tool to pry up and remove the black cover.

    Ask FixBot
  6. Sony Xperia Sola Motherboard Replacement: step 6, image 1 of 1
    Tool used on this step:
    Tweezers
    $4.99
    Buy
    • Disconnect the circuit by lifting the connector straight up as shown using the tweezers.

    Ask FixBot
  7. Sony Xperia Sola Motherboard Replacement: step 7, image 1 of 3 Sony Xperia Sola Motherboard Replacement: step 7, image 2 of 3 Sony Xperia Sola Motherboard Replacement: step 7, image 3 of 3
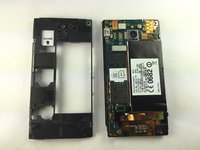
    • Turn the phone onto its side. Insert a plastic opening tool into seam, and gently remove the cover. You can also slide the spudger in from the top.

    • Once the cover is loose, lift it off the phone. The side buttons may feel a bit sticky, but this is normal.

    Ask FixBot
  8. Sony Xperia Sola Motherboard Replacement: step 8, image 1 of 1
    • Locate the additional circuit at the bottom left. Using the tweezers, remove it gently by pulling up.

    Ask FixBot
  9. Sony Xperia Sola Motherboard Replacement: step 9, image 1 of 2 Sony Xperia Sola Motherboard Replacement: step 9, image 2 of 2
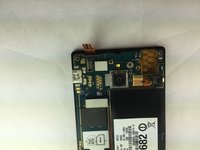
    • Use the tweezers to lift up on the circuit located at the top left.

    Ask FixBot
  10. Sony Xperia Sola Motherboard Replacement: step 10, image 1 of 1
    • Use the spudger and slide it under the top left of the board then lift the board straight up. The board should come up very easily.

    Ask FixBot
Conclusion

To reassemble your device, follow these instructions in reverse order.

5 other people completed this guide.

Cary Drew

Member since: 09/25/14

866 Reputation

5 Guides authored

Team

USF Tampa, Team 1-1, Brown Fall 2014 Member of USF Tampa, Team 1-1, Brown Fall 2014

USFT-BROWN-F14S1G1

4 Members

5 Guides authored

2 Guide Comments

Some of these pictures are too blurry.

Dan Brown - Reply Share

You need written instructions for each step.

Dan Brown - Reply Share

Add Comment

View Statistics:

Past 24 Hours: 2

Past 7 Days: 13

Past 30 Days: 64

All Time: 1,447