Introduction
This is a guide showing the steps required to remove and replace the battery terminals of a Sony Walkman D-EJ360. The battery terminal is required to contact the terminals of the two batteries in the Walkman.
Battery terminal damage can cause the device to fail to turn on, or turn off when in use. Battery terminals can corrode from leaking batteries, or be bent into disrepair from improper battery installation.
Replacement of the battery terminal is difficult. This repair requires soldering to remove the terminal. The prerequisite knowledge of using soldering, and de soldering tools, as well as well ventilated space is required to complete this repair.
What you need
-
-
-
Grip the thin end of each spring using a pair of tweezers, slide it out of the lid notch, then press down on the main coil to release and remove it.
-
-
-
Insert the metal spudger in the crevice between the blue lid and the white body of the Walkman.
-
There is a notch where the lid is held under to stay in place. With the spudger, push the blue lid portion down and out.
-
Repeat the same tactic on the other side. The other side should become easier to pop off.
-
Remove the lid.
-
-
-
-
Remove the eight 6.1 mm screws using a Phillips #00 screwdriver.
-
Open the battery cover to reveal the last screw.
-
Remove the ninth 6.1 mm screw using a Phillips #00 screwdriver.
-
-
-
Insert a Jimmy into the seam between the upper and lower cases and pry apart.
-
Avoid initially prying near buttons, or the laser assembly.
-
Pry until the there is an audible click. The halves should visibly separate roughly 1/4 in.
-
Work around the seam in a circular path, separating the halves completely.
-
-
-
-
Using tweezers, gently lift the the locking flap on the laser module ribbon connector.
-
Gently remove the ribbon cable from the connector.
-
-
-
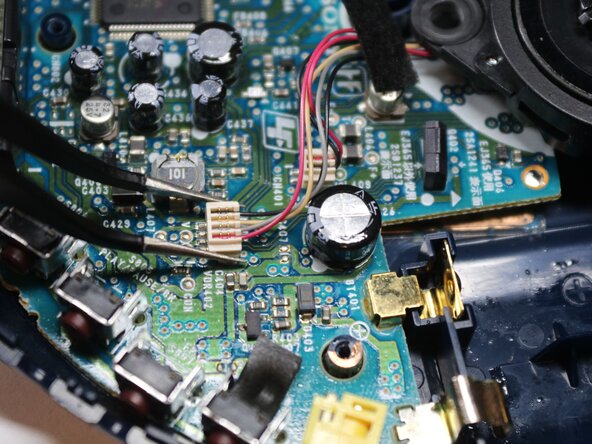
Using tweezers, squeeze the upper half of the four wire connector, and lift straight up to remove the connector.
-
Repeat the step for the two wire connector.
-
-
-
-
-
Lift the board on the same side as the battery terminals, and slide the board out diagonally.
-
-
-
-
-
Apply flux to the solder joints of the damaged battery terminal.
-
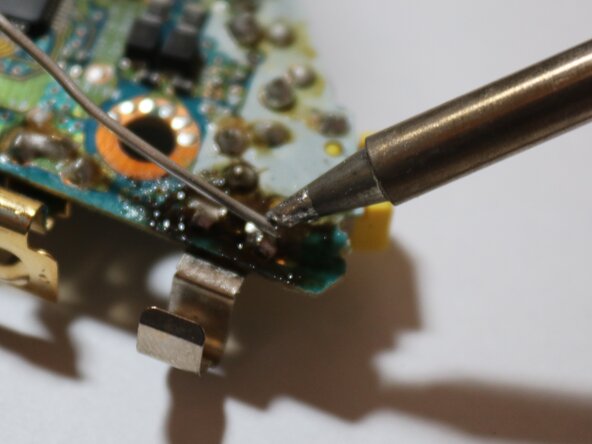
Heat the solder joint using soldering iron until liquid, and use a desoldering pump to suck the solder away from the terminal. There should be a visible void between the terminal and the motherboard.
-
Clean the hot end of the soldering iron between each joint. This will help reduce any excess solder from filling the joint. This can be done with either wet sponge or brass/copper shavings.
-
Repeat for the 3 joints of the battery terminal.
-
-
-
Use tweezers to remove the battery terminal from the motherboard. There may be a small remnant of solder holding the terminal. You may need to torque the terminal side to side in order to get it to break free.
-
-
-
Apply flux to traces, place solder wick on traces, and press soldering iron against the solder wick and carefully scrub the traces for about 3-5 seconds.
-
The traces should be visibly silver with a hole in the center. Make sure there is no solder filling in the trace, as the terminal must be able to go through the holes.
-
-
-
Apply flux to the three traces of the terminal.
-
Apply a small amount of solder to the hot end of the soldering iron until a small drop of solder is on the iron.
-
Press said drop of solder against the terminal. If the solder flows, the the trace will have no gaps around the terminal pin. You may need to add additional solder to the trace. to make a full connection.
-
Clean the soldering iron hot end, and repeat for all three traces.
-
Make sure to not bridge any traces, and to not bump any adjacent electronics to the terminal.
-
-

 Ask FixBot




To reassemble your device, follow these instructions in reverse order.

Team

Purdue University Northwest, Team 3-1, Dieterle Fall 2025 Member of Purdue University Northwest, Team 3-1, Dieterle Fall 2025
PNW-DIETERLE-F25S3G1
5 Members
60 Guides authored
