
Sony Walkman D-E356CK Back Panel Replacement

Aiden Pacheco and 3 other contributors
Last updated on Dec 29, 2025
Views: 244
View statistics:
- Past 24 Hours:
- 1
- Past 7 Days:
- 7
- Past 30 Days:
- 54
- All Time:
- 244
Comments: 0
No one has left comments on this guide. Will you be first?
Go to guide commentsCompleted: 1 2
1 person has marked this guide "completed." Will you be next?
2 people have marked this guide "completed." Including you — great job!
Favorites: 0 1
No one has favorited (and subscribed to) this guide. Will you be the first?
1 person has favorited (and subscribed to) this guide — and that's you!
Introduction
Go to step 1 ↓If your Sony Walkman D-E356CK has issues within the device, then the back panel will have to be removed from the front panel, use this guide to remove the back panel of the Sony Walkman D-E356CK. The only tools you will need for this guide are a prying tool and a Philips head screwdriver.
What you need
Tools


-
-
-
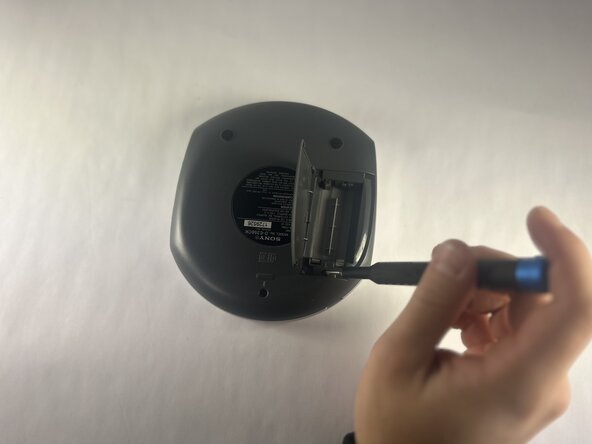
Open the battery compartment.
-
Remove the AA batteries from within the compartment.
 Ask FixBot
-
-
-
Press the button located in the bottom left corner of the device labeled "open."
-
Remove the three 11 mm-long Phillips screws.
-
-
-
Open the battery compartment.
-
Remove the two 11 mm-long Phillips screws on the back side of the Walkman.
-
-
-
-
Insert an opening tool into the seam between the back panel and chassis.
-
Pry around the perimeter until the back panel releases.
-
Remove the back panel.
-
-




To reassemble your device, follow the above steps in reverse order.
Repair didn’t go as planned? Try some basic troubleshooting or ask our Answers community for help.
Cancel: I did not complete this guide.
One other person completed this guide.

Team

UMass Dartmouth, Team 1-1, Botvin Fall 2025 Member of UMass Dartmouth, Team 1-1, Botvin Fall 2025
UMASSD-BOTVIN-F25S1G1
4 Members
60 Guides authored
