Introduction
This guide will show you how to replace the charging port on your Sony WH-CH710N headphones.
If your headphones are not charging properly, the port may be clogged with debris or damaged from moisture or regular wear. Replacing the charging port can restore proper functionality and extend the life of your device without needing a full replacement.
Before beginning the repair, review the Sony WH-CH710N Not Charging troubleshooting page for possible solutions. If you have confirmed that the charging port is damaged, power off the headphones and disconnect them from the charger or audio cable before proceeding.
Warning: This guide requires the use of a soldering iron to desolder the charging port. If you are unfamiliar with soldering or need a refresher, refer to the How to Solder and Desolder Connections guide.
What you need
-
-
-
Pinch the left ear pad cushion and gently pull it away from the ear cup to remove it.
 Ask FixBot
-
-
-
Use a Phillips #1 screwdriver to remove the four 4.0 mm screws from the outer ear plate.
-
-
-
Using even pressure around all edges, gently pull the black outer ear plate away from the cup of the headphone. It may be helpful to use the iFixit plastic opening tool to pry around the edge of the outer ear plate.
-
-
-
Use a Phillips #1 screwdriver to remove the four 3.0 mm screws from the inner ear plate.
-
-
-
Gently grasp the black inner ear plate and pull it away from the ear cup, exposing the internal components.
-
-
-
-
-
Pinch the right ear pad cushion and gently pull it away from the ear cup to remove it.
-
-
-
-
Use a Phillips #1 screwdriver to remove the four 4.0 mm screws from the outer ear plate.
-
-
-
Using even pressure around all edges, gently pull the black outer ear plate away from the cup of the earphone.
-
-
-
Use a Phillips #1 screwdriver to remove the four 3.0 mm screws from the inner ear plate.
-
-
-
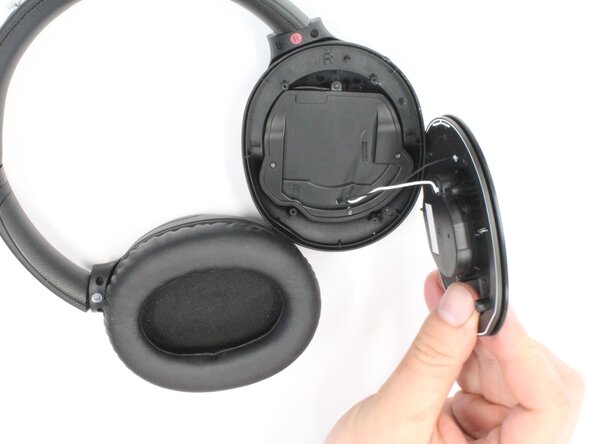
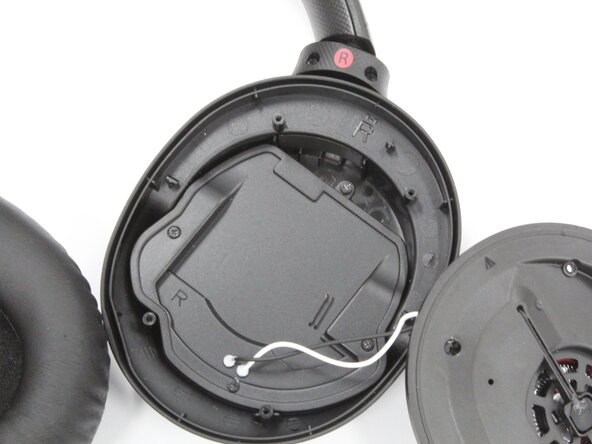
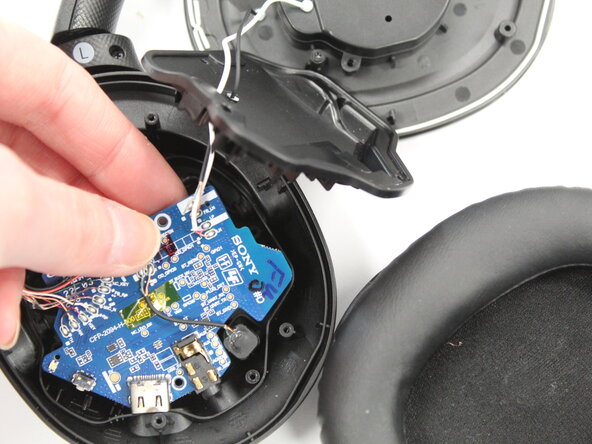
Gently grasp the black inner ear plate and pull it away from the cup of the earphone, exposing the internal components.
-
-
-
-
-
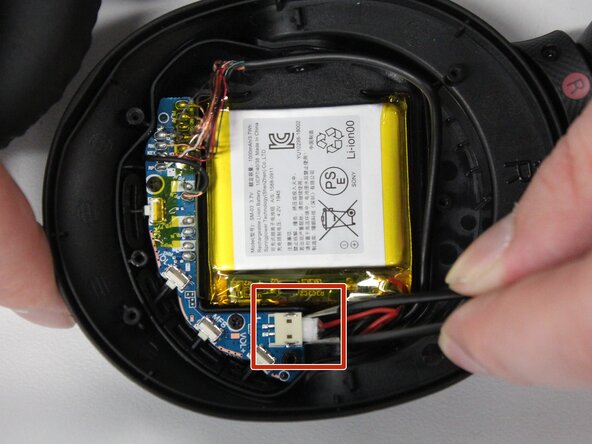
Push on alternating sides of the JST connector, to release it.
-
If that doesn't work, use a pair of tweezers to firmly grip the sides of the battery connector and pull straight away from the socket. Hold the tweezers closer to the connector to get a better grip.
-
-
-
Use a Phillips #1 screwdriver to remove the two 3.0 mm screws that hold the circuit board in place.
-
-
-
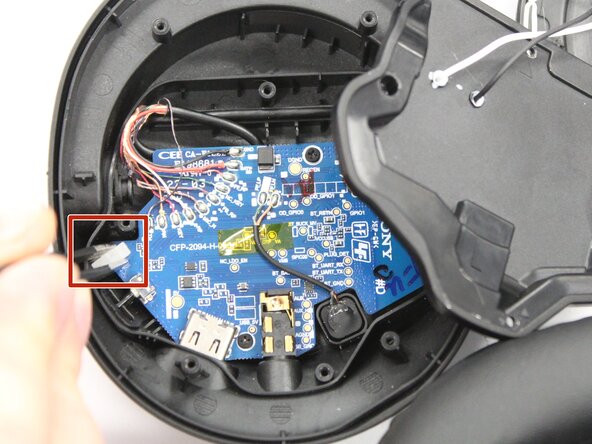
Use tweezers to gently disconnect the white plastic retention clip located on the left side of the circuit board.
-
-
-
Flip the board over and use tweezers to gently lift the charging port away from the board.
-
-












To reassemble your device, follow these instructions in reverse order. Take your e-waste to an R2 or e-Stewards certified recycler.

Team

Purdue University Northwest, Team 7-10, Dieterle Spring 2026 Member of Purdue University Northwest, Team 7-10, Dieterle Spring 2026
PNW-DIETERLE-S26S7G10
4 Members
82 Guides authored
