Introduction
This guide demonstrates how to remove the back of the laptop in order to access, repair, and replace internal parts.
What you need
-
-
Remove the battery by pinching the two lock tabs towards the center.
-
Next, lift up on the battery to remove it.
-
-
-
Using a Phillips #00 screwdriver, remove the twenty-two 5.6 mm screws from the back of the laptop.
-
-
-
-
Now, remove the small covers from the back of the case.
-
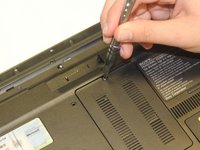
Using a Phillips #00 screwdriver, unscrew the three 5.6 mm screws from the covers (one screw on the RAM cover [middle] and two screws on the Hard Drive cover [bottom right]).
-
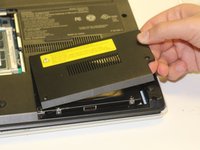
Then, lift up on and remove these covers as shown in the third image.
-
-
-
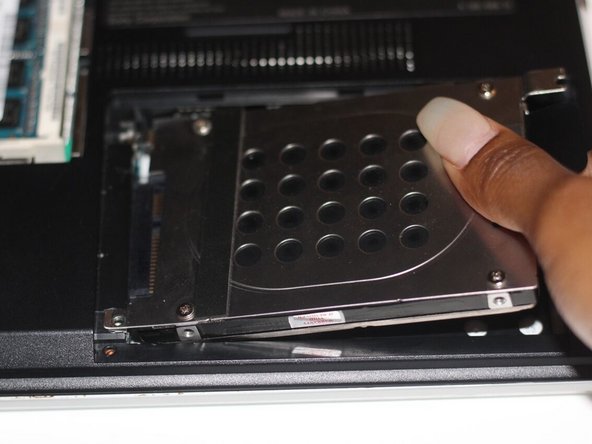
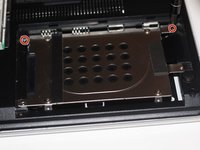
Remove the hard drive.
-
Using a Phillips #00 screwdriver, unscrew the two remaining 4.9 mm screws holding the hard drive into place.
-
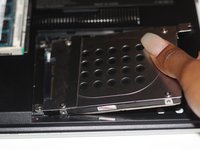
Next, lift up and pull outwards to release the hard drive from its socket.
-
-
-
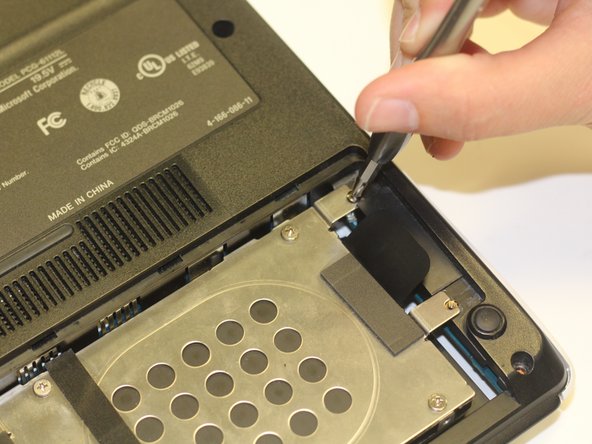
Using your fingers, grasp the black tab and lightly pull up on the ribbon cable to detach it from the motherboard.
-
-
-
After proper removal of all necessary screws, gently lift up on the back case to remove it.
-


To reassemble your device, follow these instructions in reverse order.
Cancel: I did not complete this guide.
2 other people completed this guide.
Team

University of Alabama, Team S3-G9, Bedsole Spring 2018 Member of University of Alabama, Team S3-G9, Bedsole Spring 2018
UA-BEDSOLE-S18S3G9
3 Members
12 Guides authored