
Sony Vaio SVF15A16CXB Fan Replacement

qiuhong Li and 3 other contributors
Last updated on Jan 4, 2019
Views: 926
View statistics:
- Past 24 Hours:
- 1
- Past 7 Days:
- 13
- Past 30 Days:
- 63
- All Time:
- 926
Comments: 1
1 comment on steps.
Completed: 0 1
No one has marked this guide "completed." Will you be the first?
1 person has marked this guide "completed." It's you — great job!
Favorites: 0 1
No one has favorited (and subscribed to) this guide. Will you be the first?
1 person has favorited (and subscribed to) this guide — and that's you!
Introduction
Go to step 1 ↓This guide helps users to remove a fan, which leads the user of the steps to remove and replace the fan of the laptop.
What you need
Tools


-
-
-
Unscrew the eleven 6 mm screws from the back panel on the bottom of laptop with the Phillips #0 screwdriver.
-
Unscrew the one 4 mm screw from the back panel on the bottom of laptop with the Phillips #0 screwdriver.
 Ask FixBot
-
-
-
Using a plastic opening tool, pull the optical drive out of the computer by the seam.
-
-
-
Lift the clip marked in red in order to release the back cover.
-
Lift the back cover.
-
-
-
-
-
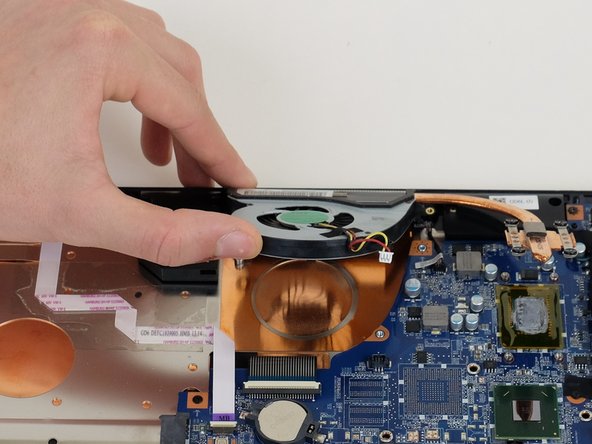
Unplug the clip (red black yellow wires) by pulling it in an upward direction.
-
-
-
-
Unscrew the four 4mm screws from the connecting copper piece. The two screws are located on either side of the copper piece.
-
-


To reassemble your device, follow these instructions in reverse order.

Team

Linn Benton Community College, Team S2-G3, Karnes Fall 2018 Member of Linn Benton Community College, Team S2-G3, Karnes Fall 2018
LBCC-KARNES-F18S2G3
4 Members
60 Guides authored
