Free Shipping on Domestic Orders $75+

Sony TV RM-862 Remote Disassembly

What you need

  1. Sony TV RM-862 Remote Disassembly, Sony TV RM-862 Remote: step 1, image 1 of 1
    • Turn the remote on it's back and remove the battery cover.

    Ask FixBot

    Add Comment

  2. Sony TV RM-862 Remote Disassembly: step 2, image 1 of 2 Sony TV RM-862 Remote Disassembly: step 2, image 2 of 2
    • The remote is not held together by any screws, just clips.

    • This is the hardest part by far. Don't break the case, your fingers or your spudgers.

    • Use a spudger and try to push the case gently but with a little force while wiggling it back and forth.

    • If the small tab breaks, don't worry as the case will just work fine without it. Mine is already gone, as you can see.

    • Be sure to take one step after another. To get inside the remote it took me approx. half an hour.

    • Open the case up until you are near the IR shield. The shield needs extra carefulness.

    • Gently wiggle the two parts to loosen the IR shield. The bottom case comes easier off than the top, so be sure to loosen the IR shield from the bottom cover.

    Ask FixBot

    Add Comment

  3. Sony TV RM-862 Remote Disassembly: step 3, image 1 of 3 Sony TV RM-862 Remote Disassembly: step 3, image 2 of 3 Sony TV RM-862 Remote Disassembly: step 3, image 3 of 3
    • Congrats, you are finally inside your remote!

    • Note that the IR shield is still attached to the top cover.

    • Remove the IR shield by pushing it up.

    • Be careful not to break the LED while removing.

    Ask FixBot

    Add Comment

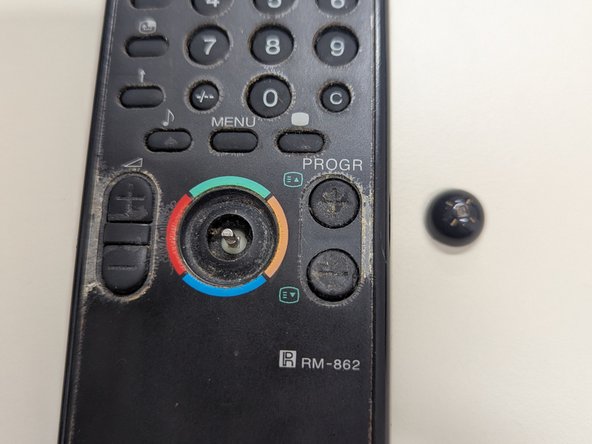
  4. Sony TV RM-862 Remote Disassembly: step 4, image 1 of 2 Sony TV RM-862 Remote Disassembly: step 4, image 2 of 2
    • Turn the remote around and remove the small joystick in the middle by just pulling it off.

    Ask FixBot

    Add Comment

  5. Sony TV RM-862 Remote Disassembly: step 5, image 1 of 2 Sony TV RM-862 Remote Disassembly: step 5, image 2 of 2
    • Now the PCB is free and you can remove everything easily.

    • First remove the PCB, afterwards the button pad.

    • As you can see my button pad needed heavy cleaning. Guess that's quite normal after 30+ years of operation...

    Ask FixBot

    Add Comment

  6. Sony TV RM-862 Remote Disassembly: step 6, image 1 of 1
    • To get everything back together just follow the steps in the reverse order.

    • Feel the satisfaction when closing the case after getting through the pain opening it. :)

    Ask FixBot

    Add Comment

Finish Line

Cancel: I did not complete this guide.

dentaku

Member since: 01/06/25

148 Reputation

1 Guide authored

0 Guide Comments

Add Comment

View Statistics:

Past 24 Hours: 0

Past 7 Days: 15

Past 30 Days: 63

All Time: 691