Introduction
This article is devoted to replacement of e-Ink screen on your Sony Reader Wi-Fi PRS-T3. The main difficulty is to remove old double-sided tape by which screen holds on main body.
ED060XC5(LF)C1 screen have been used as a new part.
What you need
-
-
Detach the back cover from the e-reader
-
Remove the black sticker, uncovering three additional screws. The sticker comes loose quite easy.
-
Unscrew all 10 screws (length 3.2mm).
-
Now take a spudger, and start opening the case at the top. There are four retaining clips at each side.
 Ask FixBot
-
-
-
Unscrew these 5 screws (length 4.3mm) . They hold the front bezel (white or black part of the main body).
-
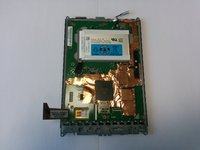
There are other screws that hold the motherboard (10×, 1.8mm) to the grey back plate. You do not need to remove them, unless you want to remove the electronics board (for example to prevent damage when cleaning the back plate in a later step).
-
-
-
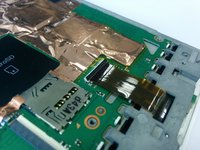
Carefully unplug buses. For the screen bus. Simple pull it from connector. For the hard keys bus . First, open the connector by hook it from below. Then it'll be easy to unplug the bus.
-
-
-
-
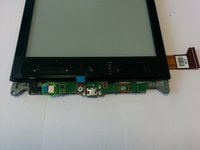
Now we need to remove a white cover. It helds by clips around the body. Please, pay attention to hooks in red ellipses on the photo. On the second photo you may see detached white cover.
-
-
-
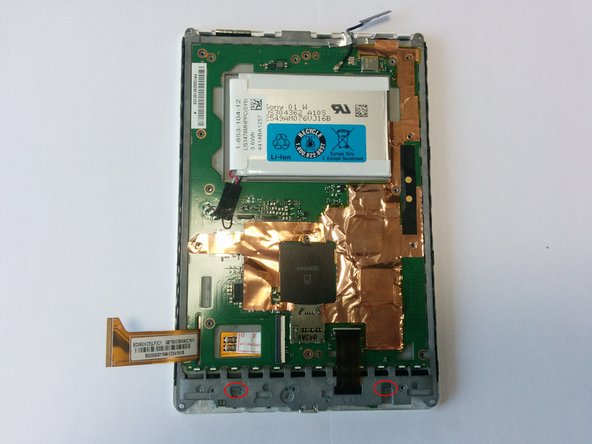
Unscrew screws marked by red cicles.
-
Carefully unplug a bus
-
Be careful, do not lose this tiny thing!
-
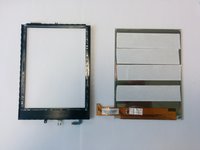
Remove black frame. It's attached to the screen by double sided tape
-
-
-
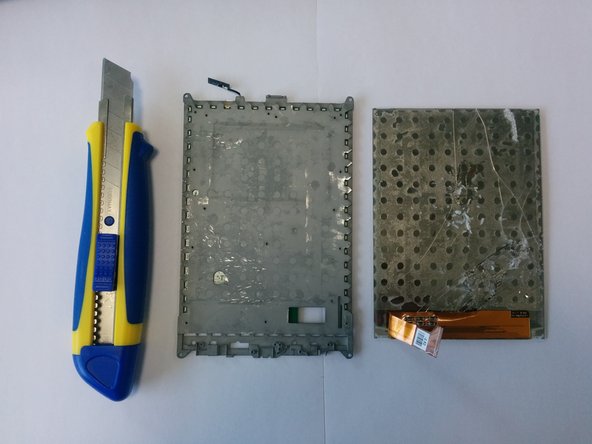
Use any suitable knife to detach broken screen from metal plate. Please, be very careful. Do not hurt yourself!
-
After you did this. You need to clean metal plate from the remnants of glue and double sided tape.
-
-
-
Take a new screen. Apply double sided tape on back side.
-
Remove protective film from the screen
-
Put the screen into the black frame. Upper side of the screen should touch upper side of the frame.
-
-
-
Get the flex cable through the slot in the metal frame. Thank you @Craig for the comment
-
Carefully join the screen in a black frame with the metal plate.
-


To reassemble your device, follow these instructions in reverse order.
Cancel: I did not complete this guide.
9 other people completed this guide.
24 Guide Comments
This an incredibly useful guide. I have the new screen, but I have asked and have not gotten an answer about what double-sided tape is used to attach the new screen to the body. Could someone supply this information pleasae.
Is the ED060XC5(LF)C1 screen, the same quality and matte as the original one? I don't trust asian sellers so much, but the only one that I found on internet is this one.
After installing replacement screen the touch functionallity does not work, screen itself seems to work but you cannot make any touch selections, does anyone has an idea?