
Sony RM-LVR1 LCD Screen Replacement

Alexander Thomas and 5 other contributors
Last updated on May 7, 2024
Views: 1.2K
View statistics:
- Past 24 Hours:
- 2
- Past 7 Days:
- 22
- Past 30 Days:
- 99
- All Time:
- 1,222
Comments: 5
1 comment on steps, 4 guide comments.
Go to guide commentsCompleted: 1 2
1 person has marked this guide "completed." Will you be next?
2 people have marked this guide "completed." Including you — great job!
Favorites: 0 1
No one has favorited (and subscribed to) this guide. Will you be the first?
1 person has favorited (and subscribed to) this guide — and that's you!
Introduction
Go to step 1 ↓This guide will teach you step by step how to replace your LCD screen.
What you need
Tools
-
Spudger4.9
-


-
-
-
Use a Phillips #00 screwdriver to remove the four (4) screws on the back of the device.
-
If the screws strips or is previously stripped, refer to the stripped screw repair guide.
 Ask FixBot
-
-
-
Battery is the rectangular and silver object in the center of device.
-
Remove battery with finger by prying at the rear.
-
If unable to remove battery, pry out using spudger.
-
-
-
-
-
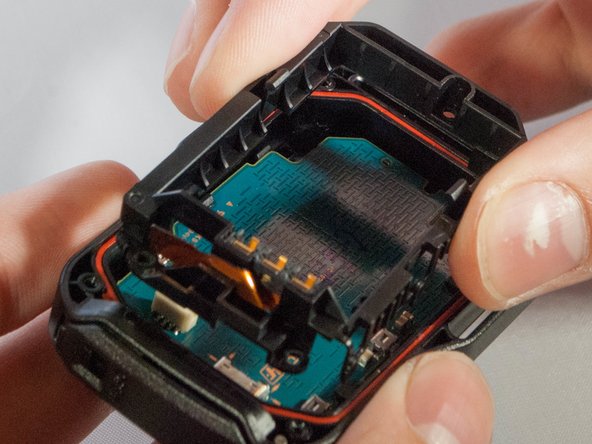
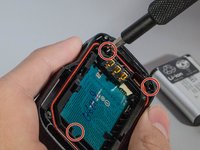
Unscrew the 3 (three) screws holding the bracket in place.
-
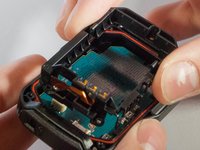
Then remove the bracket by prying one end up.
-
-
Tool used on this step:Tweezers$4.99
-
With tweezers, unplug the ribbon cable from the white connector.
-
-
-
Remove motherboard from the device by pulling upward gently, with fingers or tweezers.
-
-
-
Gently push out on these two clips holding the LCD to the motherboard
-
Once you have the first two off, ever so carefully, push the LCD towards the remaining two clips.
-
-
-
-
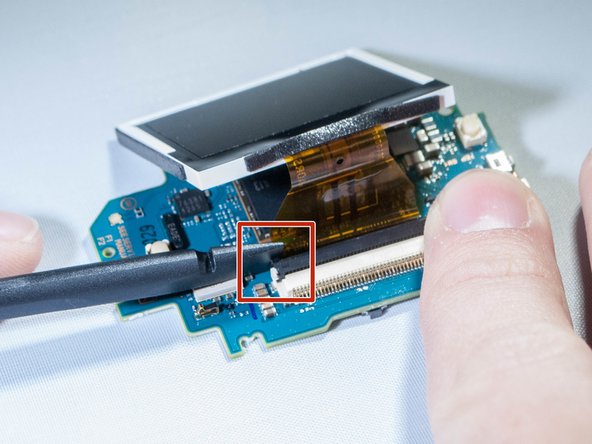
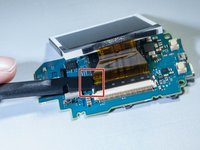
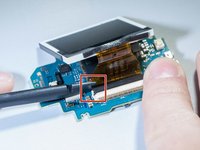
Undo the ribbon cable attached between the motherboard and screen by prying up black tab which holds the cable, using spudger. (See pictures)
-
-





To reassemble your device, follow these instructions in reverse order.
Cancel: I did not complete this guide.
One other person completed this guide.

Team

Eastern Washington University, Team S2-G2, Crane Fall 2017 Member of Eastern Washington University, Team S2-G2, Crane Fall 2017
EWU-CRANE-F17S2G2
3 Members
36 Guides authored
4 Guide Comments
Hi
I cant find an replacement lcd.
Could anybody help me where to get one?
Cheers
Sven
any link to the replacement LCD please?
