
Sony PRS-505 Screen Replacement

DaJean and one other contributor
Last updated on Dec 23, 2025
Views: 578
View statistics:
- Past 24 Hours:
- 3
- Past 7 Days:
- 14
- Past 30 Days:
- 100
- All Time:
- 578
Comments: 0
No one has left comments on this guide. Will you be first?
Go to guide commentsCompleted: 0 1
No one has marked this guide "completed." Will you be the first?
1 person has marked this guide "completed." It's you — great job!
Favorites: 0 1
No one has favorited (and subscribed to) this guide. Will you be the first?
1 person has favorited (and subscribed to) this guide — and that's you!
Introduction
Go to step 1 ↓Is the screen of your device cracked? Displays that use ink are very delicate and can easily be damaged by strong impacts or great amounts of pressure.
This particular guide is for replacing the screen of the SONY PRS-505. This procedure involves replacing the damaged E Ink screen to restore the primary function of your device.
Critical Warning: This repair is highly sensitive, and a mistake can easily destroy an expensive component. Pay extreme attention to the thin flex cable on the back of the screen; do not pull, crimp, or scratch it. Proceed slowly and with great care.
What you need
Tools


-
-
-
Press the SD card inward until it clicks and springs outward.
-
Take the SD card out of the device.
 Ask FixBot
-
-
-
-
-
Remove the stylus.
-
Remove the four 2 mm screws from the back of the device using a Phillips #000 screwdriver.
-
Loosen the screw on the bottom of the device that is in its own little divot using a Phillips #000 screwdriver.
-
-
-
Remove the thin panel on the bottom of the device using an opening tool.
-
Use a Phillips #000 screwdriver to remove the three 5 mm screws that are underneath the panel.
-
-
-
Remove the thin top panel using an opening tool.
-
Remove the two metal brackets from the top of the device.
-
-
-
Gently but firmly push the inner components of the PRS out towards the top until the ribbon cable is completely exposed and accessible.
-
-
-
Disconnect the ribbon cable.
-
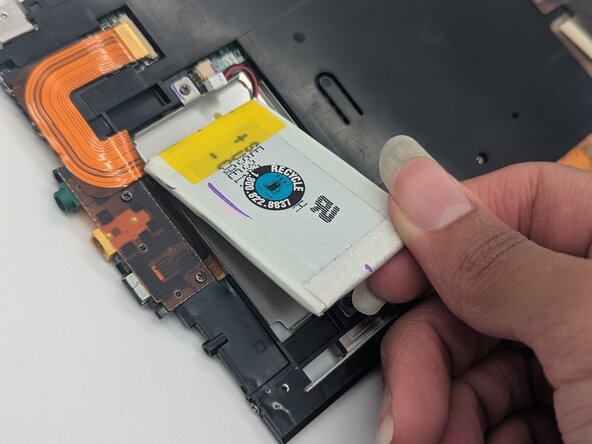
Carefully continue to push the inner body of the device towards the top until the battery is accessible.
-
-
-
Gently pry the battery from its placeholder within the device’s inner body. Disconnect and remove the battery.
-
-
-
-
-
Disconnect the two ribbon cables: one next to the battery compartment and the other next to the SD card reader.
-
Remove the black midframe.
-
-
-




To reassemble your device, follow these instructions in reverse order.

Team

University of North Texas, Team 1-5, Rea Fall 2025 Member of University of North Texas, Team 1-5, Rea Fall 2025
UNT-REA-F25S1G5
3 Members
72 Guides authored
