Introduction
If your SD card is not being recognized properly, or if the slot is physically damaged, the fault likely lies with the SD card reader component itself.
This repair is an intermediate to advanced procedure that requires disassembling the PRS-505 and replacing the SD card slot, which is often soldered directly to the main logic board.
Warning: This guide requires handling delicate internal components and may necessitate soldering skills. The aged plastic casing is brittle, and you must take anti-static precautions to avoid accidentally damaging other components on the circuit board.
What you need
-
-
Press the SD card inward until it clicks and springs outward.
-
Take the SD card out of the device.
 Ask FixBot
-
-
-
Remove the stylus.
-
Remove the four 2 mm screws from the back of the device using a Phillips #000 screwdriver.
-
Loosen the screw on the bottom of the device that is in its own little divot using a Phillips #000 screwdriver.
-
-
-
Remove the thin panel on the bottom of the device using an opening tool.
-
Use a Phillips #000 screwdriver to remove the three 5 mm screws that are underneath the panel.
-
-
-
Remove the thin top panel using an opening tool.
-
Remove the two metal brackets from the top of the device.
-
-
-
-
Gently but firmly push the inner components of the PRS out towards the top until the ribbon cable is completely exposed and accessible.
-
-
-
Disconnect the ribbon cable.
-
Carefully continue to push the inner body of the device towards the top until the battery is accessible.
-
-
-
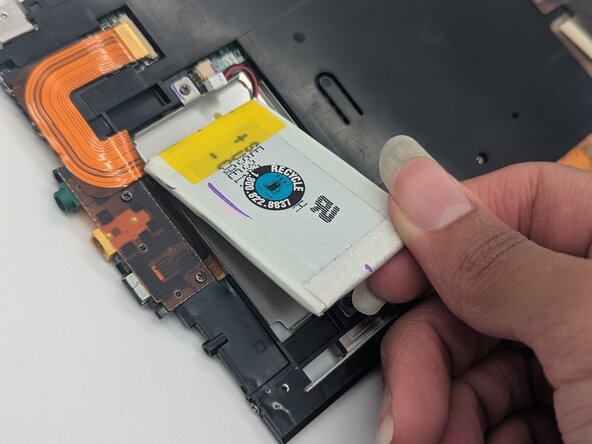
Gently pry the battery from its placeholder within the device’s inner body. Disconnect and remove the battery.
-
-
-
Disconnect the two ribbon cables: one next to the battery compartment and the other next to the SD card reader.
-
Remove the black midframe.
-
-
-
Use a soldering iron to desolder the SD card reader from its connecting points on the ribbon colored compartment.
-
Remove the SD card reader.
-


To reassemble your device, follow these instructions in reverse order.
Team

University of North Texas, Team 1-5, Rea Fall 2025 Member of University of North Texas, Team 1-5, Rea Fall 2025
UNT-REA-F25S1G5
3 Members
6 Guides authored