
Sony NEX-5R Rear Case Replacement

Emily Trujillo and 6 other contributors
Last updated on Oct 19, 2015
Views: 3.8K
View statistics:
- Past 24 Hours:
- 4
- Past 7 Days:
- 32
- Past 30 Days:
- 128
- All Time:
- 3,818
Comments: 7
7 comments on steps.
Completed: 1 2
1 person has marked this guide "completed." Will you be next?
2 people have marked this guide "completed." Including you — great job!
Favorites: 0 1
No one has favorited (and subscribed to) this guide. Will you be the first?
1 person has favorited (and subscribed to) this guide — and that's you!
Introduction
Go to step 1 ↓The replacement of the rear casing requires removal of multiple screws around the entire camera and inside the battery pack. Once the fasteners are removed, you can carefully pry off the rear case.
What you need
Tools
-
Spudger4.9


-
-
-
Open the battery pack door by moving the slider to "OPEN".
-
Remove the 3.25 mm silver screw inside the battery pack with a Phillips screwdriver.
 Ask FixBot
-
-
-
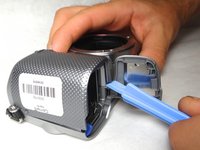
Use the spudger to raise the corner of the case from the camera.
-
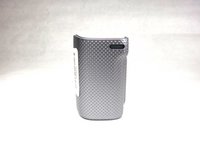
One component of the front case should now be separate from the camera.
-
-
-
-
-
Remove the three (3.5 mm) screws from the bottom of the camera with the Phillips screwdriver.
-
-
-
Open the HDMI port, and remove the the two (3.5 mm) Phillips screws exposed on that side.
-
-
-
Remove the two 4mm screws from the interior of the battery pack, and one 3.5mm screw from beside it.
-
-
-
-
Looking at the bottom of the camera, use the spudger to lift the rear case away from the camera body.
-
-
-
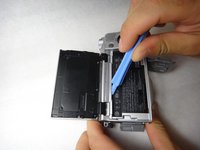
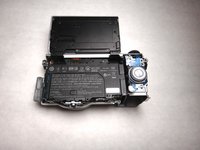
Using the spudger again, carefully pry from the top of the camera to remove the back frame.
-
The back frame is fragile, so use the spudger gently.
-
-





To reassemble your device, follow these instructions in reverse order.
Cancel: I did not complete this guide.
One other person completed this guide.

Team

Cal Poly, Team 8-9, Regan Spring 2014 Member of Cal Poly, Team 8-9, Regan Spring 2014
CPSU-REGAN-S14S8G9
4 Members
84 Guides authored
