Free Shipping on Domestic Orders $75+

Sony HDR-PJ410 Lens Replacement

What you need

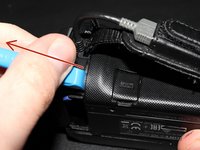
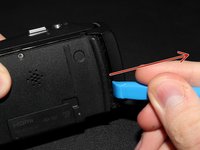
  1. Sony HDR-PJ410 Lens Replacement, Remove The Battery: step 1, image 1 of 3 Sony HDR-PJ410 Lens Replacement, Remove The Battery: step 1, image 2 of 3 Sony HDR-PJ410 Lens Replacement, Remove The Battery: step 1, image 3 of 3
    • Pull the battery cover outwards to unlock it.

    • Then, push the small blue tab outwards to unlock the battery.

    • Finally, pull the battery out.

    Ask FixBot

    Add Comment

    • Pull the battery up and outwards to "unhook" it from the camera body.

    Ask FixBot

    Add Comment

  2. Sony HDR-PJ410 Lens Replacement, Remove the screws on the bottom: step 3, image 1 of 1
    • Remove the 4x #000 Philips screws from the bottom of the camera.

    Ask FixBot

    Add Comment

  3. Sony HDR-PJ410 Lens Replacement, Remove the screws from the right panel: step 4, image 1 of 1
    • Remove the 2x #000 Philips screws from the right side of the camera.

    Ask FixBot

    Add Comment

  4. Sony HDR-PJ410 Lens Replacement, Remove the left side screw: step 5, image 1 of 1
    • Flip open the LCD screen.

    • Remove the #000 Philips screw from top left side of the camera.

    Ask FixBot

    Add Comment

  5. Sony HDR-PJ410 Lens Replacement, Remove the screw next to the LCD: step 6, image 1 of 1
    • Remove the #000 Philips screw next to the top right corner of the LCD.

    Ask FixBot

    Add Comment

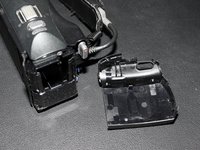
  6. Sony HDR-PJ410 Lens Replacement, Remove the small back plastic panel: step 7, image 1 of 3 Sony HDR-PJ410 Lens Replacement, Remove the small back plastic panel: step 7, image 2 of 3 Sony HDR-PJ410 Lens Replacement, Remove the small back plastic panel: step 7, image 3 of 3
    • Use the Opening Tool to remove the small plastic panel from the back of the camera.

    Ask FixBot

    Add Comment

  7. Sony HDR-PJ410 Lens Replacement, Remove the top back screw: step 8, image 1 of 1
    • Remove #000 Philips screw from the top back of the camera, under the panel we removed on step 7.

    Ask FixBot

    Add Comment

  8. Sony HDR-PJ410 Lens Replacement, Remove front hinge cover: step 9, image 1 of 1
    • Use a guitar pick or an opening tool to remove the plastic cover of the hinge that holds the LCD screen.

    Ask FixBot

    Add Comment

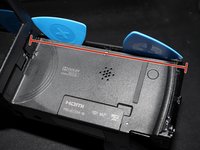
  9. Sony HDR-PJ410 Lens Replacement, Remove top and right side panel: step 10, image 1 of 2 Sony HDR-PJ410 Lens Replacement, Remove top and right side panel: step 10, image 2 of 2
    • Use guitar picks to pry off the entire top and right panel of the camera (they are one piece).

    • It might be difficult to remove at first. Do not try to remove the panel forcefully or you will break the plastic clips that hold it down.

    Ask FixBot

    Add Comment

  10. Sony HDR-PJ410 Lens Replacement, Remove the outer lens cover: step 11, image 1 of 1
    • Remove the silver colored outer lens cover using a guitar pick or an opening tool.

    Ask FixBot

    Add Comment

  11. Sony HDR-PJ410 Lens Replacement, Remove the inner lens cover screw: step 12, image 1 of 1
    • Remove the screw at the front of the camera on the bottom right corner, that holds the inner lens cover in place.

    Ask FixBot

    Add Comment

  12. Sony HDR-PJ410 Lens Replacement, Remove the inner lens cover: step 13, image 1 of 1
    • Very carefully remove the inner lens cover by pulling it outwards.

    • The microphone is glued on the inner lens cover and connected via a ribbon cable to the board. If the lens cover is pulled too hard the microphone ribbon cable can break, rendering the microphone of the camera useless. Pull the lens cover very carefully.

    Ask FixBot

    Add Comment

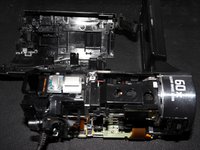
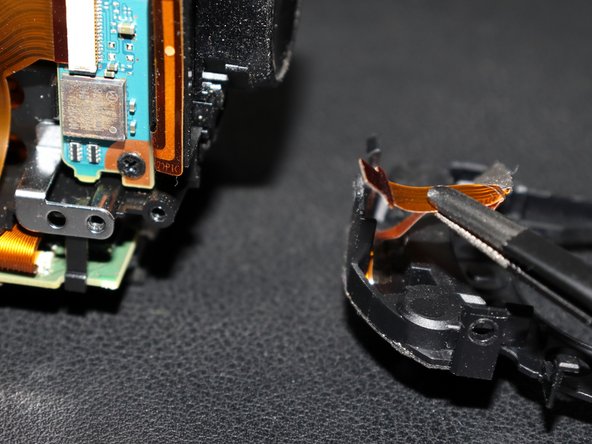
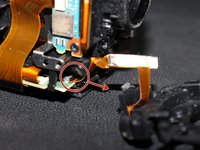
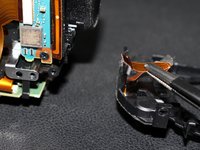
  13. Sony HDR-PJ410 Lens Replacement, Disconnect microphone ribbon cable: step 14, image 1 of 2 Sony HDR-PJ410 Lens Replacement, Disconnect microphone ribbon cable: step 14, image 2 of 2
    Tool used on this step:
    Tweezers
    $4.99
    Buy
    • Disconnect the ribbon cable of the microphone from the board carefully using a pair of tweezers.

    • When disconnecting ribbon cables, always pull the end of the cable, the connector, and never pull the cable itself. Ribbon cables, especially small ones like this are very fragile.

    Ask FixBot

    Add Comment

  14. Sony HDR-PJ410 Lens Replacement, Replace the lens: step 15, image 1 of 2 Sony HDR-PJ410 Lens Replacement, Replace the lens: step 15, image 2 of 2
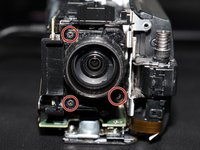
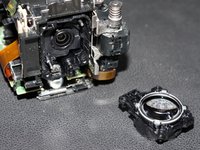
    • Remove the 3x #000 Philips screws that hold the lens in place.

    • Then, carefully pull the old lens out.

    • Then follow this step in reverse to install the new lens. Put the lens in place and then screw the 3 screws again.

    • Avoid touching the replacement lens. It's a good idea to clean the new lens with a microfiber cloth before putting it in place to remove any fingerprints or dust.

    Ask FixBot

    Add Comment

Conclusion

To reassemble your device, follow these instructions in reverse order.

Cancel: I did not complete this guide.

Stratos Thivaios

Member since: 02/27/23

1,453 Reputation

5 Guides authored

0 Guide Comments

Add Comment

View Statistics:

Past 24 Hours: 1

Past 7 Days: 5

Past 30 Days: 29

All Time: 433