Free Shipping on Domestic Orders $75+

Sony Ericsson W300i Camera Replacement

Views: 712

View statistics:

Past 24 Hours:
0
Past 7 Days:
5
Past 30 Days:
25
All Time:
712
Comments: 0

No one has left comments on this guide. Will you be first?

Go to guide comments
Completed: 0

No one has marked this guide "completed." Will you be the first?

Favorites: 0

No one has favorited (and subscribed to) this guide. Will you be the first?

Time Required: 15 minutes
Difficulty: Easy
Needs Better Images

Better photos will improve this guide. Help out by taking, editing, or uploading new ones!

Better Introduction

Improve this guide by completing or revising its introduction.

Sony Ericsson W300i Camera  Replacement

What you need

Tools

    1. Sony Ericsson W300i Camera  Replacement, Camera: step 1, image 1 of 2 Sony Ericsson W300i Camera  Replacement, Camera: step 1, image 2 of 2
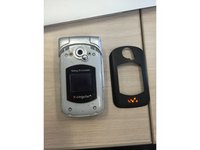
      • The tools you will need for this step is the prying tool and the T6 Torx screwdriver.

      Ask FixBot

      Add Comment

    2. Sony Ericsson W300i Camera  Replacement: step 2, image 1 of 3 Sony Ericsson W300i Camera  Replacement: step 2, image 2 of 3 Sony Ericsson W300i Camera  Replacement: step 2, image 3 of 3
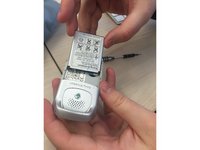
      • Remove the back cover of the phone by pushing downwards with your thumbs.

      Ask FixBot

      Add Comment

    3. Sony Ericsson W300i Camera  Replacement: step 3, image 1 of 2 Sony Ericsson W300i Camera  Replacement: step 3, image 2 of 2
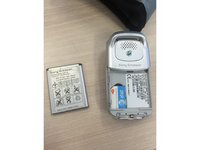
      • Now, remove the battery from the phone by gently prying the battery out.

      Ask FixBot

      Add Comment

    4. Sony Ericsson W300i Camera  Replacement: step 4, image 1 of 2 Sony Ericsson W300i Camera  Replacement: step 4, image 2 of 2
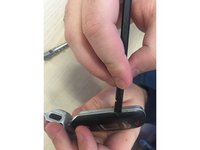
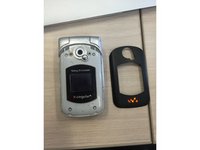
      • Remove the front plate from the phone by using the prying tool.

      Ask FixBot

      Add Comment

    5. Sony Ericsson W300i Camera  Replacement: step 5, image 1 of 2 Sony Ericsson W300i Camera  Replacement: step 5, image 2 of 2
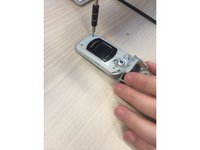
      • You now have access to the fours screws that hold the front of the phone together. Remove the four screws.

      Ask FixBot

      Add Comment

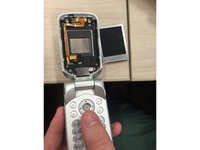
    6. Sony Ericsson W300i Camera  Replacement: step 6, image 1 of 2 Sony Ericsson W300i Camera  Replacement: step 6, image 2 of 2
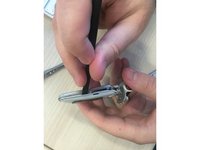
      • Use the prying tool to separate the two parts of the top of the phone

      Ask FixBot

      Add Comment

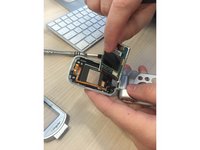
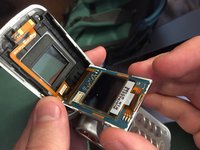
    7. Sony Ericsson W300i Camera  Replacement: step 7, image 1 of 3 Sony Ericsson W300i Camera  Replacement: step 7, image 2 of 3 Sony Ericsson W300i Camera  Replacement: step 7, image 3 of 3
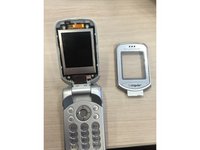
      • Use your fingers to remove the screen and unplug the ribbon cable from the bottom right corner of the back of the screen.

      Ask FixBot

      Add Comment

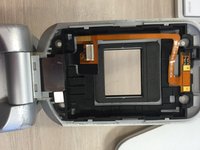
    8. Sony Ericsson W300i Camera  Replacement: step 8, image 1 of 2 Sony Ericsson W300i Camera  Replacement: step 8, image 2 of 2
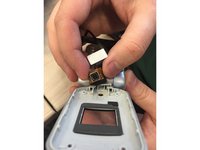
      • Now you have access to the camera, which is the silver plate at the bottom of the phone. Remove the camera and replace with a new camera.

      Ask FixBot

      Add Comment

Conclusion

To reassemble your device, follow these instructions in reverse order.

Cancel: I did not complete this guide.

Laura Inbody

Member since: 02/19/16

7 Reputation

1 Guide authored

Team

Ohio State, Team 1-2, Garvin Spring 2016 Member of Ohio State, Team 1-2, Garvin Spring 2016

OSU-GARVIN-S16S1G2

3 Members

24 Guides authored

0 Guide Comments

Add Comment

View Statistics:

Past 24 Hours: 0

Past 7 Days: 5

Past 30 Days: 25

All Time: 712