
Sony DVP-FX730 Monitor Replacement

Andrew Ward and 8 other contributors
Last updated on May 7, 2024
Views: 3.7K
View statistics:
- Past 24 Hours:
- 1
- Past 7 Days:
- 17
- Past 30 Days:
- 108
- All Time:
- 3,667
Comments: 0
No one has left comments on this guide. Will you be first?
Go to guide commentsCompleted: 0 1
No one has marked this guide "completed." Will you be the first?
1 person has marked this guide "completed." It's you — great job!
Favorites: 0 1
No one has favorited (and subscribed to) this guide. Will you be the first?
1 person has favorited (and subscribed to) this guide — and that's you!
Action Shots
Be an action hero! This guide needs images that better demonstrate how to perform specific actions.
Needs Better Images
Better photos will improve this guide. Help out by taking, editing, or uploading new ones!
Introduction
Go to step 1 ↓If the monitor or screen is broken, the monitor needs to be detached from the Sony DVP-FX730. To detach the monitor successfully, a screwdriver should be used to remove screws, use your hands to pull remove a small back cover, and use tweezers to remove wires attached to bases.
What you need
Tools
-
-
Spudger4.9


-
-
-
Remove the five exposed 7.9 mm screws using a Phillips screwdriver.
-
Punch through the warranty sticker with the spudger.
-
Remove the screw underneath with the Phillips screwdriver.
 Ask FixBot
-
-
-
Remove the rubber feet using the spudger.
-
Remove the screws that were covered by the rubber feet.
-
-
Tool used on this step:Tweezers$4.99
-
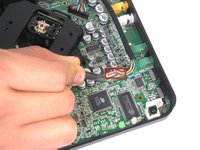
Gently remove the wires with tweezers by pulling up on the base they are attached to.
-
-
-
-
-
Use your hand to remove the small back cover by gently pulling upward.
-
-
-
Tool used on this step:Tweezers$4.99
-
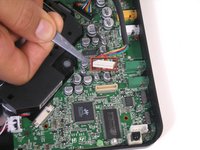
Remove the wires attached to the white base using tweezers to pull them up.
-
-
-
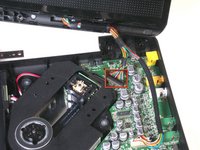
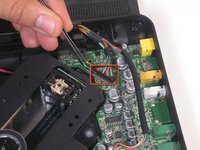
Referring back to Step 8, do the same with the wires attached to the black base.
-
-





To reassemble your device, follow these instructions in reverse order.

Team

Cal Poly, Team 11-21, Maness Winter 2012 Member of Cal Poly, Team 11-21, Maness Winter 2012
CPSU-MANESS-W12S11G21
4 Members
60 Guides authored
