Free Shipping on Domestic Orders $75+

Sony Cyber-shot DSC-WX350 Flash Assembly Replacement

What you need

  1. Sony Cyber-shot DSC-WX350 Flash Assembly Replacement, Flash Assembly: step 1, image 1 of 3 Sony Cyber-shot DSC-WX350 Flash Assembly Replacement, Flash Assembly: step 1, image 2 of 3 Sony Cyber-shot DSC-WX350 Flash Assembly Replacement, Flash Assembly: step 1, image 3 of 3
    • Remove 6 black Phillips 4 mm screws using the J00 head screwdriver tip from the sides and bottom of top cover.

    Ask FixBot

    Add Comment

  2. Sony Cyber-shot DSC-WX350 Flash Assembly Replacement: step 2, image 1 of 1
    • Remove the black Phillips 4 mm screw using the J00 head screwdriver tip from inside the battery inclosure.

    Ask FixBot

    Add Comment

  3. Sony Cyber-shot DSC-WX350 Flash Assembly Replacement: step 3, image 1 of 2 Sony Cyber-shot DSC-WX350 Flash Assembly Replacement: step 3, image 2 of 2
    • Use the plastic opening tool to take back cover off. Then take out the LCD screen with your hand.

    Ask FixBot

    Add Comment

  4. Sony Cyber-shot DSC-WX350 Flash Assembly Replacement: step 4, image 1 of 1
    • Now take the control wheel board out with your hand.

    Ask FixBot

    Add Comment

  5. Sony Cyber-shot DSC-WX350 Flash Assembly Replacement: step 5, image 1 of 1
    • On the left side of the camera, pull the LCD off the back plate.

    • There will be a ZIF connector by the control wheel, release the connector and remove the LCD.

    Ask FixBot

    Add Comment

  6. Sony Cyber-shot DSC-WX350 Flash Assembly Replacement: step 6, image 1 of 2 Sony Cyber-shot DSC-WX350 Flash Assembly Replacement: step 6, image 2 of 2
    • Remove silver Phillips 4 mm screws using the J00 head screwdriver tip from the metal cover. Once done take the metal cover off with your hands.

    Ask FixBot

    Add Comment

  7. Sony Cyber-shot DSC-WX350 Flash Assembly Replacement: step 7, image 1 of 3 Sony Cyber-shot DSC-WX350 Flash Assembly Replacement: step 7, image 2 of 3 Sony Cyber-shot DSC-WX350 Flash Assembly Replacement: step 7, image 3 of 3
    • Using your finger open take off the three zifs.

    Ask FixBot

    Add Comment

  8. Sony Cyber-shot DSC-WX350 Flash Assembly Replacement: step 8, image 1 of 2 Sony Cyber-shot DSC-WX350 Flash Assembly Replacement: step 8, image 2 of 2
    • Use your hand to take out the lens assembly. Then take out the motherboard assembly with your hand.

    Ask FixBot

    Add Comment

  9. Sony Cyber-shot DSC-WX350 Flash Assembly Replacement: step 9, image 1 of 3 Sony Cyber-shot DSC-WX350 Flash Assembly Replacement: step 9, image 2 of 3 Sony Cyber-shot DSC-WX350 Flash Assembly Replacement: step 9, image 3 of 3
    • Remove the silver Phillips 4 mm screws using the J00 head screwdriver tip from the metal piece and remove the 4mm screws from the metal piece lining the lens assembly hole.

    Ask FixBot

    Add Comment

  10. Sony Cyber-shot DSC-WX350 Flash Assembly Replacement: step 10, image 1 of 2 Sony Cyber-shot DSC-WX350 Flash Assembly Replacement: step 10, image 2 of 2
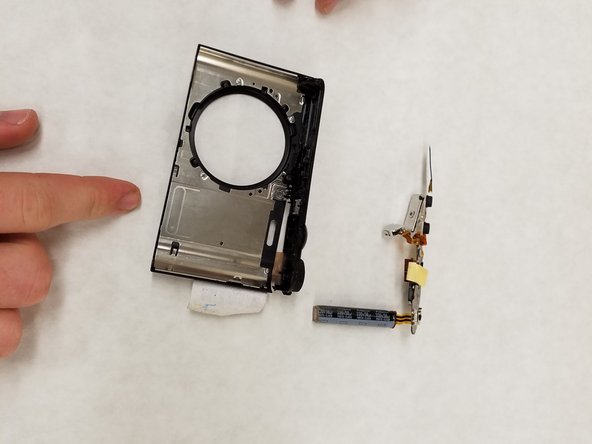
    • Grab the top of the camera and take it out. Then grab the flash assembly and slide it out.

    Ask FixBot

    Add Comment

Conclusion

To reassemble your device, follow these instructions in reverse order.

Cancel: I did not complete this guide.

4 other people completed this guide.

Matt Garthwaite

Member since: 05/22/17

125 Reputation

1 Guide authored

Team

IUPUI, Team S1-G1, Wilson Summer 2017 Member of IUPUI, Team S1-G1, Wilson Summer 2017

IUPUI-WILSON-SU17S1G1

4 Members

3 Guides authored

0 Guide Comments

Add Comment

View Statistics:

Past 24 Hours: 2

Past 7 Days: 11

Past 30 Days: 49

All Time: 2,391