Free Shipping on Domestic Orders $75+

Sony Cyber-shot DSC-T1 Flash Replacement

What you need

  1. Sony Cyber-shot DSC-T1 Flash Replacement, Battery: step 1, image 1 of 1
    • Locate the cover on the bottom of the camera.

    • Slide the cover towards the back of the camera.

    • Be careful—the battery can slide out on its own.

    Ask FixBot

    Add Comment

  2. Sony Cyber-shot DSC-T1 Flash Replacement: step 2, image 1 of 1
    • Carefully remove the exposed battery.

    • If it is difficult to remove, flip over the camera and the battery will slide out.

    Ask FixBot

    Add Comment

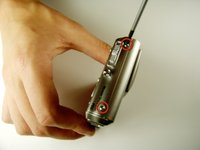
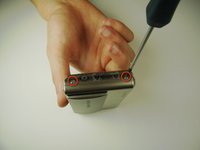
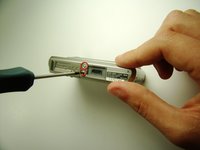
  3. Sony Cyber-shot DSC-T1 Flash Replacement, Flash: step 3, image 1 of 3 Sony Cyber-shot DSC-T1 Flash Replacement, Flash: step 3, image 2 of 3 Sony Cyber-shot DSC-T1 Flash Replacement, Flash: step 3, image 3 of 3
    • Locate and remove the 3mm screws on the top and sides of the camera with the size 00 screwdriver.

    Ask FixBot

    Add Comment

  4. Sony Cyber-shot DSC-T1 Flash Replacement: step 4, image 1 of 1
    • Pull the two halves of the camera apart.

    • Place the two halves down with the insides facing you.

    Ask FixBot

    Add Comment

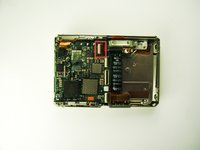
  5. Sony Cyber-shot DSC-T1 Flash Replacement: step 5, image 1 of 1
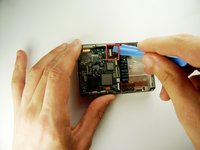
    • Find the two clips holding the motherboard to the black lens box.

    • Slide the plastic opening tool in between the ribbon and the black part of the clip, then flip it. (If difficult, your fingernail can also be used)

    Ask FixBot

    Add Comment

  6. Sony Cyber-shot DSC-T1 Flash Replacement: step 6, image 1 of 1
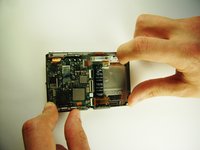
    • After releasing the clips, pull out black lens box.

    Ask FixBot

    Add Comment

  7. Sony Cyber-shot DSC-T1 Flash Replacement: step 7, image 1 of 2 Sony Cyber-shot DSC-T1 Flash Replacement: step 7, image 2 of 2
    • Use the plastic opening tool to flip the clip.

    Ask FixBot

    Add Comment

  8. Sony Cyber-shot DSC-T1 Flash Replacement: step 8, image 1 of 2 Sony Cyber-shot DSC-T1 Flash Replacement: step 8, image 2 of 2
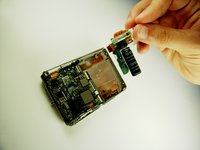
    • Grab the white part and slide it to the right until it clicks.

    • This may require some force.

    • Pull out the flash.

    Ask FixBot

    Add Comment

Conclusion

To reassemble your device, follow these instructions in reverse order.

Cancel: I did not complete this guide.

One other person completed this guide.

Paul Elrich

Member since: 04/12/12

48 Reputation

2 Guides authored

Team

Cal Poly, Team 7-35, Maness Spring 2012 Member of Cal Poly, Team 7-35, Maness Spring 2012

CPSU-MANESS-S12S7G35

4 Members

3 Guides authored

0 Guide Comments

Add Comment

View Statistics:

Past 24 Hours: 0

Past 7 Days: 7

Past 30 Days: 34

All Time: 1,253