Free Shipping on Domestic Orders $75+

Sony Cyber-shot DSC-H20 Screen Replacement

What you need

  1. Sony Cyber-shot DSC-H20 Screen Replacement, Screen: step 1, image 1 of 2 Sony Cyber-shot DSC-H20 Screen Replacement, Screen: step 1, image 2 of 2
    • Slide open the battery cover and remove the battery and the Memory Stick Duo.

    • Return the battery cover to its closed position.

    Ask FixBot

    Add Comment

  2. Sony Cyber-shot DSC-H20 Screen Replacement: step 2, image 1 of 1
    • Remove all three screws from the bottom of the camera.

    Ask FixBot

    Add Comment

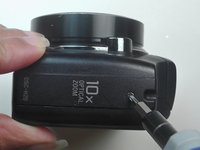
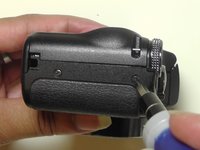
  3. Sony Cyber-shot DSC-H20 Screen Replacement: step 3, image 1 of 2 Sony Cyber-shot DSC-H20 Screen Replacement: step 3, image 2 of 2
    • Remove the screws on the left and right sides of the camera.

    Ask FixBot

    Add Comment

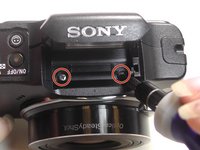
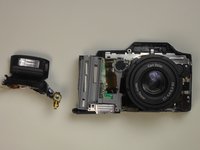
  4. Sony Cyber-shot DSC-H20 Screen Replacement: step 4, image 1 of 3 Sony Cyber-shot DSC-H20 Screen Replacement: step 4, image 2 of 3 Sony Cyber-shot DSC-H20 Screen Replacement: step 4, image 3 of 3
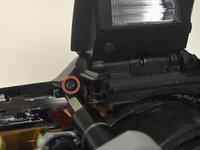
    • Press down on the flash cover to raise the flash.

    • Remove both screws that hold the flash cover to the body of the camera.

    Ask FixBot

    Add Comment

  5. Sony Cyber-shot DSC-H20 Screen Replacement: step 5, image 1 of 1
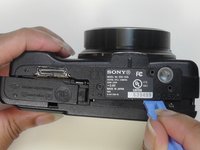
    • Place the camera upside down with the battery port positioned upward.

    • Slide open the battery port.

    Ask FixBot

    Add Comment

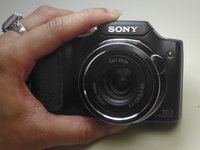
  6. Sony Cyber-shot DSC-H20 Screen Replacement: step 6, image 1 of 3 Sony Cyber-shot DSC-H20 Screen Replacement: step 6, image 2 of 3 Sony Cyber-shot DSC-H20 Screen Replacement: step 6, image 3 of 3
    • Pry the front cover of the camera off with the plastic opening tool.

    Ask FixBot

    Add Comment

  7. Sony Cyber-shot DSC-H20 Screen Replacement: step 7, image 1 of 1
    • Remove the power shutter unit.

    Ask FixBot

    Add Comment

  8. Sony Cyber-shot DSC-H20 Screen Replacement: step 8, image 1 of 2 Sony Cyber-shot DSC-H20 Screen Replacement: step 8, image 2 of 2
    • Unscrew the screw located at the back left corner of the flash component.

    • Set the flash component aside.

    Ask FixBot

    Add Comment

  9. Sony Cyber-shot DSC-H20 Screen Replacement: step 9, image 1 of 1
    • Remove the two screws from the bottom of the motherboard.

    Ask FixBot

    Add Comment

  10. Sony Cyber-shot DSC-H20 Screen Replacement: step 10, image 1 of 1
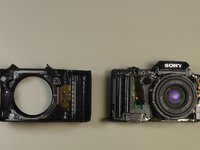
    • Use the plastic opening tool to assist you in separating the metal frame from the back cover of the camera.

    Ask FixBot

    Add Comment

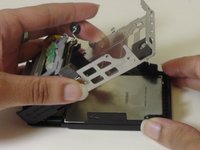
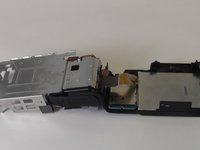
  11. Sony Cyber-shot DSC-H20 Screen Replacement: step 11, image 1 of 2 Sony Cyber-shot DSC-H20 Screen Replacement: step 11, image 2 of 2
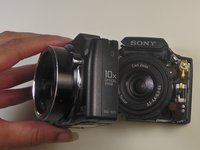
    • Flip the metal frame over to the left side of the camera and onto the surface on which you are working.

    Ask FixBot

    Add Comment

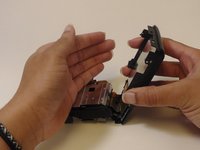
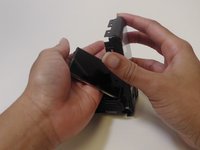
  12. Sony Cyber-shot DSC-H20 Screen Replacement: step 12, image 1 of 2 Sony Cyber-shot DSC-H20 Screen Replacement: step 12, image 2 of 2
    • Now remove the LCD screen by bringing the back cover over to the left so that the LCD screen falls into your hand.

    Ask FixBot

    Add Comment

Conclusion

To reassemble your device, follow these instructions in reverse order.

Cancel: I did not complete this guide.

3 other people completed this guide.

Rachel Payne

Member since: 02/23/15

425 Reputation

2 Guides authored

Team

USF Tampa, Team 1-1, Leahy Winter 2015 Member of USF Tampa, Team 1-1, Leahy Winter 2015

USFT-LEAHY-W15S1G1

3 Members

10 Guides authored

1 Guide Comment

Thank you so much. I could successfully open the camera and got the LCD display out. But I couldn't find out how to replace the LCD, I wanted to mean where to open the LCD cable?

ummejamil - Reply Share

Add Comment

View Statistics:

Past 24 Hours: 0

Past 7 Days: 16

Past 30 Days: 66

All Time: 2,931