
Sony CFD-8 Front Panel Replacement

Andrew Kleve and 7 other contributors
Last updated on Feb 28, 2020
Views: 4.4K
View statistics:
- Past 24 Hours:
- 3
- Past 7 Days:
- 19
- Past 30 Days:
- 111
- All Time:
- 4,450
Comments: 0
No one has left comments on this guide. Will you be first?
Go to guide commentsCompleted: 3 4
3 people have marked this guide "completed." Will you be next?
4 people have marked this guide "completed." Including you — great job!
Favorites: 1 2
1 person has favorited (and subscribed to) this guide. Will you be next?
2 people have favorited (and subscribed to) this guide — including you!
Introduction
Go to step 1 ↓Use this guide to remove or replace the front panel of the Sony CFD-8 and view the inside of the radio. This process can be hard without a long screwdriver.
What you need
Tools


-
-
-
Remove the battery cover on the back of the boombox by applying downward pressure to the two clamps.
 Ask FixBot
-
-
-
Push against the positive end of each battery. Once it is loose, lift the battery out. Repeat for all six batteries.
-
-
-
-
-
Hold the boombox handle at an angle to access the screws behind the CD player.
-
Use a Phillips #1 screwdriver to unscrew the top two 14 mm screws. You may need a flashlight to see the screws.
-
-
-
Remove four 14 mm screws using a Phillips #1 screwdriver. Two of these screws are at the bottom of the boombox and the other two are on either side of the boombox as highlighted in the related images.
-
All four screws have black arrows (not visible in the photo) indicating their location on the boombox.
-
-
-
-
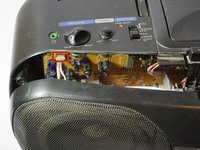
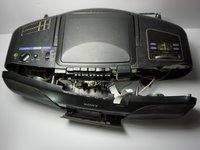
Gently separate the front panel from the back panel.
-
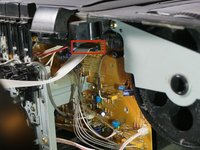
Remove the two connections holding the front panel to boombox.
-
One connection is located on the upper left hand side of the main circuit board.
-
The other is a large white strip slightly to the right of the cassette player.
-
Remove the front panel.
-
-


To reassemble your device, follow these instructions in reverse order.
Cancel: I did not complete this guide.
3 other people completed this guide.

Team

Cal Poly, Team 10-38, Amido Fall 2014 Member of Cal Poly, Team 10-38, Amido Fall 2014
CPSU-AMIDO-F14S10G38
5 Members
84 Guides authored
