Free Shipping on Domestic Orders $75+

Sony CDX-GT540UI Front Panel Replacement

What you need

    1. Sony CDX-GT540UI Front Panel Replacement, Front Panel: step 1, image 1 of 1
      • Locate face-plate eject button.

      Ask FixBot

      Add Comment

    2. Sony CDX-GT540UI Front Panel Replacement: step 2, image 1 of 2 Sony CDX-GT540UI Front Panel Replacement: step 2, image 2 of 2
      • Press the eject button.

      • Remove the face-plate.

      Ask FixBot

      Add Comment

    3. Sony CDX-GT540UI Front Panel Replacement: step 3, image 1 of 3 Sony CDX-GT540UI Front Panel Replacement: step 3, image 2 of 3 Sony CDX-GT540UI Front Panel Replacement: step 3, image 3 of 3
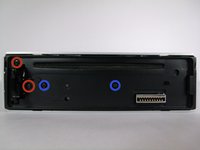
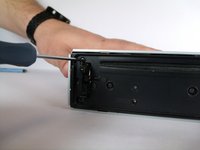
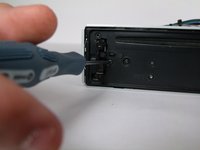
      • Remove two 4.9mm Phillips #00screws on the front of the device.

      • Remove two 7.5mm Phillips #00screws on the front of the device.

      • When the screws are removed, the eject lever may fall into the device. Make sure the device is held horizontal and level.

      Ask FixBot

      Add Comment

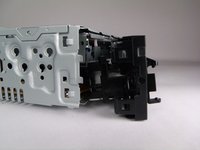
    4. Sony CDX-GT540UI Front Panel Replacement: step 4, image 1 of 2 Sony CDX-GT540UI Front Panel Replacement: step 4, image 2 of 2
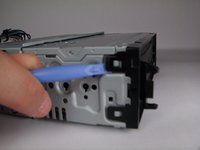
      • Rotate device 90 degrees to either side.

      • Use the plastic opening tool to pry open the top and bottom tab respectively.

      • Repeat on opposite side.

      Ask FixBot

      Add Comment

    5. Sony CDX-GT540UI Front Panel Replacement: step 5, image 1 of 1
      • Remove front panel.

      Ask FixBot

      Add Comment

Conclusion

To reassemble your device, follow these instructions in reverse order.

Cancel: I did not complete this guide.

2 other people completed this guide.

Odelkys Marquez

Member since: 09/22/14

1,139 Reputation

7 Guides authored

Team

USF Tampa, Team 10-2, Brown Fall 2014 Member of USF Tampa, Team 10-2, Brown Fall 2014

USFT-BROWN-F14S10G2

3 Members

84 Guides authored

0 Guide Comments

Add Comment

View Statistics:

Past 24 Hours: 1

Past 7 Days: 7

Past 30 Days: 34

All Time: 3,324