
Sony CDX-GT540UI Back Panel Replacement

Odelkys Marquez and 4 other contributors
Last updated on Jan 10, 2015
Views: 1.7K
View statistics:
- Past 24 Hours:
- 4
- Past 7 Days:
- 19
- Past 30 Days:
- 116
- All Time:
- 1,714
Comments: 0
No one has left comments on this guide. Will you be first?
Go to guide commentsCompleted: 3 4
3 people have marked this guide "completed." Will you be next?
4 people have marked this guide "completed." Including you — great job!
Favorites: 0 1
No one has favorited (and subscribed to) this guide. Will you be the first?
1 person has favorited (and subscribed to) this guide — and that's you!
Introduction
Go to step 1 ↓This guide will show how to remove the back panel to be able to work inside of the device.
Before any repair work can be done one must remove the device for the vehicle. To do so follow this link to see a general vehicle removal of a stereo system.
What you need
Tools

-
-
-
Press down on the clip like you would an Ethernet cable.
-
Rock harness side to side, pulling gently towards you until harness detaches.
-
-
-
-
-
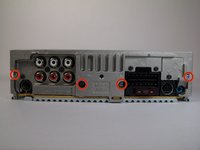
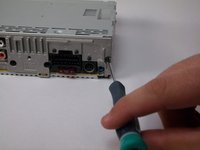
Remove four 9.5mm Phillips #00 (black) screws from back panel.
-
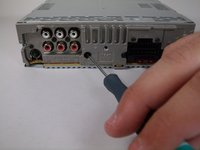
Remove two 7.5mm Phillips #00 (black) screws from back panel.
-

 Ask FixBot




To reassemble your device, follow these instructions in reverse order.
Cancel: I did not complete this guide.
3 other people completed this guide.

Team

USF Tampa, Team 10-2, Brown Fall 2014 Member of USF Tampa, Team 10-2, Brown Fall 2014
USFT-BROWN-F14S10G2
3 Members
84 Guides authored
