Introduction
To replace the camera image sensor, the majority of the device will need to be taken apart. Organization will be crucial in order to reconstruct the device, and make the camera work properly. This repair may be needed if your device is capturing photographs that appear completely black, or contains random patches of light.
What you need
-
-
-
Unscrew the 3 silver 1.2 mm Phillips #000 screws from the bottom of the camera.
 Ask FixBot
-
-
-
On the bottom casing, locate the split along the tripod port.
-
Insert the prying tool into the split.
-
Pull the prying tool towards the LCD screen to begin separating the split.
-
-
-
Hold the device with the lens facing you, and grasp the battery compartment.
-
Locate the split on the side of the battery compartment.
-
Locate the split and insert the prying tool.
-
Pull the prying tool towards the LCD screen to begin separating the split.
-
-
-
Locate the charging port.
-
Unscrew the silver 3.5 mm Phillips #0 screw next to the port.
-
-
-
Open the battery compartment.
-
Unscrew the 2 silver 3.5 mm Phillips #0 screws found at the inside bottom of the battery port.
-
-
-
Insert prying tool in the split between the top panel (where you find the movie button) and the LCD screen.
-
Jiggle the prying tool and pull the tool away from the device.
-
-
-
-
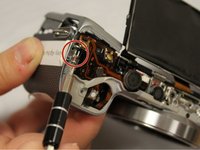
Unscrew the silver 3.5 mm Phillips #0 screw, visible on the left top edge when looking at the face of the device.
-
-
-
Locate the middle top of the device.
-
Unscrew 2 copper 1.2 mm Phillips #000 screws.
-
-
-
To the right of where you unscrewed the copper screws, unscrew 4 black 1.2 mm Phillips #000 screws.
-
-
-
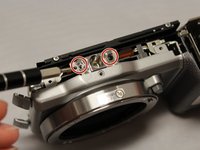
Locate the tripod port.
-
Unscrew 2 black 1.2 mm Phillips #000 screws, one on each side of the tripod port.
-
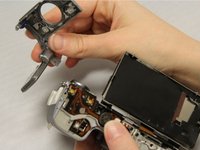
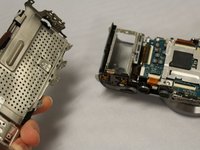
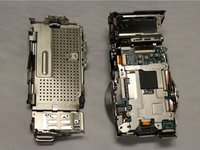
Pull the section holding the LCD screen away from the device body.
-
-
-
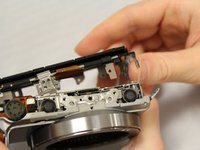
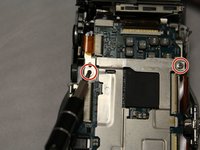
Unscrew 2 copper 1.2 mm Phillips #000 screws underneath the lanyard loop (near the control wheel).
-
-
-
Pull off the metal back from the device body.
-
Locate a thin metal piece on top of the motherboard, and unscrew 4 silver 1.2 mm Phillips #000 screws in the corners of the metal piece.
-
Underneath. you will locate the motherboard.
-
The tripod piece will be loose. Take the piece from the device and set it off to the side.
-
-
-
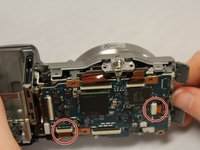
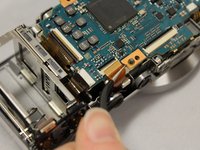
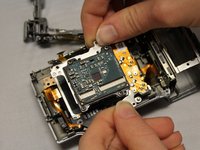
Flip up the white retaining tabs, and utilize tweezer to, pull out the 2 thin ribbon cables, located on top of the motherboard.
-
-
Tool used on this step:Tweezers$4.99
-
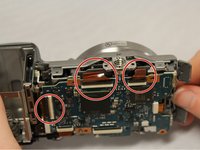
Locate 3 thick ribbon cables on the bottom, and flip up the white retaining tabs. Pull out the remaining ribbon cables, utilizing tweezers.
-
-
-
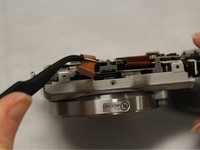
Lift the gray plastic camera piece surrounding the motherboard up.
-
Leave the long, thin ribbon cable that runs along the gray piece attached. It is not necessary to detach.
-
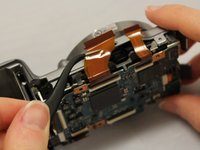
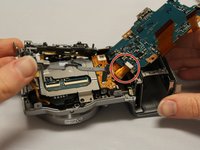
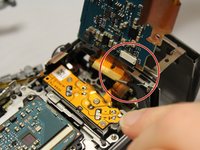
Lift up the motherboard to reveal one final thin ribbon cable connected to a white retaining tab underneath the motherboard.
-
Flip up the white retaining tab, and utilize tweezers to pull out the final thin ribbon cable.
-
-
-
-
Tool used on this step:Tweezers$4.99
-
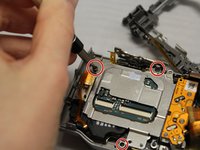
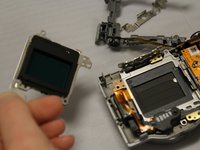
Unscrew 3 black 2.25mm screws, utilizing the screwdriver head PH000, on the metal plate underneath the motherboard.
-
Utilizing a pair of tweezers, remove the metal plate from the device.
-
-
-
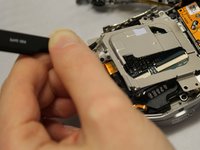
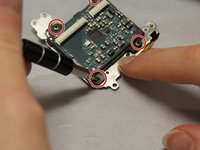
Unscrew 4 2.25mm Phillips #000 screws on the circuit board.
-
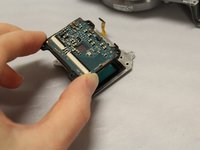
Remove the circuit board from the camera image sensor.
-
-


















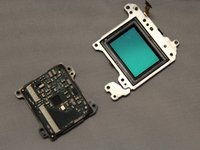
To reassemble your device, follow these instructions in reverse order.
Cancel: I did not complete this guide.
4 other people completed this guide.

Team

Eastern Washington University, Team 1-4, Matresse Fall 2015 Member of Eastern Washington University, Team 1-4, Matresse Fall 2015
EWU-MATRESSE-F15S1G4
4 Members
72 Guides authored
