Free Shipping on Domestic Orders $75+

Sony Alpha NEX-3N Mainboard Replacement

Views: 566

View statistics:

Past 24 Hours:
3
Past 7 Days:
21
Past 30 Days:
75
All Time:
566
Comments: 2

2 comments on steps.

Completed: 0

No one has marked this guide "completed." Will you be the first?

Favorites: 0

No one has favorited (and subscribed to) this guide. Will you be the first?

Time Required: 2 hours
Difficulty: Very difficult
Grammar Police

Embrace your inner English teacher and help improve this guide's grammar!

Bullets!

Better coordination with markups and the color/type of bullets will help make this guide more clear!

Community-Contributed Guide

An awesome member of our community made this guide. It was not created by iFixit staff.

Sony Alpha NEX-3N Mainboard Replacement

What you need

Tools

    1. Sony Alpha NEX-3N Mainboard Replacement, Getting Started: step 1, image 1 of 2 Sony Alpha NEX-3N Mainboard Replacement, Getting Started: step 1, image 2 of 2
      • Remove the battery and SD card from the bottom of the camera before starting any disassembly. This is not only to keep your image files safe, but to also prevent getting shocked by electronic components inside the camera.

      Ask FixBot

      Add Comment

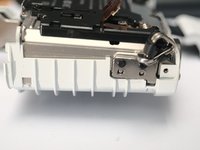
    2. Sony Alpha NEX-3N Mainboard Replacement, Back Case 1: step 2, image 1 of 3 Sony Alpha NEX-3N Mainboard Replacement, Back Case 1: step 2, image 2 of 3 Sony Alpha NEX-3N Mainboard Replacement, Back Case 1: step 2, image 3 of 3
      • On the right side, remove 1 M1.4x3.7 screw marked with a yellow box.

      • On the left, remove 3 M1.4x3.7 screws also marked by the yellow boxes.

      • On the bottom side, remove 5 M1.4x3.7 screws, including 2 in the battery bay. 2 of them are in this photo; you can find them.

      • Do NOT touch the screws on the bottom of the LCD assembly.

      Ask FixBot

      Add Comment

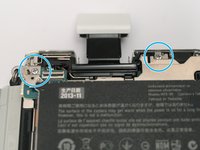
    3. Sony Alpha NEX-3N Mainboard Replacement, Back Case 2: step 3, image 1 of 1
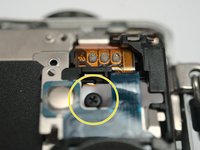
      • Pop open the flash.

      • In flash area, remove 1 (one) M1.4x3.8 black screw, marked by the blue box.

      Ask FixBot

      Add Comment

    4. Sony Alpha NEX-3N Mainboard Replacement, Back Case 3: step 4, image 1 of 3 Sony Alpha NEX-3N Mainboard Replacement, Back Case 3: step 4, image 2 of 3 Sony Alpha NEX-3N Mainboard Replacement, Back Case 3: step 4, image 3 of 3
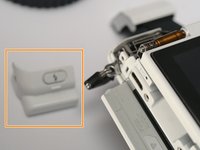
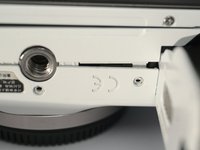
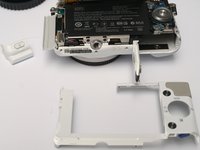
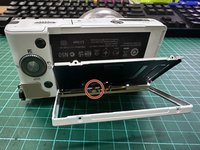
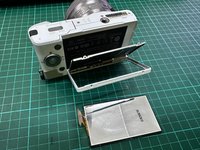
      • Remove the LCD hinge cover, by sliding it to the left.

      • Remove the back cover, which is actually just a plastic frame.

      Ask FixBot

      Add Comment

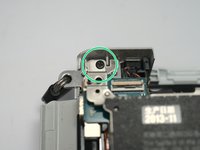
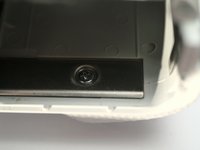
    5. Sony Alpha NEX-3N Mainboard Replacement, LCD assembly: step 5, image 1 of 2 Sony Alpha NEX-3N Mainboard Replacement, LCD assembly: step 5, image 2 of 2
      • Remove 1 M1.4x2 screw marked by the blue box.

      • Remove another M1.4x2 screw. (sorry for the angle of the photo!)

      Ask FixBot

      Add Comment

    6. Sony Alpha NEX-3N Mainboard Replacement, LCD Assembly: step 6, image 1 of 3 Sony Alpha NEX-3N Mainboard Replacement, LCD Assembly: step 6, image 2 of 3 Sony Alpha NEX-3N Mainboard Replacement, LCD Assembly: step 6, image 3 of 3
      • CAUTION. Sony makes world's MOST BRITTLE FPC! Use extra care when taking the LCD off to try not to break the FPC.

      • Loosen the LCD assembly with caution!

      • Release the FPC cable, as the connector is a flip type.

      Ask FixBot

      Add Comment

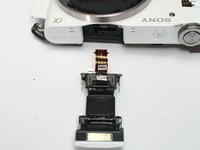
    7. Sony Alpha NEX-3N Mainboard Replacement, The LCD assembly: step 7, image 1 of 1
      • The LCD assembly when taken out of the camera.

      Ask FixBot

      Add Comment

    8. Sony Alpha NEX-3N Mainboard Replacement, Dismantle the LCD Part: step 8, image 1 of 3 Sony Alpha NEX-3N Mainboard Replacement, Dismantle the LCD Part: step 8, image 2 of 3 Sony Alpha NEX-3N Mainboard Replacement, Dismantle the LCD Part: step 8, image 3 of 3
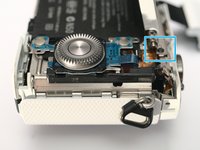
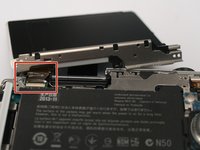
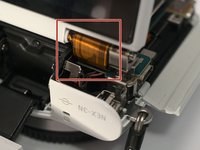
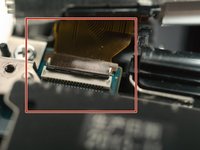
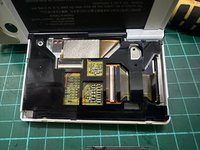
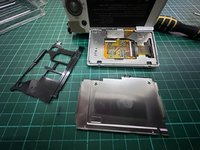
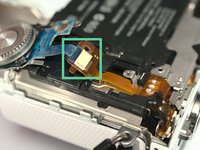
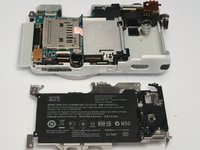
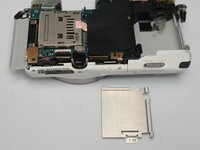
      • After unscrew 4pcs screw, you will remove the steel black plate, then slowly pull the black frame there to see the ribbon stripe.

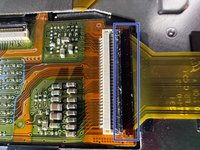
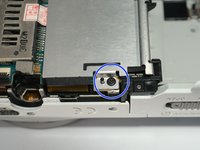
      • Slowly pull the very fragile ribbon lock, which I marked with the blue boxes. Around just 1mm to unlock the ribbon. Unfortunately, I broke mine.

      Ask FixBot

      Add Comment

    9. Sony Alpha NEX-3N Mainboard Replacement, Dismantle the LCD Part: step 9, image 1 of 3 Sony Alpha NEX-3N Mainboard Replacement, Dismantle the LCD Part: step 9, image 2 of 3 Sony Alpha NEX-3N Mainboard Replacement, Dismantle the LCD Part: step 9, image 3 of 3
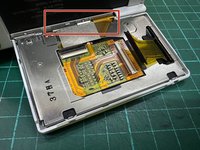
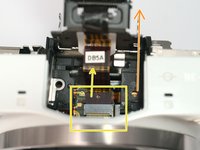
      • You can see the ribbon has already pulled out. But be careful with the other 2 ribbons when you try to pull out this one.

      • The the circle marker that shows others ribbons you need to be careful. Goodluck!

      Ask FixBot

      Add Comment

    1. Sony Alpha NEX-3N Mainboard Replacement, Keypad: step 10, image 1 of 3 Sony Alpha NEX-3N Mainboard Replacement, Keypad: step 10, image 2 of 3 Sony Alpha NEX-3N Mainboard Replacement, Keypad: step 10, image 3 of 3
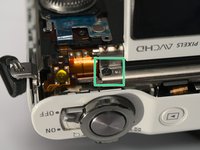
      • Remove 1 M1.4x2 screw

      • Lift the keypad.

      • Detach FPC

      Ask FixBot

      Add Comment

    1. Sony Alpha NEX-3N Mainboard Replacement, Screws: step 11, image 1 of 1
      • Remove 3 M1.4x3.6 black screws, 2 of them out of focus

      Ask FixBot

      Add Comment

    2. Sony Alpha NEX-3N Mainboard Replacement: step 12, image 1 of 2 Sony Alpha NEX-3N Mainboard Replacement: step 12, image 2 of 2
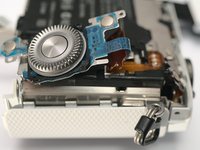
      • Slide the flash assembly backwards with caution.

      • Detach flash FPC by pulling it out of the socket.

      • High Voltage! Do NOT touch metal on FPC.

      • Then remove the flash assembly.

      Ask FixBot

      Add Comment

    3. Sony Alpha NEX-3N Mainboard Replacement: step 13, image 1 of 1
      • Remove that part whatever called, by sliding it backwards.

      Ask FixBot

      Add Comment

    1. Sony Alpha NEX-3N Mainboard Replacement, Screws: step 14, image 1 of 3 Sony Alpha NEX-3N Mainboard Replacement, Screws: step 14, image 2 of 3 Sony Alpha NEX-3N Mainboard Replacement, Screws: step 14, image 3 of 3
      • 1 ST1.7x5

      • 2 ST1.7x5

      • 1 M1.4x3.6 black

      Ask FixBot

      Add Comment

    2. Sony Alpha NEX-3N Mainboard Replacement, The Grip: step 15, image 1 of 2 Sony Alpha NEX-3N Mainboard Replacement, The Grip: step 15, image 2 of 2
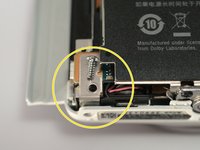
      • Remove 2 ST1.7x5 screws from inside the battery bay. (one of them not shown, deeper inside) insert screw driver through a hole in the shielding cover.

      • Pop the grip off. From back, push to the right, then it flies forward.

      Ask FixBot

      Add Comment

    3. Sony Alpha NEX-3N Mainboard Replacement, More Screws: step 16, image 1 of 1
      • Remove 2 M1.4x2 black screws

      Ask FixBot

      Add Comment

    4. Sony Alpha NEX-3N Mainboard Replacement, Pop the Shielding Cover: step 17, image 1 of 2 Sony Alpha NEX-3N Mainboard Replacement, Pop the Shielding Cover: step 17, image 2 of 2
      • with caution and patient.

      Ask FixBot

      Add Comment

    5. Sony Alpha NEX-3N Mainboard Replacement, One More Shield: step 18, image 1 of 3 Sony Alpha NEX-3N Mainboard Replacement, One More Shield: step 18, image 2 of 3 Sony Alpha NEX-3N Mainboard Replacement, One More Shield: step 18, image 3 of 3
      • 1 M1.4x3.6

      Ask FixBot

      Add Comment

    6. Sony Alpha NEX-3N Mainboard Replacement, Detach 7000 FPCs: step 19, image 1 of 1
      • Sensor power, flip

      • Sensor signal, flip

      • Shutter, pull

      • Lens contacts, pull. Did I mention that Sony makes world's most brittle FPC?

      • Whatever, pull

      • Whatever, pull

      • Shutter charger motor FPC, (backside, pull out)

      Ask FixBot

      Add Comment

    7. Sony Alpha NEX-3N Mainboard Replacement: step 20, image 1 of 1
      • Flip the Mainboard up

      • Pull out one more FPC

      • Discharge then desolder 4 wires.

      • CAUTION! Possible high DC voltage >300V

      Ask FixBot

      Add Comment

    8. Sony Alpha NEX-3N Mainboard Replacement: step 21, image 1 of 1
      • Lift main board and plastic frame with flash capacitor.

      Ask FixBot

      Add Comment

Conclusion

To reassemble your device, follow these instructions in reverse order.

Cancel: I did not complete this guide.

Terrance

Member since: 11/17/09

7,099 Reputation

19 Guides authored

0 Guide Comments

Add Comment

View Statistics:

Past 24 Hours: 3

Past 7 Days: 21

Past 30 Days: 75

All Time: 566