Free Shipping on Domestic Orders $75+

Sonos Play 5 Audio/Control Board Replacement

What you need

    1. Sonos Play 5 Audio/Control Board Replacement, Front Panel Assembly: step 1, image 1 of 1
      • Disconnect any power to the speaker and wait a few minutes for the capacitors to fully discharge.

      • Flip the speaker upside down.

      • There may be a rubber foot covering the bottom screws (not included in picture). Remove this by pulling up from one of the corners using a spudger.

      Ask FixBot

      Add Comment

    2. Sonos Play 5 Audio/Control Board Replacement: step 2, image 1 of 2 Sonos Play 5 Audio/Control Board Replacement: step 2, image 2 of 2
      • Remove eight 10mm Phillips #2 screws

      • Remove the bottom panel by pulling upwards.

      • Be very gentle with the ends of the three antennas. They are very fragile.

      Ask FixBot

      Add Comment

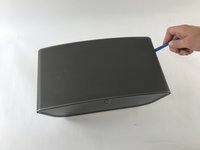
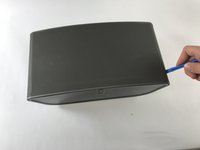
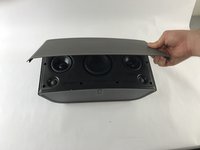
    3. Sonos Play 5 Audio/Control Board Replacement: step 3, image 1 of 3 Sonos Play 5 Audio/Control Board Replacement: step 3, image 2 of 3 Sonos Play 5 Audio/Control Board Replacement: step 3, image 3 of 3
      • Flip the device so that the grille is facing up.

      • Locate the line on the right side of the speaker where the grill and the plastic meet, and place your plastic opening tool in the gap.

      • Run the spudger along the gap, loosening the grille from the plastic. Repeat this process on the left side as well.

      • Gently pull up on the grille, removing it from the front panel.

      Ask FixBot

      Add Comment

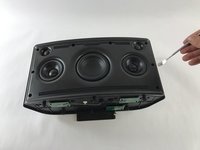
    4. Sonos Play 5 Audio/Control Board Replacement: step 4, image 1 of 1
      • Remove the six 8mm Phillips #2 screws.

      • Remove the two 10mm Phillips #2 screws.

      Ask FixBot

      Add Comment

    5. Sonos Play 5 Audio/Control Board Replacement: step 5, image 1 of 2 Sonos Play 5 Audio/Control Board Replacement: step 5, image 2 of 2
      • Locate the line on the right side where the front panel and back panel meet. Place a plastic opening tool in the gap, and run it along the gap. Repeat this on the left side.

      • Use the opening tool to lift the front plate. If a plastic tool is not providing enough leverage, use a metal opening tool.

      • Gently pull up on the face plate to ensure it has been detached from the enclosure.

      • When pulling on the face plate be cautious because it is still connected by wires on the back of the plate.

      Ask FixBot

      Add Comment

    6. Sonos Play 5 Audio/Control Board Replacement: step 6, image 1 of 3 Sonos Play 5 Audio/Control Board Replacement: step 6, image 2 of 3 Sonos Play 5 Audio/Control Board Replacement: step 6, image 3 of 3
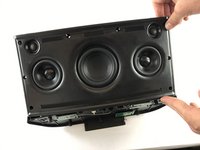
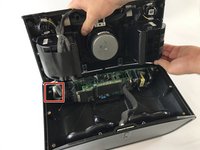
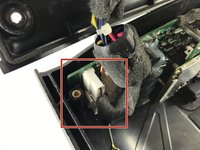
      • Lift up the front panel, forming a 90 degree angle with the back panel. Locate the locate ten pin connector shown. This is the wire that connects the front panel to back panel.

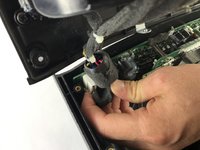
      • Press down on the small tab located on the connector. With the tab firmly pressed down, pull the connector out from its socket.

      • The faceplate assembly is now fully detached from the rest of the speaker.

      Ask FixBot

      Add Comment

    1. Sonos Play 5 Audio/Control Board Replacement, Motherboard: step 7, image 1 of 3 Sonos Play 5 Audio/Control Board Replacement, Motherboard: step 7, image 2 of 3 Sonos Play 5 Audio/Control Board Replacement, Motherboard: step 7, image 3 of 3
      • Remove the ten pin connector.

      Ask FixBot

      Add Comment

    2. Sonos Play 5 Audio/Control Board Replacement: step 8, image 1 of 1
      • Flip the device over on its front side.

      Ask FixBot

      Add Comment

    3. Sonos Play 5 Audio/Control Board Replacement: step 9, image 1 of 1
      • Remove six 5mm Phillips #0 screws.

      • Remove two 7mm Phillips #2 screws.

      Ask FixBot

      Add Comment

    4. Sonos Play 5 Audio/Control Board Replacement: step 10, image 1 of 1
      • Flip the device on its back.

      Ask FixBot

      Add Comment

    5. Sonos Play 5 Audio/Control Board Replacement: step 11, image 1 of 3 Sonos Play 5 Audio/Control Board Replacement: step 11, image 2 of 3 Sonos Play 5 Audio/Control Board Replacement: step 11, image 3 of 3
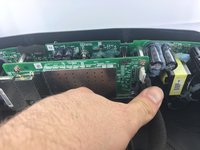
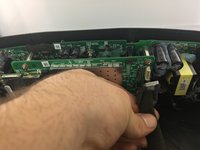
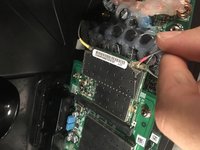
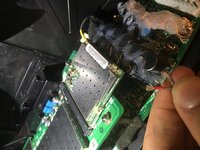
      • Remove the grey and red antenna connectors by lifting them away from the board.

      • Pull cords away from the board.

      Ask FixBot

      Add Comment

    6. Sonos Play 5 Audio/Control Board Replacement: step 12, image 1 of 2 Sonos Play 5 Audio/Control Board Replacement: step 12, image 2 of 2
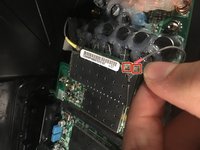
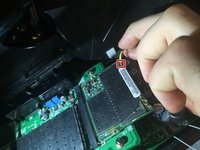
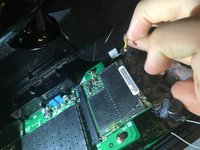
      • Remove the yellow antenna connector by lifting it away from the board.

      • Pull cord away from the board.

      Ask FixBot

      Add Comment

    7. Sonos Play 5 Audio/Control Board Replacement: step 13, image 1 of 3 Sonos Play 5 Audio/Control Board Replacement: step 13, image 2 of 3 Sonos Play 5 Audio/Control Board Replacement: step 13, image 3 of 3
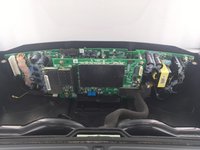
      • Remove circuit board by lifting it straight away from the rear plate.

      Ask FixBot

      Add Comment

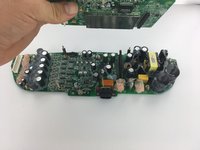
    1. Sonos Play 5 Audio/Control Board Replacement, Audio/Control Board: step 14, image 1 of 1
      • Lay the two connected boards so that the power board is facing upwards

      Ask FixBot

      Add Comment

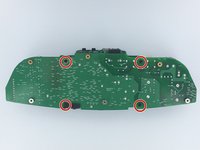
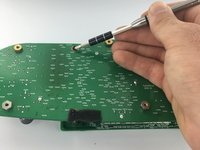
    2. Sonos Play 5 Audio/Control Board Replacement: step 15, image 1 of 2 Sonos Play 5 Audio/Control Board Replacement: step 15, image 2 of 2
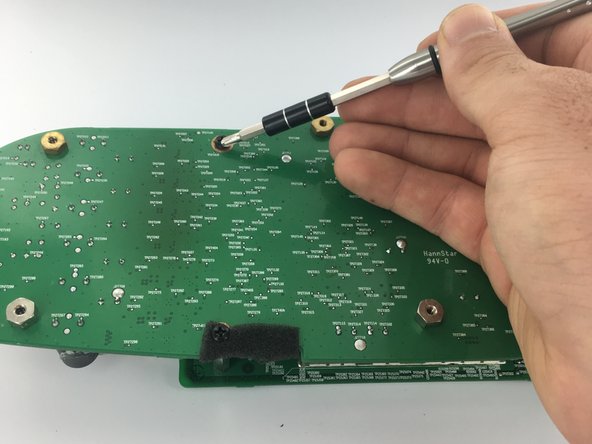
      • Unscrew Four Phillips #2 bolts

      • These bolts will not come out, but will pull out of the nuts on the other side of the board

      Ask FixBot

      Add Comment

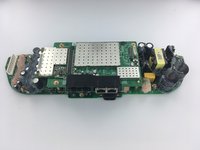
    3. Sonos Play 5 Audio/Control Board Replacement: step 16, image 1 of 1
      • Flip boards so audio board is facing upwards, as is shown in picture

      Ask FixBot

      Add Comment

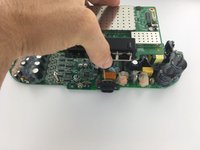
    4. Sonos Play 5 Audio/Control Board Replacement: step 17, image 1 of 3 Sonos Play 5 Audio/Control Board Replacement: step 17, image 2 of 3 Sonos Play 5 Audio/Control Board Replacement: step 17, image 3 of 3
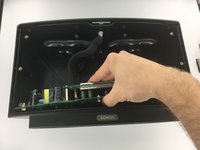
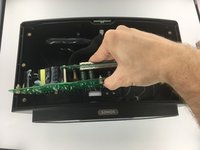
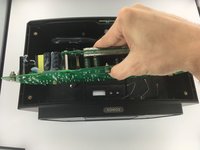
      • Lift control board up and away from power supply board

      Ask FixBot

      Add Comment

    5. Sonos Play 5 Audio/Control Board Replacement: step 18, image 1 of 1
      • The smaller of the two boards is the audio/control board.

      Ask FixBot

      Add Comment

Conclusion

To reassemble your device, follow these instructions in reverse order.

Cancel: I did not complete this guide.

5 other people completed this guide.

Warren Willingham

Member since: 02/20/17

1,179 Reputation

3 Guides authored

Team

USF Tampa, Team S3-G6, Sullivan Spring 2017 Member of USF Tampa, Team S3-G6, Sullivan Spring 2017

USFT-SULLIVAN-S17S3G6

4 Members

96 Guides authored

0 Guide Comments

Add Comment

View Statistics:

Past 24 Hours: 1

Past 7 Days: 12

Past 30 Days: 53

All Time: 7,036