
Solio Rocsta Charging Cable Replacement

David Vazquez and 2 other contributors
Last updated on Dec 28, 2017
Views: 614
View statistics:
- Past 24 Hours:
- 3
- Past 7 Days:
- 27
- Past 30 Days:
- 99
- All Time:
- 614
Comments: 0
No one has left comments on this guide. Will you be first?
Go to guide commentsCompleted: 0 1
No one has marked this guide "completed." Will you be the first?
1 person has marked this guide "completed." It's you — great job!
Favorites: 1 2
1 person has favorited (and subscribed to) this guide. Will you be next?
2 people have favorited (and subscribed to) this guide — including you!
Introduction
Go to step 1 ↓The Solio Rocsta's charging cable is the main connection for charging/using your device. In this guide, we will show you how to replace your charging cable if it no longer works or needs repairing.
Please note that this guide requires soldering. For more information on how to solder and desolder connections, please visit this guide.
What you need
Tools
-
-
-
Spudger4.9


-
-
-
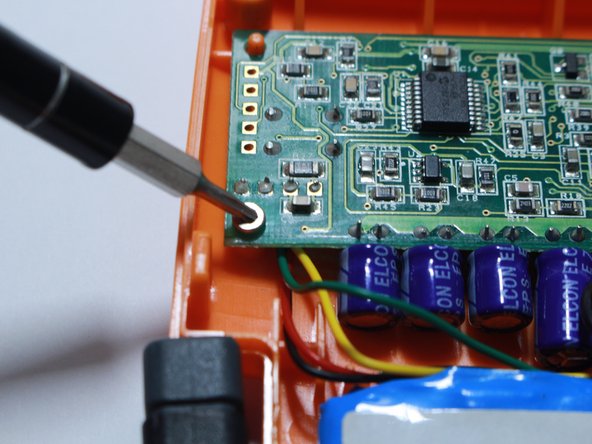
Locate, and unscrew, the three 5.72 mm screws that hold down the top cover using the T6 Torx screwdriver.
 Ask FixBot
-
-
-
-
With the circuit board flipped, locate the battery connector.
-
Hold the component attached to the circuit board the battery is connected to and wiggle the cable out.
-
-
-
With a Soldering Iron, desolder the four cables that connect the charging cable to the circuit board.
-
-




To reassemble your device, follow these instructions in reverse order.

Team

USF Tampa, Team S13-G13, Cagle Fall 2017 Member of USF Tampa, Team S13-G13, Cagle Fall 2017
USFT-CAGLE-F17S13G13
4 Members
72 Guides authored
