Introduction
The Skytech Nebula Gaming PC is an entry level gaming PC which comes with a PCIe Wi-Fi card for wireless connectivity. Over time these cards can fail due to hardware issues, driver issues, or physical damage to the antenna connectors or the card itself, leaving you without a Wi-Fi connection. This guide will walk you through and instruct you on how to safely remove and replace the existing PCIe Wi-Fi card restoring full wireless connectivity to your PC.
What you need
-
-
Fully shutdown your computer, then unplug it
-
Press and hold the power button for 5-10 seconds to discharge any electricity remaining in the system.
 Ask FixBot
-
-
-
Set up your workspace on a hard, non-carpeted surface to minimize static electricity.
-
Ground yourself by touching a large, unpainted metal object (such as a metal table leg or radiator).
-
-
-
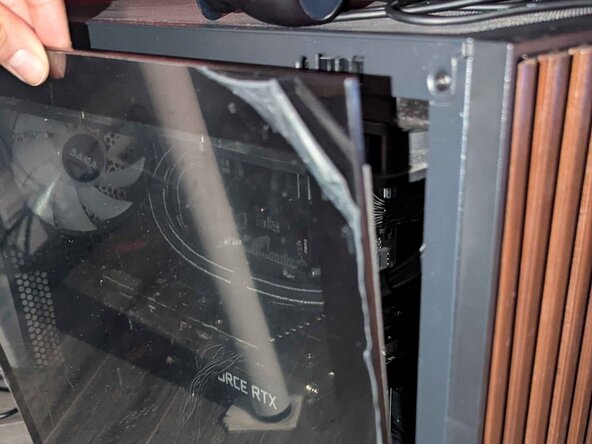
Locate the groove on the top-left edge of the side panel to get a firm grip.
-
Pull the panel firmly toward you to pop it off the chassis.
-
-
-
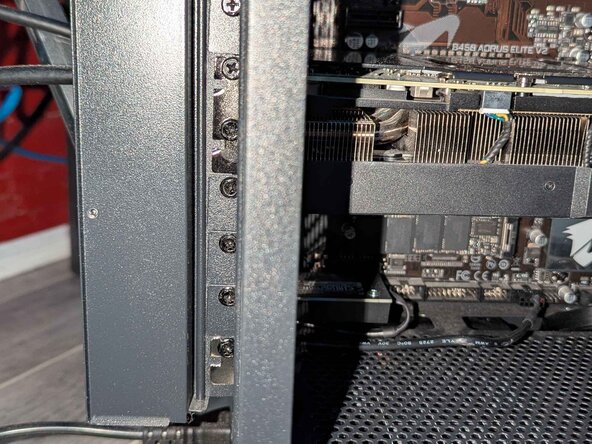
Unscrew the small panel on rear of PC by hand which will reveal the retaining screw holding the Wi-Fi card in place.
-
-
-
-
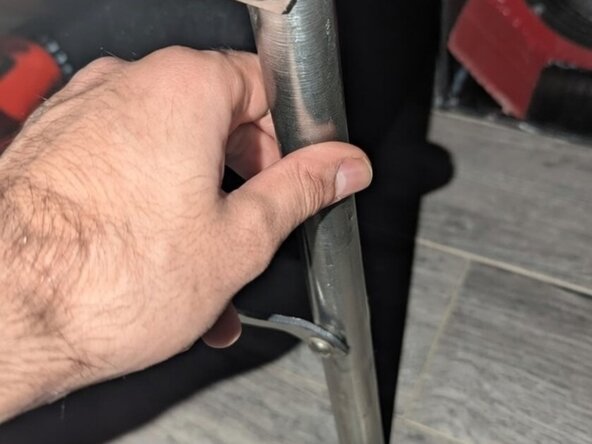
Unscrew the two antennas from the rear of the PC by hand.
-
Use a Phillips #1 screwdriver to remove the screw securing the Wi-Fi card and its bracket.
-
-
-
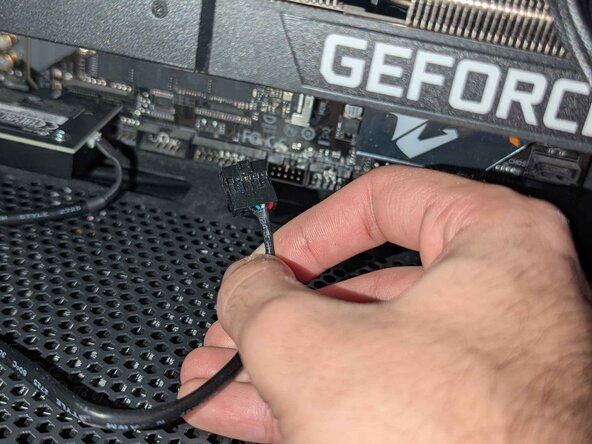
Gently disconnect the USB cable attached to the Wi-Fi card from the motherboard.
-
Remove the Wi-Fi card by pulling it out lightly.
-
-
-
Seat the new Wi-Fi card back into place and connect the USB cable into the same header labeled USB it was removed from.
-
-
-
Secure the bracket, reinsert the bracket screw and tighten it with a Phillips screwdriver until snug.
-
-
-
Screw the new antennas by hand onto the gold connectors at the rear of the PC.
-
-
-
Align the bottom tabs of the side panel with the chassis, then press firmly along every edge and corner until the panel clicks securely into place.
-
Close the small panel on the rear of the PC and tighten its screw by hand.
-


Team

York University, Team 3-5, Woodhouse Winter 2026 Member of York University, Team 3-5, Woodhouse Winter 2026
YORK-WOODHOUSE-W26S3G5
2 Members
1 Guide authored