Free Shipping on Domestic Orders $75+

Skullcandy Air Raid USB Board Replacement

What you need

  1. Skullcandy Air Raid USB Board Replacement, Rubber Cover: step 1, image 1 of 1
    • Starting with the corners, gently pull the rubber cover off of the device.

    Ask FixBot

    Add Comment

  2. Skullcandy Air Raid USB Board Replacement, Handle: step 2, image 1 of 1
    • Using the T-6 hexagonal screwdriver, unscrew the four 10mm #6 hex screws on the right side of the device.

    • Remove the handle from the device.

    Ask FixBot

    Add Comment

  3. Skullcandy Air Raid USB Board Replacement, Front Plate: step 3, image 1 of 1
    • Unscrew the two screws on the left side of the device using the phillips #00 screwdriver.

    • One 5mm Phillips screw.

    • One 8mm Phillips screw.

    Ask FixBot

    Add Comment

  4. Skullcandy Air Raid USB Board Replacement: step 4, image 1 of 1
    • Gently pull the sides of the front plate outwards from the device.

    • Pull up on the front plate to remove it from the device.

    Ask FixBot

    Add Comment

  5. Skullcandy Air Raid USB Board Replacement, Speakers: step 5, image 1 of 1
    • Using a #000 Philips Screwdriver, unscrew the four 8 mm Philips screws from each corner of both speakers (eight 8 mm Philips screws total).

    Ask FixBot

    Add Comment

  6. Skullcandy Air Raid USB Board Replacement: step 6, image 1 of 1
    • Using the plastic opening tool, pry around edges of the speaker to loosen glue contact with front plate.

    • If you are unable to loosen glue contact using the plastic opening tool, use a heat gun to assist in removal.

    Ask FixBot

    Add Comment

  7. Skullcandy Air Raid USB Board Replacement: step 7, image 1 of 1
    • Lift the speaker out of the device.

    • Be aware of the connection with the ribbon cable.

    • For reassembly, ensure proper orientation of the cable plug.

    Ask FixBot

    Add Comment

  8. Skullcandy Air Raid USB Board Replacement: step 8, image 1 of 1
    • Firmly pull on the end of ribbon cable to disconnect the speaker from the motherboard.

    Ask FixBot

    Add Comment

  9. Skullcandy Air Raid USB Board Replacement, Control Buttons: step 9, image 1 of 1
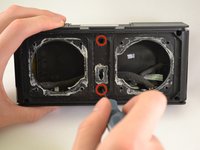
    • Using a Phillips #00 Precision Screwdriver, unscrew two 6 mm screws from the middle of the panel, above and below volume buttons.

    Ask FixBot

    Add Comment

  10. Skullcandy Air Raid USB Board Replacement: step 10, image 1 of 1
    • Lift the button panel.

    Ask FixBot

    Add Comment

  11. Skullcandy Air Raid USB Board Replacement, Button Motherboard: step 11, image 1 of 1
    • Using a Phillips #00 Precision Screwdriver, unscrew two 6 mm screws from the button motherboard.

    Ask FixBot

    Add Comment

  12. Skullcandy Air Raid USB Board Replacement: step 12, image 1 of 1
    • Using a plastic opening tool, pry the button motherboard to detach it from the device.

    • The button motherboard is connected to a ribbon cable inside the device.

    Ask FixBot

    Add Comment

  13. Skullcandy Air Raid USB Board Replacement, Ribbon Cable: step 13, image 1 of 1
    • Pull the black ribbon cord attachment away from the motherboard.

    • Pull on the cable until it releases from the back of the motherboard.

    • The black attachment is part of the connector, not the blue ribbon cable, so it will not disconnect from the motherboard.

    Ask FixBot

    Add Comment

  14. Skullcandy Air Raid USB Board Replacement, Back panel: step 14, image 1 of 2 Skullcandy Air Raid USB Board Replacement, Back panel: step 14, image 2 of 2
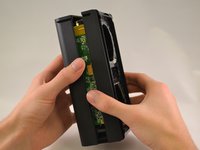
    • Using a Phillips #00 Precision Screwdriver, unscrew two 8 mm screws.

    • Lift off the back panel.

    Ask FixBot

    Add Comment

  15. Skullcandy Air Raid USB Board Replacement, Ribbon Cables: step 15, image 1 of 1
    • Where the blue and white ribbon cable meets the motherboard, pull up on the black piece of the ribbon cable connector.

    • Pull the ribbon cable away from the motherboard.

    Ask FixBot

    Add Comment

  16. Skullcandy Air Raid USB Board Replacement: step 16, image 1 of 1
    • Pull on grey and white ribbon cable until it disconnects from the motherboard.

    Ask FixBot

    Add Comment

  17. Skullcandy Air Raid USB Board Replacement, Left Divider: step 17, image 1 of 3 Skullcandy Air Raid USB Board Replacement, Left Divider: step 17, image 2 of 3 Skullcandy Air Raid USB Board Replacement, Left Divider: step 17, image 3 of 3
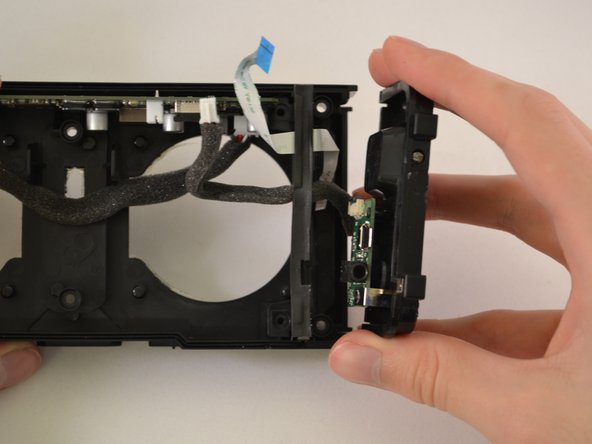
    • Using a Phillips #00 Precision Screwdriver, unscrew two 6 mm screws from the left divider between the main cavity and the USB motherboard.

    • Pull out the USB/On Switch panel.

    • Pull out the Left Divider.

    • For reassembly, lift up on right side of motherboard to slide left divider back in place.

    Ask FixBot

    Add Comment

  18. Skullcandy Air Raid USB Board Replacement, USB Motherboard: step 18, image 1 of 2 Skullcandy Air Raid USB Board Replacement, USB Motherboard: step 18, image 2 of 2
    • Using a Phillips #00 Precision Screwdriver, unscrew two 5 mm Phillips-head screws from the USB motherboard.

    • Remove the metal clip.

    Ask FixBot

    Add Comment

Conclusion

To reassemble your device, follow these instructions in reverse order.

Cancel: I did not complete this guide.

2 other people completed this guide.

Cyrene

Member since: 01/13/15

200 Reputation

1 Guide authored

2 Guide Comments

Where can you purchase the replacement?

Mikail Lane - Reply Share

As far as I know,You can't!

Luke Thomas - Reply Share

Add Comment

View Statistics:

Past 24 Hours: 1

Past 7 Days: 2

Past 30 Days: 19

All Time: 1,815