
Sink O-Ring Replacement

Brooke Don and 2 other contributors
Last updated on Dec 23, 2024
Views: 1.6K
View statistics:
- Past 24 Hours:
- 6
- Past 7 Days:
- 43
- Past 30 Days:
- 180
- All Time:
- 1,576
Comments: 0
No one has left comments on this guide. Will you be first?
Go to guide commentsCompleted: 0 1
No one has marked this guide "completed." Will you be the first?
1 person has marked this guide "completed." It's you — great job!
Favorites: 0 1
No one has favorited (and subscribed to) this guide. Will you be the first?
1 person has favorited (and subscribed to) this guide — and that's you!
Introduction
Go to step 1 ↓A leaky sink can be a common household annoyance, often caused by worn or damaged O-rings. O-rings are small rubber or silicone seals that prevent water from escaping where parts of your sink assembly connect. Over time, these rings can deteriorate due to wear, water pressure, or exposure to cleaning agents, leading to drips, reduced water efficiency, and even potential damage to surrounding areas.
Replacing an O-ring is an essential, cost-effective maintenance task that can save you money on water bills and prevent more extensive plumbing issues. This guide will walk you through the step-by-step process of identifying the problem, removing the old O-ring, and installing a new one, ensuring your sink operates as good as new. With just a few tools and a little patience, you can restore your sink’s functionality in no time!
What you need


-
-
-
Locate both valves for hot and cold water. These are typically under the sink.
-
Turn off the water supply by turning each knob clockwise to stop the flow of water.
 Ask FixBot
-
-
-
Insert the screwdriver into the screw in the sink handle, and rotate the screwdriver counterclockwise (left) to remove the screw.
-
-
-
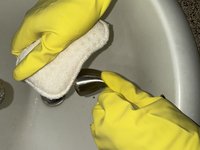
Once the handle is separated from the sink, clean it and its interior with an antibacterial spray, such as Lysol or Clorox.
-
-
-
-
Re-assemble the sink, reversing all steps used to disassemble the sink.
-
Congratulations! Once all the steps have been reversed and completed, feel free to test out your updated sink.
-
-





Team

UC Davis, Team 2-8, Vidal-Chiesa Fall 2024 Member of UC Davis, Team 2-8, Vidal-Chiesa Fall 2024
UCD-VIDAL-CHIESA-F24S2G8
2 Members
12 Guides authored
