Free Shipping on Domestic Orders $75+

Simagic Alpha Mini Direct Drive Wheelbase Magnet Positional Sensor Replacement

Views: 1.8K

View statistics:

Past 24 Hours:
1
Past 7 Days:
23
Past 30 Days:
98
All Time:
1,848
Comments: 0

No one has left comments on this guide. Will you be first?

Go to guide comments
Completed: 0

No one has marked this guide "completed." Will you be the first?

Favorites: 0

No one has favorited (and subscribed to) this guide. Will you be the first?

Time Required: 25 - 35 minutes
Difficulty: Moderate
Featured Student Guide

This guide has been the hard work of our awesome students and is found to be exceptionally cool by the iFixit staff.

Simagic Alpha Mini Direct Drive Wheelbase Magnet Positional Sensor Replacement

Introduction

Go to step 1 ↓

Use this guide to restore the power loss caused by a misplaced sensor on a Simagic Alpha Mini Direct Drive Wheelbase.

Frequent usage can misalign the positional sensor, reducing its power output, which is further exacerbated by the rotating motors during operation. As a result, the inertia and dampening of the wheelbase can be affected, leading to less than desired hardware performance.

Before beginning, be sure that your Simagic firmware is up to date and FFB (Forced Feedback) settings are correctly calibrated.

Alongside following these instructions, you should refer to this device's user manual to make installation and use quick and convenient while adhering to its safe operation guidelines.

What you need

    1. Simagic Alpha Mini Direct Drive Wheelbase Magnet Positional Sensor Replacement, Magnet positional sensor: step 1, image 1 of 1
      • Ensure the power connector is switched OFF before plugging in or unplugging the wheelbase. Leaving it on while plugging or unplugging the power connector could damage your device.

      • Turn the power off.

      Ask FixBot

      Add Comment

    2. Simagic Alpha Mini Direct Drive Wheelbase Magnet Positional Sensor Replacement: step 2, image 1 of 1
      • Disconnect all cables from the wheelbase.

      Ask FixBot

      Add Comment

    3. Simagic Alpha Mini Direct Drive Wheelbase Magnet Positional Sensor Replacement: step 3, image 1 of 2 Simagic Alpha Mini Direct Drive Wheelbase Magnet Positional Sensor Replacement: step 3, image 2 of 2
      • Use a 2.5 mm Hex Key to remove the two 10 mm screws that connect the wheelbase to the mounting plate.

      Ask FixBot

      Add Comment

    4. Simagic Alpha Mini Direct Drive Wheelbase Magnet Positional Sensor Replacement: step 4, image 1 of 1
      • Lay the wheelbase right side up, ensuring the "Simagic" logo is on top.

      Ask FixBot

      Add Comment

    5. Simagic Alpha Mini Direct Drive Wheelbase Magnet Positional Sensor Replacement: step 5, image 1 of 2 Simagic Alpha Mini Direct Drive Wheelbase Magnet Positional Sensor Replacement: step 5, image 2 of 2
      • Rotate the wheelbase 180 degrees so the bolts on the back of the device are facing you.

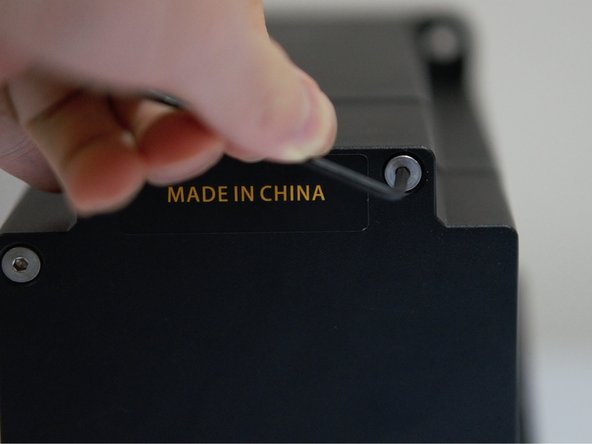
      • Use a 2.5mm M3 Hex Key to remove four 4 mm screws.

      Ask FixBot

      Add Comment

    6. Simagic Alpha Mini Direct Drive Wheelbase Magnet Positional Sensor Replacement: step 6, image 1 of 1
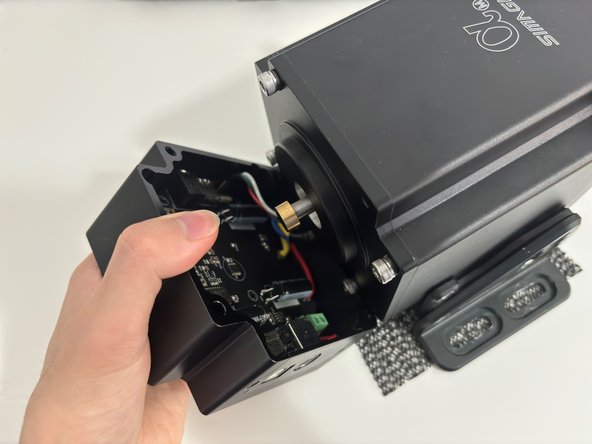
      • Open the electronics cover.

      • As you open the electronics cover, be careful not to unplug or tear the wires connecting the cover to the wheelbase.

      Ask FixBot

      Add Comment

    7. Simagic Alpha Mini Direct Drive Wheelbase Magnet Positional Sensor Replacement: step 7, image 1 of 2 Simagic Alpha Mini Direct Drive Wheelbase Magnet Positional Sensor Replacement: step 7, image 2 of 2
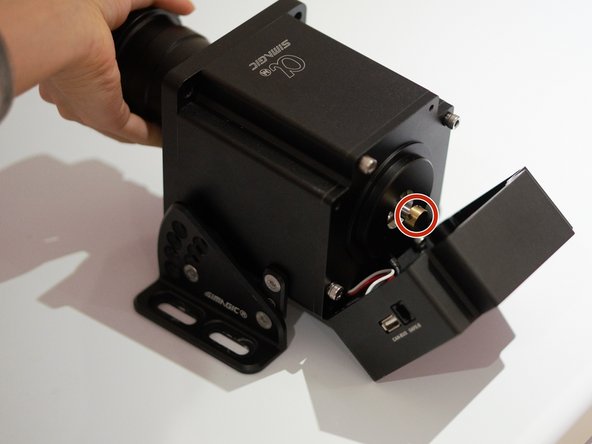
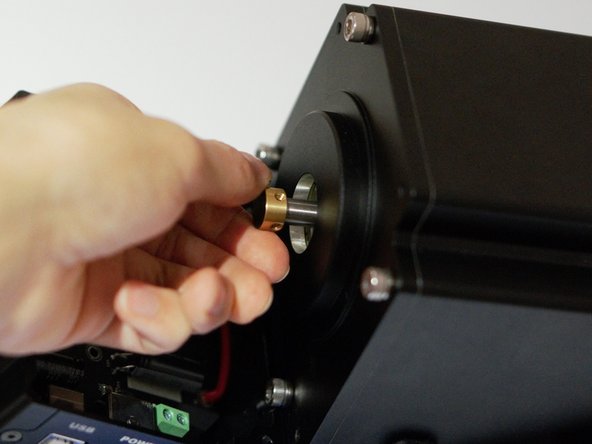
      • Use a 1.5mm M1 Hex Key two remove two 5 mm screws from the back magnet.

      Ask FixBot

      Add Comment

    8. Simagic Alpha Mini Direct Drive Wheelbase Magnet Positional Sensor Replacement: step 8, image 1 of 2 Simagic Alpha Mini Direct Drive Wheelbase Magnet Positional Sensor Replacement: step 8, image 2 of 2
      • Turn the wheel shaft until the Wi-Fi symbol is facing up.

      • The wheelbase was rotated 180 degrees in this picture. However, if your workspace allows it, leave the device with the back facing you, like in the previous step.

      Ask FixBot

      Add Comment

    9. Simagic Alpha Mini Direct Drive Wheelbase Magnet Positional Sensor Replacement: step 9, image 1 of 2 Simagic Alpha Mini Direct Drive Wheelbase Magnet Positional Sensor Replacement: step 9, image 2 of 2
      • Ensure the Wi-Fi symbol located on the front of the wheelbase is facing straight up prior to turning the magnet.

      • Turn the magnet clockwise until one of the screw holes is facing up and the other screw hole is facing right to realign the positional sensor (magnet).

      Ask FixBot

      Add Comment

    10. Simagic Alpha Mini Direct Drive Wheelbase Magnet Positional Sensor Replacement: step 10, image 1 of 1
      • Use a 1.5 mm M1 Hex Key to tighten two 5 mm screws and secure the sensor into position.

      Ask FixBot

      Add Comment

    11. Simagic Alpha Mini Direct Drive Wheelbase Magnet Positional Sensor Replacement: step 11, image 1 of 1
      • To check if you have aligned the sensor correctly, launch the Alpha Manager application. On the screen that follows, ensure the wheel is 0.0.

      Ask FixBot

      Add Comment

Conclusion

To reassemble your device, follow these instructions in reverse order.

Cancel: I did not complete this guide.

Hugo Lai

Member since: 02/05/24

193 Reputation

1 Guide authored

Team

0 Guide Comments

Add Comment

View Statistics:

Past 24 Hours: 1

Past 7 Days: 23

Past 30 Days: 98

All Time: 1,848