Free Shipping on Domestic Orders $75+

Shower Handle O-ring Replacement

Views: 28K

View statistics:

Past 24 Hours:
14
Past 7 Days:
88
Past 30 Days:
405
All Time:
27,859
Comments: 8

4 comments on steps, 4 guide comments.

Go to guide comments
Completed: 3

3 people have marked this guide "completed." Will you be next?

Favorites: 7

7 people have favorited (and subscribed to) this guide. Will you be next?

Time Required: 10 minutes
Difficulty: Moderate
Shower Handle O-ring  Replacement

Introduction

Go to step 1 ↓

If you have a shower head with a constant drip, follow this simple and easy guide to replace the rubber o-ring in your shower handle. Replacing the O-ring can help prevent hard water build up, rusting, and wasting water.

What you need

    1. Shower Handle O-ring  Replacement, Shower Handle O-ring: step 1, image 1 of 1
      • Be sure your water main is turned off, preventing water flow to your shower.

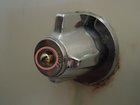
      • Using your flat head screwdriver, remove the screw from the middle of the handle.

      Ask FixBot

      Add Comment

    2. Shower Handle O-ring  Replacement: step 2, image 1 of 1
      • Use your groove joint pliers to loosen and remove the escutcheon plate.

      Ask FixBot

      Add Comment

    3. Shower Handle O-ring  Replacement: step 3, image 1 of 1
      • Using your groove joint pliers, loosen and remove the cartridge stem.

      Ask FixBot

      Add Comment

    4. Shower Handle O-ring  Replacement: step 4, image 1 of 1
      • Slowly unscrew and remove the stem completely.

      • There may be some water leakage due to built up pressure.

      Ask FixBot

      Add Comment

    5. Shower Handle O-ring  Replacement: step 5, image 1 of 2 Shower Handle O-ring  Replacement: step 5, image 2 of 2
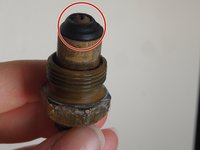
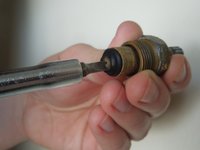
      • Using your flat head screwdriver, remove the screw from the end of the stem cartridge.

      • Once the screw is removed, replace the damaged O-ring with the new replacement O-ring.

      • When installing a new O-ring, be sure the O-ring has a tight seal to prevent further leaking.

      • Once reassembly is complete and all parts are snug, turn the water main back on to allow water to flow to the shower again.

      Ask FixBot

      Add Comment

Finish Line

Cancel: I did not complete this guide.

3 other people completed this guide.

Cori Fitzpatrick

Member since: 03/20/16

213 Reputation

1 Guide authored

Team

4 Guide Comments

This fixed the dripping shower head but now my shower handles are tight and difficult to turn and the water pressure is affected after replacing the o-rings. What could the issue be?

Cin - Reply Share

Try putting petroleum jelly all over the outside of the stem/cartridge (including the threading/grooves) before screwing it all back together. That will keep your handles turning smoothly, and easily.

It's the plumbing equivalent to WD40.

Jess - Reply Share

As for the change in water pressure, I'm not sure what that would be. Did you use the same size O-ring?

Jess - Reply Share

I have the same handles and stems, but leaking not from the rubber. Leaking occuring when tuning on the handle. Do you know where to find the parts?

Phil Yue - Reply Share

Add Comment

View Statistics:

Past 24 Hours: 14

Past 7 Days: 88

Past 30 Days: 405

All Time: 27,859