Free Shipping on Domestic Orders $75+

Shark Ultimate Professional Reservoir Replacement

What you need

    1. Shark Ultimate Professional Reservoir  Replacement, Reservoir: step 1, image 1 of 3 Shark Ultimate Professional Reservoir  Replacement, Reservoir: step 1, image 2 of 3 Shark Ultimate Professional Reservoir  Replacement, Reservoir: step 1, image 3 of 3
      • Remove the two screws at the back of the iron.

      • Remove the back cover piece.

      • Make sure iron is unplugged and cooled off.

      Ask FixBot

      Add Comment

    2. Shark Ultimate Professional Reservoir  Replacement: step 2, image 1 of 2 Shark Ultimate Professional Reservoir  Replacement: step 2, image 2 of 2
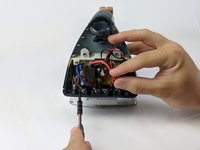
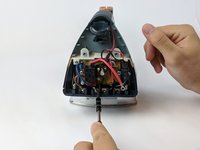
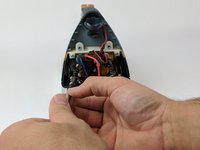
      • Remove the two screws holding the white clamp to the iron.

      • Remove the two screws holding the black wires to the body of the iron.

      • Removing the left black wire will also free the red wire, attached by the same screw.

      Ask FixBot

      Add Comment

    3. Shark Ultimate Professional Reservoir  Replacement: step 3, image 1 of 1
      • Pull the split end of the power cord upward through the ball joint of the iron.

      • Set aside power cord.

      Ask FixBot

      Add Comment

    4. Shark Ultimate Professional Reservoir  Replacement: step 4, image 1 of 3 Shark Ultimate Professional Reservoir  Replacement: step 4, image 2 of 3 Shark Ultimate Professional Reservoir  Replacement: step 4, image 3 of 3
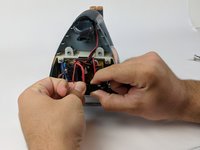
      • Remove remaining screws that hold a wire on the bottom (brown and blue).

      • Unscrew from left to right.

      • Unclip the black adapter piece on the bottom right.

      • Wires order (from left to right): Brown, Blue, Black, Red

      Ask FixBot

      Add Comment

    5. Shark Ultimate Professional Reservoir  Replacement: step 5, image 1 of 2 Shark Ultimate Professional Reservoir  Replacement: step 5, image 2 of 2
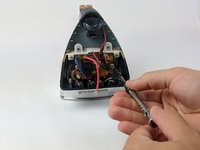
      • Remove two screws (left and right) affixed to circuit board.

      Ask FixBot

      Add Comment

Conclusion

To reassemble your device, follow these instructions in reverse order.

Cancel: I did not complete this guide.

3 other people completed this guide.

Drew Carff

Member since: 10/23/17

892 Reputation

5 Guides authored

3 Guide Comments

i am trying to replace the thermal cutoff but can’s remember the wire inside how to replace

primrose33166 - Reply Share

I have a constant leak in the vertical position - long after the iron is cold. The repair presented is well done. However it stopped short and doesn't get to the reservoir - thanks

Dalmacca - Reply Share

Then WHAAAAAAAAAAAAAAAAAAAAAAAAAAAAAAAAAAAAT?

Muhammad Ahmad - Reply Share

Add Comment

View Statistics:

Past 24 Hours: 0

Past 7 Days: 15

Past 30 Days: 45

All Time: 3,099