Introduction
One of the most overlooked parts of a vacuum is the wheel, but when it breaks, it can cause several problems. A broken wheel can lower the vacuum, making it harder to move and reducing its ability to pick up dirt. It can also scratch your floors and put extra strain on the motor. Replacing the wheel is a simple, low-cost repair that can help extend the life of your Shark Rocket HV301 instead of replacing the entire vacuum. Before starting this repair, unplug the vacuum from the outlet.
What you need
-
-
-
Turn off the power switch and unplug the vacuum from the wall outlet.
 Ask FixBot
-
-
-
Press the release button to detach the extension stick/wand from the main floor nozzle assembly.
-
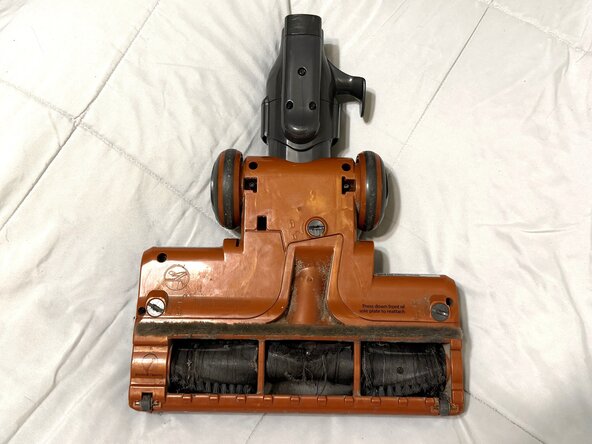
Flip the floor nozzle over so the bottom brush roller plate is facing upward.
-
-
-
-
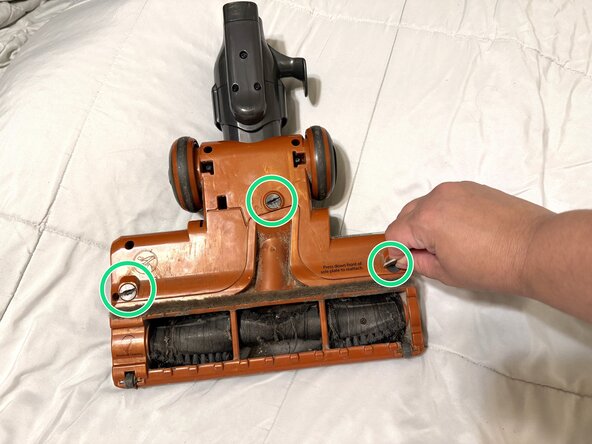
Insert a coin (like a quarter) into the slot of each lock and turn it counterclockwise to the unlock position.
-
-
-
Insert the tip of a flathead screwdriver into the designated slot on the panel.
-
Gently push inward and press upward to pry the panel out and release it from the housing.
-
-
-
Place the tip of the flathead screwdriver underneath the small wheel assembly.
-
Gently push upward to pry the wheel out of its slot.
-
-
-
If the wheel is stuck and the previous step didn't release it, use a pair of needle-nose pliers to grip and pull the old wheel out of the slot.
-
Use the needle-nose pliers to firmly hold and press the replacement wheel securely into place.
-
-







To reassemble your device, follow these instructions in reverse order.

Team

Austin Community College, Team 14-7, Cox Summer 2026 Member of Austin Community College, Team 14-7, Cox Summer 2026
AUSTINCC-COX-SU26S14G7
1 Member
12 Guides authored
