
Free Shipping on Domestic Orders $75+

Shark Professional Steam Pocket Mop Control Panel Replacement

What you need

  1. Shark Professional Steam Pocket Mop Control Panel Replacement, Shark Professional Steam Pocket Mop Front Panel Disassembly: step 1, image 1 of 2 Shark Professional Steam Pocket Mop Control Panel Replacement, Shark Professional Steam Pocket Mop Front Panel Disassembly: step 1, image 2 of 2
    • Unwrap the power cord from the handle.

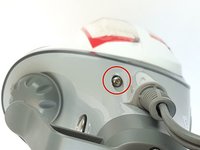
    • Remove the 56.0 mm Phillips head #2 screw located above the water tank cap.

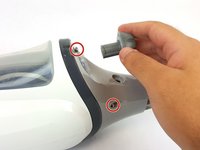
    • Pull the handle to separate it from the body.

  2. Shark Professional Steam Pocket Mop Control Panel Replacement: step 2, image 1 of 3 Shark Professional Steam Pocket Mop Control Panel Replacement: step 2, image 2 of 3 Shark Professional Steam Pocket Mop Control Panel Replacement: step 2, image 3 of 3
    • Remove the three 12.0 mm Phillips head #2 screws where the handle connects to the body.

    • Remove the plastic cap.

  3. Shark Professional Steam Pocket Mop Control Panel Replacement: step 3, image 1 of 2 Shark Professional Steam Pocket Mop Control Panel Replacement: step 3, image 2 of 2
    • Remove the three 16.0 mm T10 Torx screws near the top of the body and remove the water tank cap.

    • The third screw is directly on other side of the bottom screw in the photo.

  4. Shark Professional Steam Pocket Mop Control Panel Replacement: step 4, image 1 of 3 Shark Professional Steam Pocket Mop Control Panel Replacement: step 4, image 2 of 3 Shark Professional Steam Pocket Mop Control Panel Replacement: step 4, image 3 of 3
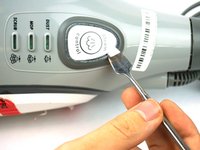
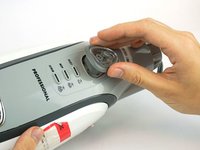
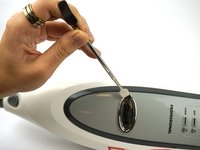
    • Remove steam control button cover with a metal spudger.

    • Remove the two 12.0 mm Phillips head #2 screws underneath.

    • Remove the plastic rim with clear plastic cover.

  5. Shark Professional Steam Pocket Mop Control Panel Replacement: step 5, image 1 of 3 Shark Professional Steam Pocket Mop Control Panel Replacement: step 5, image 2 of 3 Shark Professional Steam Pocket Mop Control Panel Replacement: step 5, image 3 of 3
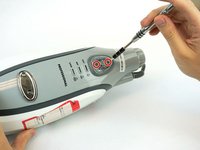
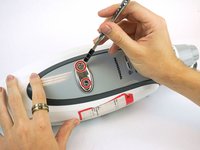
    • Remove the Shark logo decal on the front of body using a metal spudger.

    • Remove the two 12.0 mm Phillips head #2 screws underneath.

    • Pull out the plastic cover to remove.

  6. Shark Professional Steam Pocket Mop Control Panel Replacement: step 6, image 1 of 1
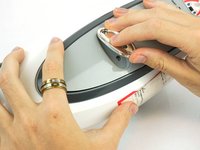
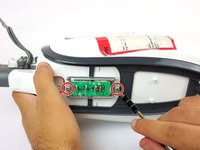
    • Pop off the grey front plate to expose the control panel and screws necessary to open mop body.

  7. Shark Professional Steam Pocket Mop Control Panel Replacement, Control Panel: step 7, image 1 of 2 Shark Professional Steam Pocket Mop Control Panel Replacement, Control Panel: step 7, image 2 of 2
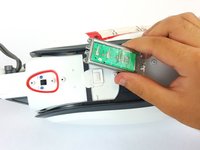
    • Remove the two 12.0 mm Phillips head #2 screws. Disconnect the control board.

    • Disconnect the control board

Conclusion

To reassemble your device, follow these instructions in reverse order.

Brett Wilson

Member since: 02/12/18

1,019 Reputation

6 Guides authored

Team

USF Tampa, Team S15-G1, Boczar Spring 2018 Member of USF Tampa, Team S15-G1, Boczar Spring 2018

USFT-BOCZAR-S18S15G1

4 Members

14 Guides authored

0 Guide Comments

Add Comment

View Statistics:

Past 24 Hours: 0

Past 7 Days: 7

Past 30 Days: 19

All Time: 1,000