Free Shipping on Domestic Orders $75+

Shark Flex DuoClean Motherboard Replacement

What you need

    1. Shark Flex DuoClean Motherboard Replacement, Garage Door: step 1, image 1 of 2 Shark Flex DuoClean Motherboard Replacement, Garage Door: step 1, image 2 of 2
      • Open the garage door by sliding both of the release buttons away from you.

      • Lift off the garage door.

      Ask FixBot

      Add Comment

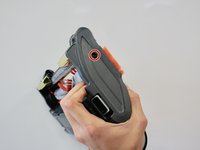
    1. Shark Flex DuoClean Motherboard Replacement, Side Component: step 2, image 1 of 2 Shark Flex DuoClean Motherboard Replacement, Side Component: step 2, image 2 of 2
      • Remove the plastic screw covering using a metal spudger by pushing the sharp side into the crevice and prying the cover out.

      Ask FixBot

      Add Comment

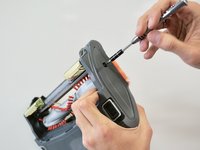
    2. Shark Flex DuoClean Motherboard Replacement: step 3, image 1 of 2 Shark Flex DuoClean Motherboard Replacement: step 3, image 2 of 2
      • Turn the T10 Security Torx screwdriver counterclockwise to remove the 15mm screw.

      Ask FixBot

      Add Comment

    3. Shark Flex DuoClean Motherboard Replacement: step 4, image 1 of 1
      • Use the iFixit Opening Tool to pry the side of the vacuum open.

      Ask FixBot

      Add Comment

    4. Shark Flex DuoClean Motherboard Replacement: step 5, image 1 of 1
      • Remove the side component with your hands.

      Ask FixBot

      Add Comment

    1. Shark Flex DuoClean Motherboard Replacement, Top Component: step 6, image 1 of 1
      • Remove the four 15 mm T10 screws on the underside of the vacuum.

      Ask FixBot

      Add Comment

    2. Shark Flex DuoClean Motherboard Replacement: step 7, image 1 of 2 Shark Flex DuoClean Motherboard Replacement: step 7, image 2 of 2
      • Using the plastic spudger, pry the back seam of the top component to pop it off the vacuum.

      Ask FixBot

      Add Comment

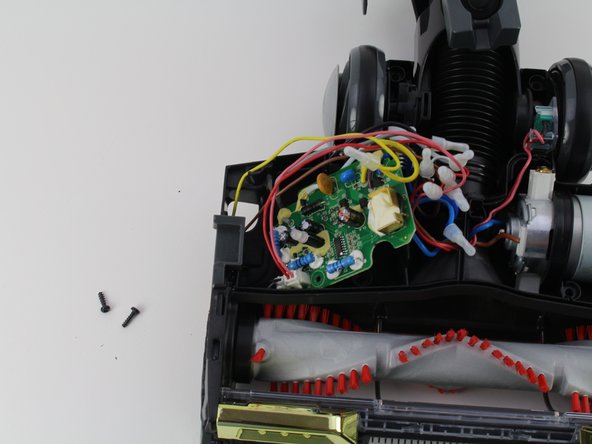
    1. Shark Flex DuoClean Motherboard Replacement, Motherboard: step 8, image 1 of 1
      • Remove one 15mm T10 screw from the inside left of the base of the vacuum to access the motherboard.

      Ask FixBot

      Add Comment

    2. Shark Flex DuoClean Motherboard Replacement: step 9, image 1 of 1
      • Using the nylon spudger, place the curved side under the motherboard.

      • Gently pry the motherboard out of the base of the vacuum.

      • Do not use your fingers to take out the motherboard, as the bottom can be sharp.

      • The motherboard will still be connected to the base with wires.

      Ask FixBot

      Add Comment

    3. Shark Flex DuoClean Motherboard Replacement: step 10, image 1 of 1
      • Desolder the motherboard wires using wire cutters.

      Ask FixBot

      Add Comment

Conclusion

To reassemble your device, follow these instructions in reverse order.

Cancel: I did not complete this guide.

Samantha Mickelson

Member since: 10/08/18

496 Reputation

4 Guides authored

Team

Cal Poly, Team S17-G5, White Fall 2018 Member of Cal Poly, Team S17-G5, White Fall 2018

CPSU-WHITE-F18S17G5

4 Members

132 Guides authored

0 Guide Comments

Add Comment

View Statistics:

Past 24 Hours: 1

Past 7 Days: 4

Past 30 Days: 34

All Time: 1,958