Free Shipping on Domestic Orders $75+

Sega Game Gear Motherboard Replacement

What you need

    1. Sega Game Gear Motherboard Replacement, Battery: step 1, image 1 of 1
      • Place your device upside down and locate the two battery compartments.

      Ask FixBot

      Add Comment

    2. Sega Game Gear Motherboard Replacement: step 2, image 1 of 1
      • Press on the tabs at the bottom of the battery covers then lift up to remove.

      • Remove batteries if they are present.

      Ask FixBot

      Add Comment

    1. Sega Game Gear Motherboard Replacement, Case: step 3, image 1 of 1
      • Remove the following screws:

      • Six Phillips screws

      • One 4.5 mm Gamebit screw

      Ask FixBot

      Add Comment

    2. Sega Game Gear Motherboard Replacement: step 4, image 1 of 1
      Tool used on this step:
      Tweezers
      $4.99
      Buy
      • Use tweezers to take all other screws out.

      Ask FixBot

      Add Comment

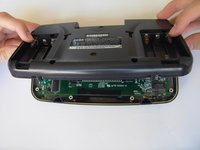
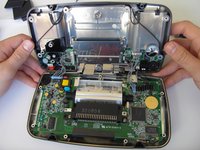
    3. Sega Game Gear Motherboard Replacement: step 5, image 1 of 2 Sega Game Gear Motherboard Replacement: step 5, image 2 of 2
      • Gently open the case by unfolding it over the top of the Sega Game Gear.

      • Do not pull the back of the case away, as cables are connected between both sides.

      Ask FixBot

      Add Comment

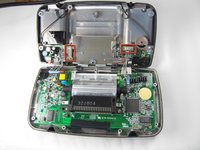
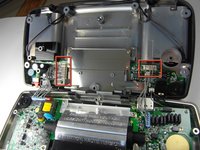
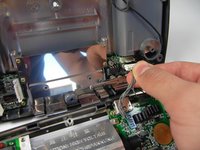
    4. Sega Game Gear Motherboard Replacement: step 6, image 1 of 3 Sega Game Gear Motherboard Replacement: step 6, image 2 of 3 Sega Game Gear Motherboard Replacement: step 6, image 3 of 3
      • Carefully unplug the 2 white-tipped connectors on the top cover.

      Ask FixBot

      Add Comment

    1. Sega Game Gear Motherboard Replacement, Motherboard: step 7, image 1 of 1
      • Unscrew all the marked screws.

      Ask FixBot

      Add Comment

    2. Sega Game Gear Motherboard Replacement: step 8, image 1 of 1
      • Slide the logic board out from under the circular black fastener at the top-left corner of the case.

      Ask FixBot

      Add Comment

    3. Sega Game Gear Motherboard Replacement: step 9, image 1 of 1
      • Place the logic board on a flat surface.

      Ask FixBot

      Add Comment

Conclusion

To reassemble your device, follow these instructions in reverse order.

Cancel: I did not complete this guide.

12 other people completed this guide.

Brandon Page

Member since: 04/15/10

217 Reputation

2 Guides authored

Team

Cal Poly, Team 28-33, Regan Spring 2010 Member of Cal Poly, Team 28-33, Regan Spring 2010

CPSU-REGAN-S10S28G33

5 Members

72 Guides authored

0 Guide Comments

Add Comment

View Statistics:

Past 24 Hours: 7

Past 7 Days: 79

Past 30 Days: 273

All Time: 28,630