
Samsung Refrigerator Fuse Block Replacement

nicO and one other contributor
Last updated on Jun 27, 2023
Views: 5.2K
View statistics:
- Past 24 Hours:
- 7
- Past 7 Days:
- 46
- Past 30 Days:
- 201
- All Time:
- 5,218
Comments: 0
No one has left comments on this guide. Will you be first?
Go to guide commentsCompleted: 1 2
1 person has marked this guide "completed." Will you be next?
2 people have marked this guide "completed." Including you — great job!
Favorites: 0 1
No one has favorited (and subscribed to) this guide. Will you be the first?
1 person has favorited (and subscribed to) this guide — and that's you!
Introduction
Go to step 1 ↓This guide shows how to remove and replace the fuse block or fuse board in your Samsung refrigerator.
The fuse block contains a number of fuses soldered on a circuit board and is made to be replaced as a whole unit. If your refrigerator doesn't power on at all, you may need to replace the fuse block.
This guide will work for most Samsung Refrigerators. This guide is based on a model RF28R7201SG Refrigerator. If you have a different model, you may encounter some minor disassembly differences, but the overall repair process will be the same.
What you need
Tools

-
-
-
Unplug your refrigerator before you begin your repair.
-
Condenser fan motor
-
Compressor motor and thermal overload device
-
Water supply valve assembly
 Ask FixBot
-
-
-
-
-
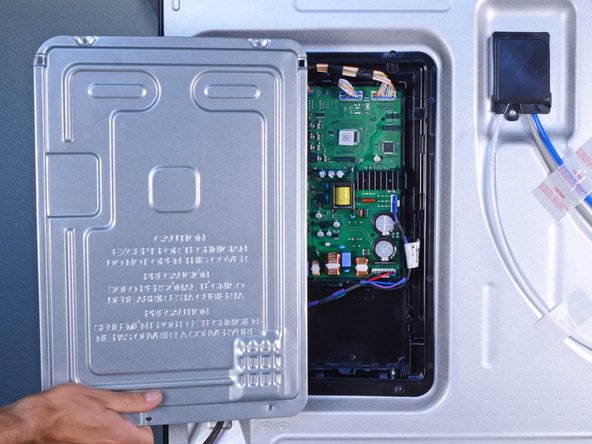
Remove the screws securing the board access panel to the back of the refrigerator.
-
-
-
-
-
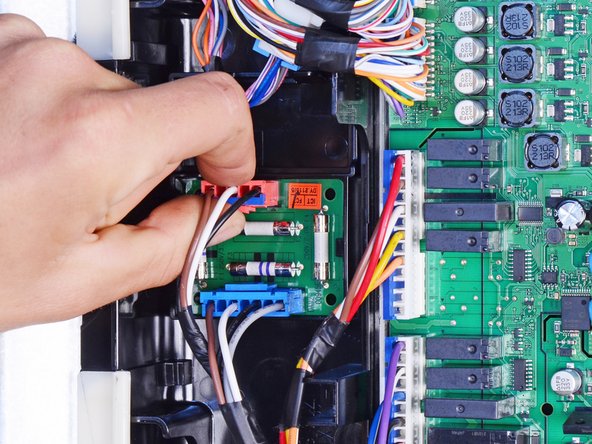
Squeeze the wide sides of the red connector to unlatch it from the fuse block.
-
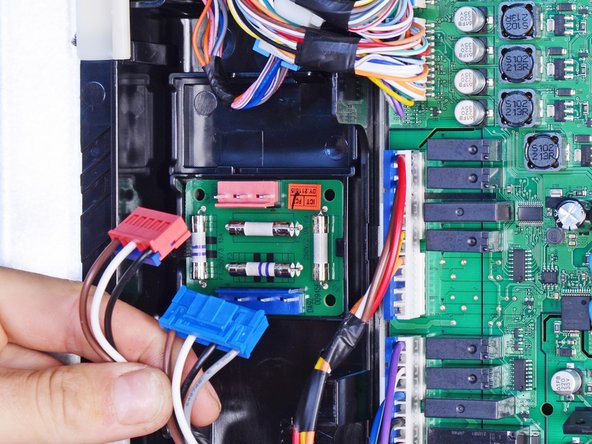
Pull to disconnect the connector.
-
Repeat the procedure to disconnect the blue connector.
-
-
-
-
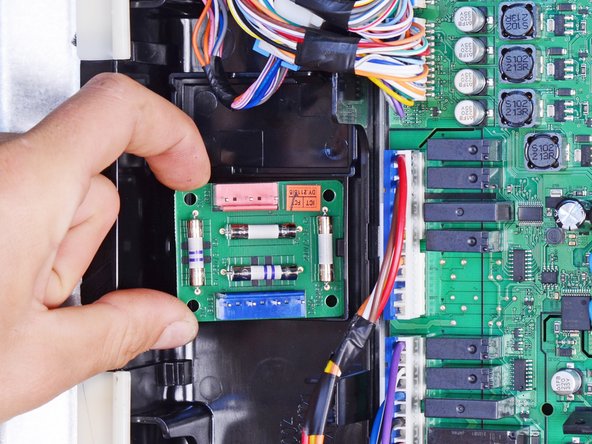
Use your fingers to pry and release the black plastic clip holding the left edge of the fuse block.
-
Lift out and remove the fuse block.
-
-









To reassemble your device, follow these instructions in reverse order.
Take your e-waste to an R2 or e-Stewards certified recycler.
Repair didn’t go as planned? Ask our Answers Community for help.
Cancel: I did not complete this guide.
One other person completed this guide.


